Ginger Syrup: DIY Apothecary

| 4 Comments
ginger from an angle 2.jpgWhenever I feel a cold coming on I grab some fresh ginger, lemons, and honey and make a cup of tea for myself.  It doesn't always prevent the cold from coming (though it has once or twice) but it eases up the symptoms and makes me feel a lot better.  Ginger is useful for a lot of ailments such as nausea, indigestion, infection, sore throats, and the flu. 

Although I love making fresh ginger tea I sometimes want something stronger.  This syrup is it.  If you don't like your ginger too spicy you can reduce the amount of ginger in this recipe, it will still be effective, just more gentle.  Made my way it will burn going down, warming your whole torso.   
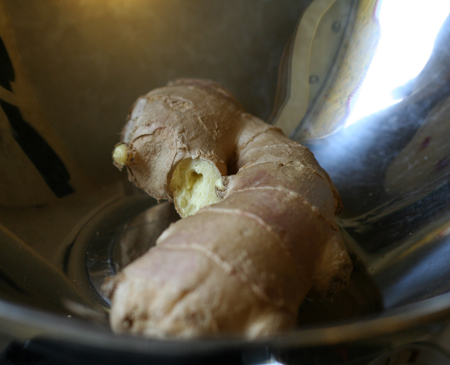

fresh ginger 2.jpgGinger is usually called a root and though I call it that myself it's really a tuberous rhizome.  When you buy fresh ginger you want to look for a piece of root that is supple and tan.  Don't buy any that has a shriveled or grey appearance or has mold on it.

Ingredients:


4 ounces of fresh ginger
1 quart of water
1 cup raw honey  
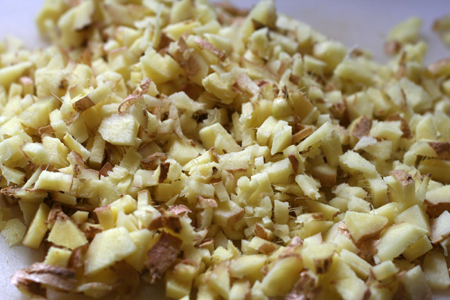
chopped fresh ginger 2.jpgHow to make ginger syrup:

Chop the ginger into small pieces (no need to peel the skin).  Add the ginger to a medium sauce pot with the quart of water and put the stove on high heat until the water boils.

When the water boils turn down the heat (to med/low or low) so the water is only gently boiling.  Let it boil until the liquid reduces by half.  This will take roughly a half an hour but you should check it every ten minutes to see its progress. 
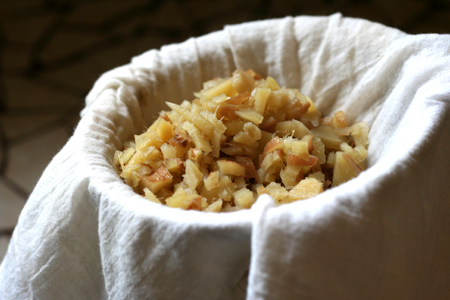

straining ginger 2.jpgWhen the liquid has reduced by half, take the pot off the heat and let it cool down for a while.  When it's cooled enough not to give you third degree burns, strain the solid ginger bits out by pouring it through a piece of butter muslin or doubled up cheese cloth.  Squeeze all the liquid you can out of the ginger and toss it onto your compost pile if you have one.

At this point you have a ginger decoction.  To make it into a syrup you need to add the honey.  If your decoction has cooled down completely, heat it up again so that it's warm (but not boiling), then remove from the heat and add the honey.  It's important that your decoction isn't boiling at this point because you don't want to cook the honey.  It has a lot of beneficial qualities in its raw state that it loses when cooked.

ginger syrup 2.jpg
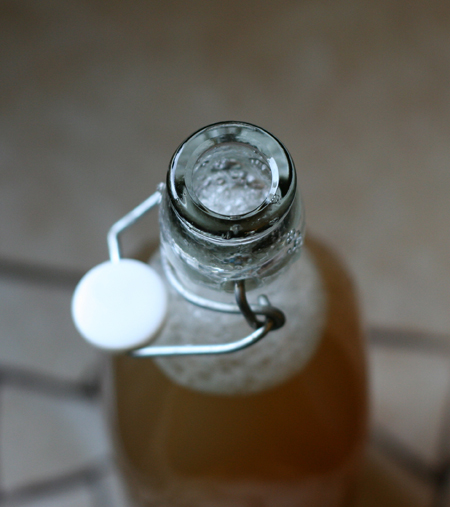
Stir the honey until it's completely incorporated in the liquid.  When it's completely cool pour it into a bottle or a jar and keep it in the fridge.  It should last up to a month.

If you want a thicker syrup double the honey.  I didn't want a really thick syrup but more honey will make it even better suited to soothing a sore throat.

Dosage:  1 ounce every couple of hours while feeling acutely unwell or when your body feels low from an oncoming cold.  (This is merely my suggestion based on how I've found it useful and therapeutic.  You won't hurt yourself taking more or less ginger syrup.)

If you're coughing a lot you can add an ounce of ginger syrup to an ounce of vodka or whiskey.  The alcohol soothes spasms in the lungs.  Plus it soothes the mind at the same time.

Tip:  This syrup can be made into a lovely cocktail as well: 2 ounces ginger syrup, 1 ounce vodka or other favorite liquor, mineral water, ice, and slice of lemon.  Especially nice on a cold evening!


Enhanced by Zemanta

Soap Making: Learning From A Professional

| 8 Comments


Last weekend I was able to watch my friend Kari, the owner of the company The Soap Barn, make a batch of soap.  I'm interested in learning to make my own soap and Kari says she'll teach me.  A lot of people are scared to make soaps using lye  so they stick to melt-and-pour soaps.  Why use lye?  Lye is the ingredient in soap that makes it harden.  You can't make soap without it.  A reader mentioned this to me and I've done further research and even glycerine soaps are made with lye.  In my experience the melt and pour soaps seem to to be softer while the soaps made from scratch are often harder and last longer.  From the reading I've been doing there are many factors that control the texture and the hardness of your soap including the proportions of your ingredients, method used, and the length of time you let your soap cure.  The only benefit of using melt and pour soaps, in my opinion, is to avoid having to use the lye yourself because it's already been added for you.  Otherwise it's more expensive to use and you have a lot less control over the quality of your finished product.

  • All her soap ingredients are measured by weight on a scale.


I have never seen a lye based soap being made so it was fascinating and exciting.  One thing Kari pointed out to me is that she usually has all her soap making components ready to go, but because she was going to show me the process she dissolved her lye while I was there and we let it sit for a while.  When you add water to your measured amount of lye the water starts heating up immediately which is really weird and certainly illustrates how caustic it is.  She said she would normally have mixed the lye and water a couple of hours ahead of time because a lot of soap-making is about temperature.

A tip from Kari: always add your lye to the water, never the other way around.  If you add water to the lye you could make a lye volcano and hurt yourself.

All the soap making books and on-line instructions I've read have you cooking your lye and oils on the stove top.  Kari used to make her soaps this way too but heard of another way of doing it years ago and hasn't gone back since.   She adds her lye to her oils and then blends it with an immersion blender until it thickens to the trace point.  When it's reached the proper thickness she pours it into one of her wooden soap molds and puts it in the oven on a low temperature for several hours.


Doesn't that sound easier than cooking it on the stove-top?  Watching Kari make this batch made me feel a lot more confident that I can learn to do this too.

You can see how thick it got just before she poured it into the mold.


Here's Kari smoothing the soap into the mold before heating it in the oven.  After about a day in the mold it will be hard enough to remove and cut into bars but you need to let the bars cure for several weeks, even a few months, for the soap to reach its maximum hardness.

Why should you bother to make your own soap?  I think there are a few compelling reasons to make your own soap.

Control Of Ingredients: the majority of soaps out there, whether or not they are fancy or cheap, have a lot of ingredients you'd be better off not using on your skin or polluting our waterways with.  Skin is a porous organ and anything you put on it will also go IN it.  Skin absorbs poisons really well.  So whatever you put on your skin should be healthy, gentle, and pesticide free.  The best way in the world to control what's in your soap is to make it yourself.

Cost Effectiveness (household economy):  there are some very cheap soaps out there that will fit a frugal budget but in most cases I'm willing to bet they've got a lot of stuff in them you wouldn't really want inside your body.  Natural soaps are expensive.  You can nearly always save money making things yourself.  Not if you buy expensive kits from craft stores or from fancy gift shops, but if you buy bulk ingredients you can save a lot of money.  Sometimes buying bulk isn't worth it for one family; consider going in on the ingredients with another family and make the soaps together!

No Packaging Waste: every single time we purchase something it comes in packaging.  It is possible to buy soaps in specialty shops with no packaging, but this is still rare.  More often than not soap comes wrapped in some kind of paper and often it comes in paper and also a box.  It may not seem like much, but it all adds up.  When you make your own soap you don't need any packaging.

Personalized: when you make your own bath products half the fun is in being able to make exactly what you want.  You develop herbal combinations that specifically suit your skin type and your individual taste in scents.  Why let soap companies cram more lavender down your nose?*  There are so many essential oils and herbs you can use in your soaps to suit who you are and what your body really wants.  I think we all deserve that.

We haven't set a date yet but when Kari teaches me to make my own batch of soap I'll be writing up a detailed tutorial so that you can make your own too!

If you have no interest in making your own but would love to have another source for quality hand made natural soaps- check out Kari's soaps at The Soap Barn!


*I LOVE lavender but I have a friend who hates it.

Hot Spot Remedy: DIY Pet Apothecary

| 2 Comments
hot spot remedy 2

My dog got her first hot spot recently and I couldn't afford to take her to the vet.  She was licking the base of her tail obsessively and after a couple of days of this a completely bald round spot developed on her tail.  I noticed that it started getting slightly infected looking and so I looked up what the cause might be.  It became clear very quickly that she had a "hot spot" which is a section of skin on a dog that becomes infected with bacteria (known to vets as pyotraumatic dermatitis) and itches, so the dog licks it until it becomes worse and eventually the most infected spot loses its fur and the sore may even ooze with pus.

In my dog's case I am almost certain the cause was fleas because we had neglected to give her flea medication for several months.  Other causes of hot spots may be irritated anal sacs, allergies, thick coats, or grooming issues such as tangles and mats.

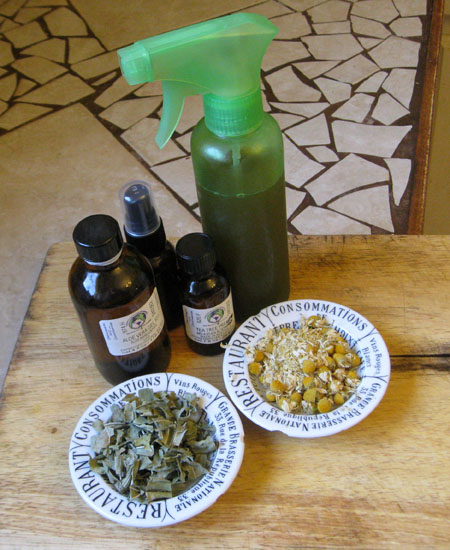
A friend of mine who works in a feed store looked up the ingredients in their most highly recommended hot spot treatment and suggested I might be able to make one of my own.  (Thank you Blaize!!)  The three ingredients she mentioned were the chamomile, aloe vera, and the tea tree oil.  It seemed that my dog's hot spot was very itchy and I had harvested some plantain from my yard because I'd read about its anti-itch properties and I decided that this would make a good addition to the hot spot treatment.

Once I made up the remedy I sprayed my dog liberally with it directly on her hot spot and then I did my best to lift the fur of her heavy coat to spray the skin surrounding the hot spot.  Before this she had been very agitated about her sore area and when I tried to examine the area she growled and warned me to keep my hands off.  She had been chewing and licking the area obsessively so it was easy to notice that after the first spray application she must have felt some immediate relief.  She stopped bugging the spot almost immediately and only tried licking it again after an hour or two at which point I applied another round of spritzing her hot spot.

Within 24 hours she stopped touching her hot spot entirely and it was able to scab up and heal.  She still has a little bald spot on her tail but there's no sore left at all.

What You'll Need:

Non reactive sauce pan (either stainless steel or enamel coated)
Wooden spoon
Strainer
3/4 cups dried chamomile
3/4 cups dried plantain
1 Tbsp aloe vera juice
6 drops tea tree oil
2 cups water
8 ounce spray bottle

Method:

In a nonreactive small saucepan add the chamomile, plantain, and water and bring to a boil.  Turn down the heat and simmer herbs for a half an hour or until the water has reduced by about half.

Strain out the herbs and then pour the liquid into the spray bottle.  Add the aloe vera juice and the tea tree oil drops.  Shake well every time before use.

Store in the refrigerator.

To use:

Shake up the remedy and then spray it on the affected area liberally.  Rough the fur up around the hot spot to expose the skin and spray as you do it.

You should notice an improvement within the first few hours.  Be very careful to notice if the exposed skin of the hot spot reacts to the spray.  If it shows any signs of getting worse stop using the spray immediately.  Though all the ingredients in this remedy are mild and in normal circumstances shouldn't cause your dog's skin to react, there is always the possibility that your dog may be allergic to one of the ingredients so use common sense.

Apply the spray to the hot spot every couple of hours until your dog stops worrying the sore and lets it begin to dry out.  Stop using the spray when the hot spot scabs up and your dog is no longer paying any attention to it.


Elderberry Syrup: DIY Apothecary

| 3 Comments | 1 TrackBack
bottled syrup 2

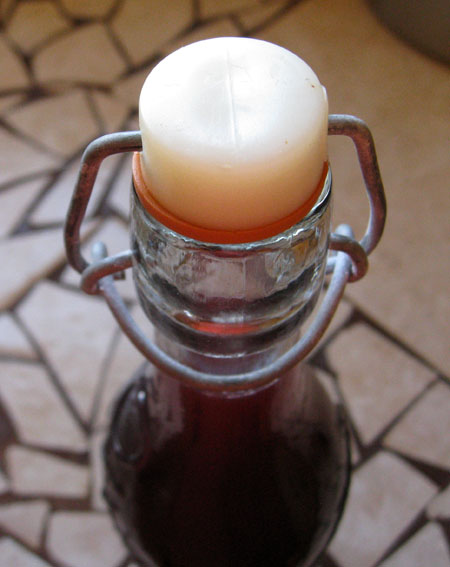
I used a bottle with a swing top closure (with rubber washer).  I've had this one for years and have used it to store flavored vinegars, liqueurs, and now elderberry syrup.  I believe I bought it at a Cost Plus.

elderberries macro 2

I foraged these elderberries from my neighborhood.  When foraging for elderberries:  never pick red ones, they are not safe to eat, even when cooked.  The twigs and bark of elderberries are toxic and should never be taken internally and when you're harvesting the berries, which are very small, be sure not to leave any stems on the fruit as these are also toxic.  The berries should not be eaten raw either*.  Cooking makes them safe to use in pies, jams, liqueurs, wines, and syrups.  They also become more flavorful when cooked.

elderberry syrup 2

Pouring the water into the pot of berries.

Cold medicine 2

The finished syrup poured into a little shot glass.


Elderberries have been used medicinally for hundreds of years.  The bark,  stems, and leaves have been traditionally used as healing poultices and the berries are used to make syrups to strengthen the immune system, to lessen the symptoms and shorten the durations of colds, coughs, and flus.  The berries have also been used to make jams, jellies, and pies.  It is important to always cook the berries- they are astringent when raw and could potentially make you sick.  Cooking them not only neutralizes the chemicals in them that can make you sick, but it enhances the unique flavor of the berry.  You can use both the American native varieties or the more traditional European varieties to make this recipe.

The proportions of ingredients here come from Rosemary Gladstar's book "Herbal Recipes for Vibrant Health".  Rosemary Gladstar is one of the leading herbalists in our country and it was her herbal training books that my mom learned from to get her herbology certificate.

I had to do some considerable research to find out about recommended dosage.  I ended up calling my mom for information and what she told me confirmed the information I found online.  It is not possible to overdose on elderberry syrup.  The only ill effect anyone might experience  is a little diarrhea if you eat/drink too many elderberries**, but only in the same way some people experience this eating too much of any fruit.

  • For boosting your child's immune system during the cold season take a teaspoon every morning and every night.
  • For lessening the symptoms and durations of coughs, colds, sore throats, and flu: take 1 to 2 teaspoons every couple of hours until you are better.

What my mom said is that you can experiment to find what is most effective for you and your family members.  I found some recommendations on line that suggested taking 2 tablespoons a day for adults and 1 tablespoon a day for children to help avoid colds.  So there is a tremendous amount of flexibility here so that you can find what works.

Elderberry Syrup

Ingredients:

1 cup fresh or 1/2 cup dried elderberries

3 cups of water

1 cup honey

Method:

1.  Put the berries in a medium sized nonreactive sauce pan and cover them with the water.  Bring the water and berries to a boil and then turn the heat down to low and simmer for 30 to 45 minutes.

2.  Smash the berries and then strain them out.  (I use butter muslin over a strainer and then squeeze the muslin to get all the juices I can out of the berries.)

3.  Add the honey and stir well.

4.  When the syrup has cooled put it into bottles (or jars- but bottles will make for easier pouring), label, and store in the refrigerator.   The syrup will keep for 2 to 3 months.

You can freeze any extra elderberries to make additional batches of the syrup as you need it.

*I have seen some extension service information that says you can eat the berries raw, I ate one before I read that they could potentially not be safe to eat raw and was thoroughly unimpressed with the flavor so I am not tempted to eat more raw.  Most sources state that you should cook the berries before eating.

**This is provided you aren't allergic to elderberries.


If you want to know more about foraging and identifying elderberries read this:

Elderberry: Plant Profile

Recent Comments

  • Angelina: I can't think of any reason why not. The only read more
  • ginia : Can u combine with elderberry syrup? For a blended wellness read more
  • Angelina: You're welcome! Vodka makes most things better! read more
  • Julie: Thanks for this great recipe. I love ginger and honey read more
  • natalie: have you done the soap tutorial somewhere else? I would read more
  • myrevolvingpassions: cannot wait to see the tutorial. I would also request read more
  • stitchy1: Cindy- I did more research and have included the information read more
  • ToilingAnt: I am VERY interested in a tutorial-- please post! :-) read more
  • stitchy1: Cindy-since I'm not an expert I had no idea- please read more
  • Cindy: Just to clarify, soap can't be made without lye. Melt read more