Author Archives: angelina

Cinnamuffin Recipe

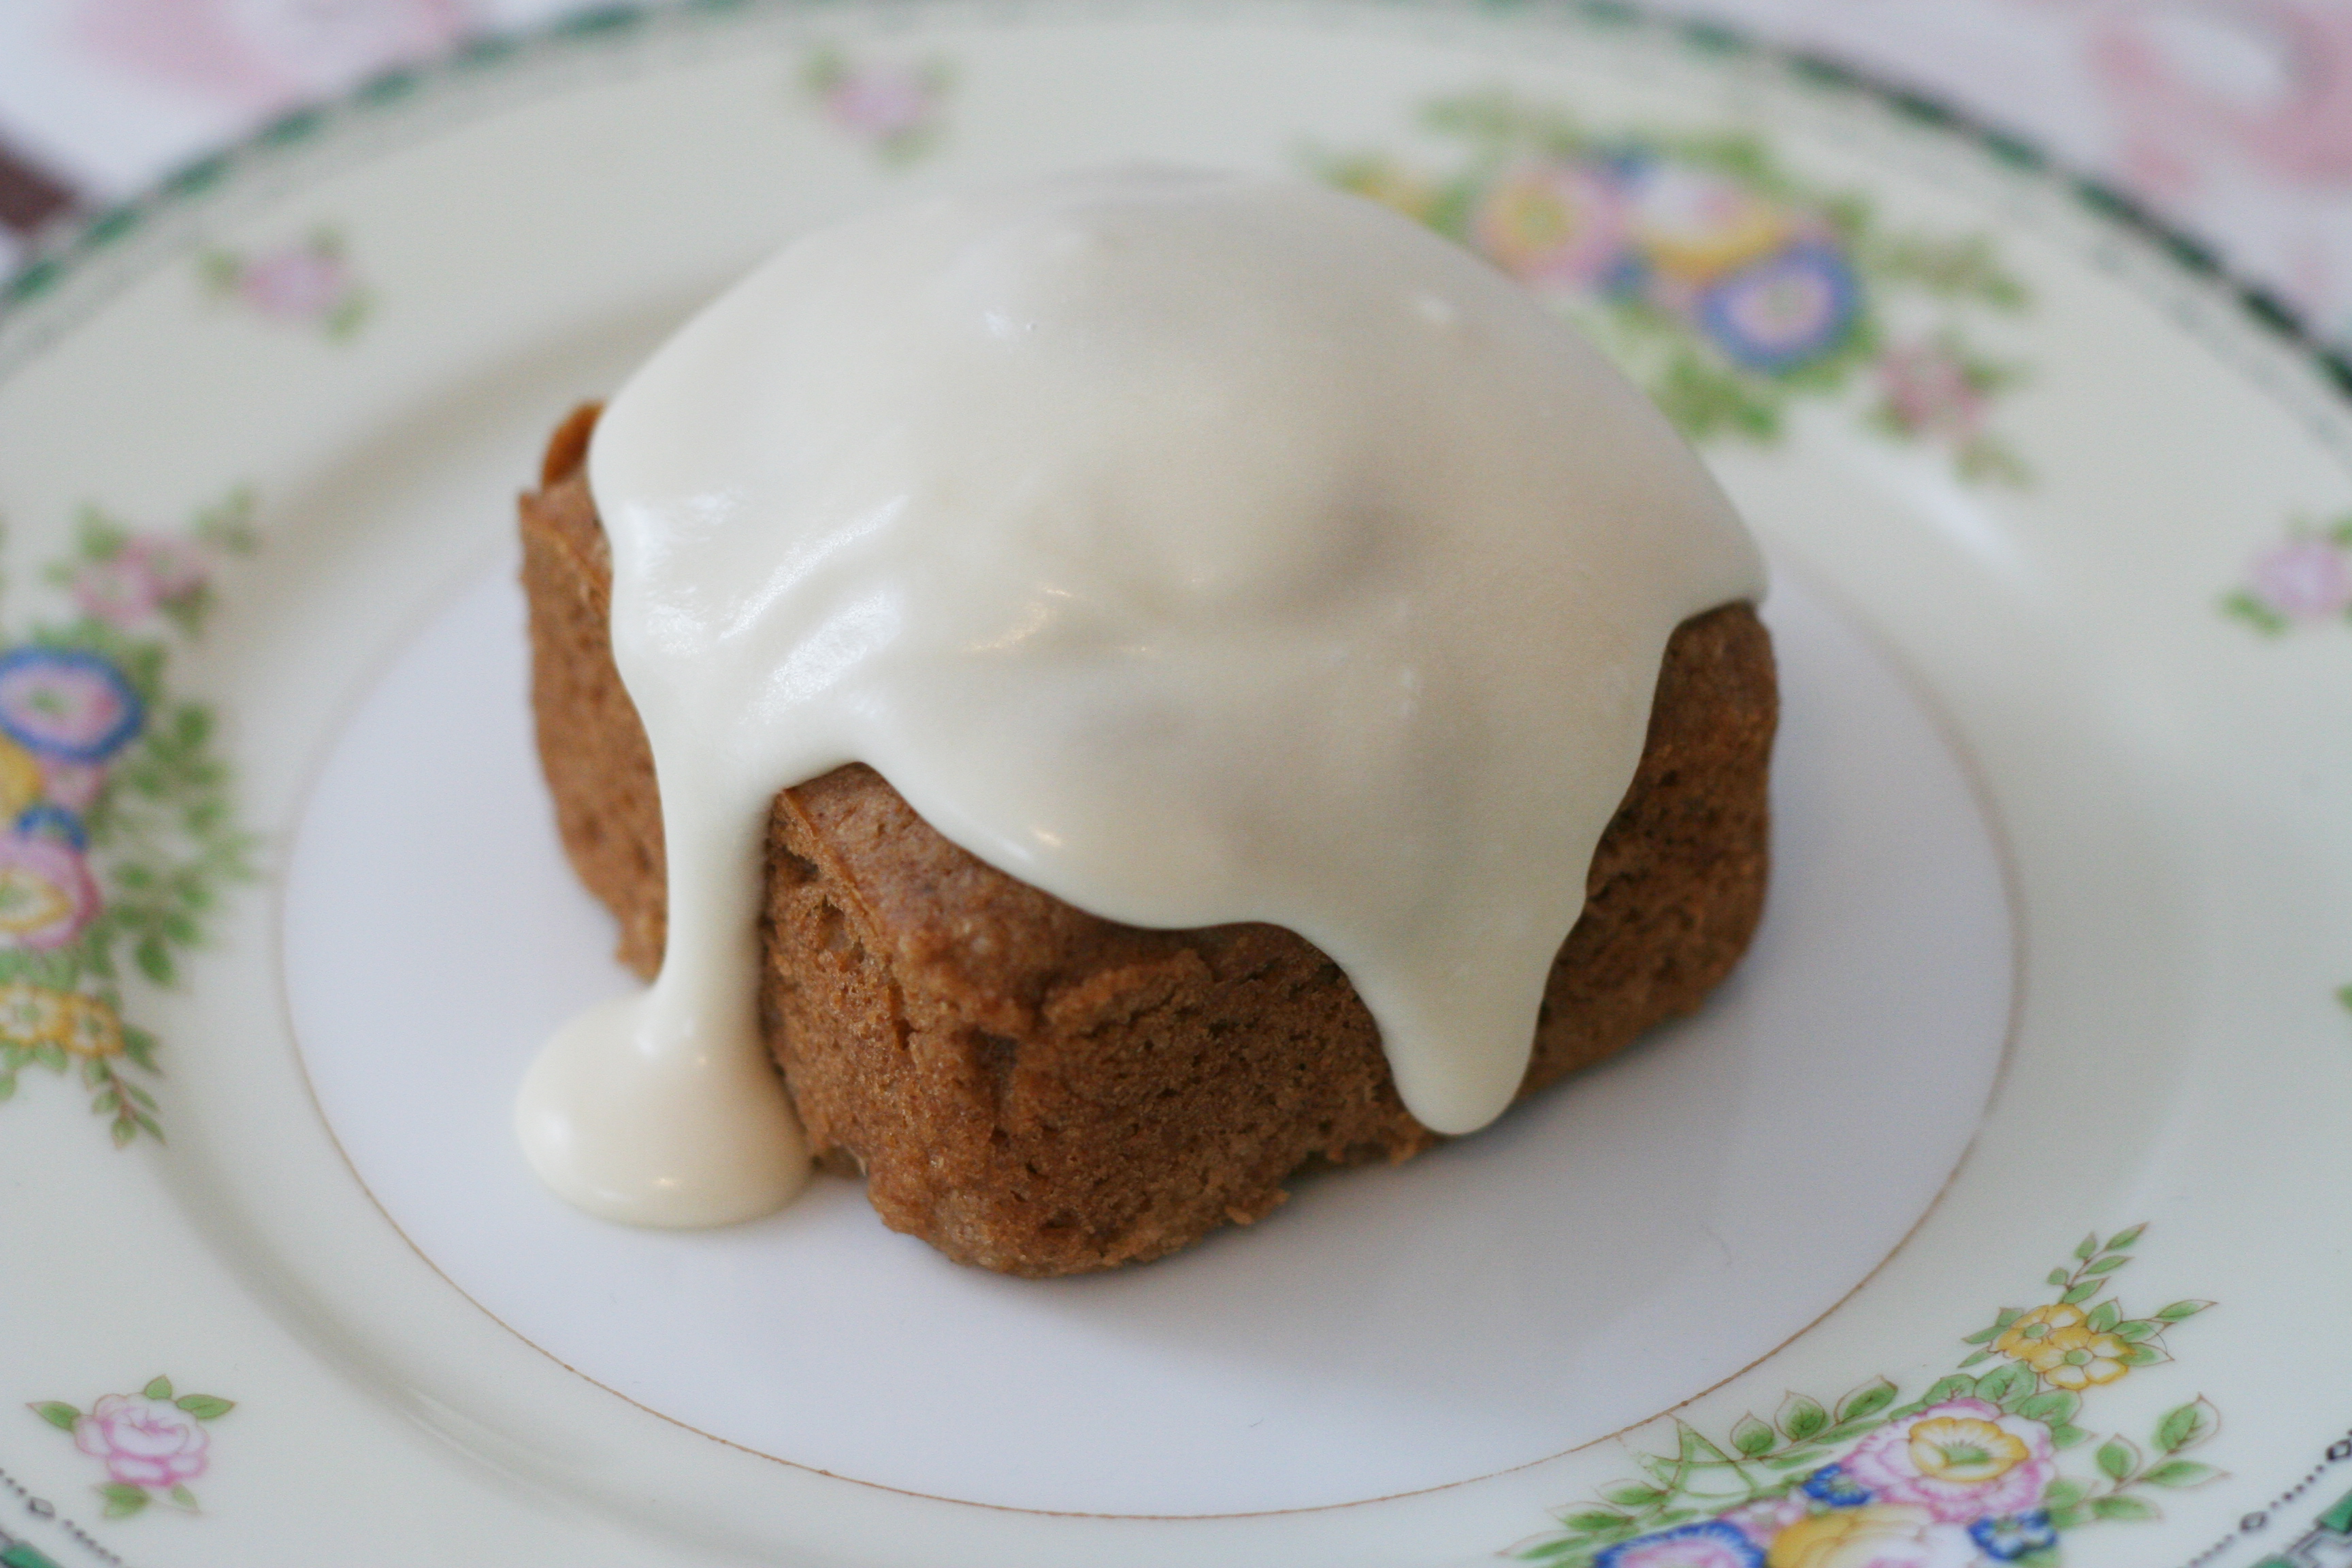
cinnamuffinI first made this muffin when Max was a toddler and he loved them until the great food rejection began.  I got the recipe from The Bed & Breakfast Cookbook by Martha W. Murphy.  It’s a great little muffin full of oats, low in fat and sugar, and has a maple glaze.  I decided to make it for Max to try again but I knew the whole oats would be texturally repugnant to him so I came up with a revised version of this muffin by pulverizing the oats in the food processor until they were as fine as I could get them and this worked well for Max.  The result went like this:

“This tastes just like a cinnabun*!  You should give this recipe to them to make and sell.  Seriously mom, it’s THAT good!”

*I don’t think it tastes like a cinnabun but I’m perfectly happy to have him think it does.

For Max’s sake I have been making the glaze into more of a frosting and I make it fresh each time and don’t measure at all.  I will provide instructions for making the glaze how the recipe was originally meant to be (thin) and I will tell you how I have perverted it to suit Max’s needs.

Cinnamuffin Recipe

8 -ish muffins

Cinnamuffin Recipe

Ingredients

  • 1 1/2 cups rolled oats, pulverized in food processor to a coarse flour
  • 1 1/4 cups whole wheat flour
  • 1 tsp cinnamon
  • 1 tsp baking powder
  • 3/4 tsp baking soda
  • 1/2 tsp salt
  • 1 cup applesauce
  • 1 1/4 cup buttermilk
  • 1/2 cup brown sugar
  • 3 Tbs melted butter or vegetable oil
  • 1 egg
  • butter or oil for greasing the muffin tin
  • For the Glaze:
  • 1 Tbs. butter, melted
  • 1/2 cup powdered sugar
  • 2 Tbs. maple syrup

Instructions

  1. Preheat the oven to 400°.
  2. Grease a muffin tin.
  3. Mix all dry ingredients, except for the sugar, in a medium sized bowl.
  4. Mix the sugar and all the wet ingredients together.
  5. Add the wet ingredients to the dry, avoid beating the crap out of it.
  6. Fill the muffin tins about half full.
  7. Bake for 20 minutes, then cool for a few minutes before removing the muffins.
  8. Make the glaze by madly stirring the three ingredients until they become super smooth. If you want a thicker glaze (as shown in the image) add more powdered sugar until it reaches the thickness you want. If you make a thick glaze it will cover fewer muffins, so make MORE. Capisce?

Notes

About the yield: my square muffin tin yields between 8 and 9 muffins depending on how I've divvied up the batter. If using a standard sized round muffin tin you'll be more likely to get 12.

This recipe is adapted from The Bed & Breakfast Cookbook by Martha W. Murphy.

https://stitchandboots.com/2013/04/12/cinnamuffin-recipe/

The Black Smock with Striped Seersucker Details

bandw shirtThis is my favorite of all the smocks I’ve made recently.  I admit that it’s largely because it’s mostly black.  With stripy details.  I should have washed my cotton gauze before sewing this because when I washed it the black bled into the seersucker a little bit.  It’s not that I don’t know about pre-washing, it’s that I’m insanely lazy and the one piece of housework I loathe with every fiber of my being is laundry.  I hate it.  I avoid it.  Here’s the other thing – I love ironing seams and hems flat but I don’t like ironing yardage because it’s unwieldy.

back bandw shirtBack detail.  I love the black and white stripes.  I want to do a jacket in pillow ticking.  I also want to do one of these over-shirts in solid black.

front facing bandw shirtThe facings continue to give surprise enjoyment.  So do the buttons.  I’m using buttons I’ve had around for ages.  No button buying for me.

pocket detail bandw shirtLove the pockets.  However, last night I ripped the damn pocket which got caught on a door knob.  I destroyed the first shirt by catching its pockets on a door knob too.  I mended it but it will never be the same.  So these big pockets are a design flaw.  What sucks is that I really love them – perfect size for shoving my hands into and for putting tissues and lip balm in when taking walks.  On future smock-shirty-things I need to consider either putting the pockets on the side seams or putting them inside.  The other option is to put a button and button-hole on the pocket to keep it closed.  But then I can’t just shove my hands into them without fussing with buttons first.  There’s nothing insouciant about that.

How to Make Laundry Detergent

homemade laundry detergentLaundry detergent is very easy to make and costs a lot less to make than buying the eco-friendly and natural detergents that I use.  If you are used to buying really cheap detergents with lots of perfumes and unnecessary chemicals then you may not see much of a cost savings.  My friend Sharon and I made a batch of this detergent and have some notes to share about it:

  • You use 1/4 cup per regular load, more for heavily soiled loads, but if you want to get stains out you may still need to treat stains before washing.  Sharon’s son’s white school uniform shirt did not come entirely clean with this soap.
  • This works for high efficiency and front loading machines (that’s what Sharon uses) but you need to put it directly in the load rather than in the compartments you might normally put your detergent in.
  • The bar soap you use may make quite a difference in the finished detergent.  Most recipes call for either Fels-Naptha or Zote – both are really heavily perfumed and have ingredients I don’t want in my laundry but I know Fels-Naptha is a great stain remover so your detergent may not need stain treatment pre-wash if you use it.  For this batch we used Trader Joe’s tea tree oil soap because it’s cheap and natural.  When I used it in a “handwash” load in my machine it left some residue on a dark shirt – so this may not be the best soap for the job.  This did not happen with my last batch.


  • You do not have to use distilled water but it’s better to use water with no added chlorine or other chemicals in it.


  • The cost for this batch was $6.39.  How long it lasts will depend on how many loads of wash you do a week and how much detergent you generally use.  I usually spend $11 or more for liquid detergent that lasts less than a month.  The last time I made this detergent a gallon of it lasted a month and a half.


  • It is NOT dangerous to work with washing soda if you refrain from getting it in your eyes or mouth.  So don’t eat it or wipe your eyes right after you’ve hand your hands in it.


  • Sharon had an old Parmesan cheese grater and this worked so well I want to get one to grate my soap with too.

I based my recipe on one I found in the homemade laundry detergent recipes post on Tipnut but my method is a combination between Tipnut and my friend Kathy.

Homemade Laundry Detergent

Homemade Laundry Detergent

Ingredients

  • 2 cups washing soda
  • 2 cups borax
  • 2 cups bar soap, grated
  • 2 gallons distilled water

Instructions

  1. Bring the water to a boil in a large pot.
  2. Once water is boiling, add the grated soap and boil until all soap is dissolved then turn off the heat.
  3. Add the washing soda and borax and stir until dissolved.
  4. Put a lid on the pot and let sit over night to let it set up.
  5. If the detergent is soft and gelatinous - go ahead and put it in the containers you plan to store it in.
  6. If the detergent is hard - stir it by hand until it's broken up enough to allow an immersion blender to do the rest of the work. Blend it until it is in a pour-able state, then put in storage containers.
  7. Use 1/4 cup per regular load, 1/2 cup for heavily soiled loads.
https://stitchandboots.com/2013/03/16/how-to-make-laundry-detergent/

IMG_3827That cheese grater was awesome!  The last time I made detergent it was a pain to grate the soap.

sharon adding sodaWe learned an important lesson: turn the heat off before adding the washing soda and borax UNLESS you use a huge canning pot like my friend Kathy does -because it boils up really fast.

IMG_3853This is how we found it the next day.  it was very stiff like a jello with too much gelatin added.

super lumpsWe broke it up with a spoon but the clumps were big and it was a lot of work trying to break them up.

lumpy laundry detergentThe clumps were too big for this to be easily scoopable.

resorting to the immersion blenderSo then Sharon had a brilliant idea: use an immersion blender!  It worked.  It still has a clumpy look to it but is now pourable/scoopable.

bottling it upI store my detergent in half-gallon jars but you can use old liquid laundry detergent containers or any other glass or plastic container with lids.

Cannibalistic Hot Dog Over-shirt

hot dog shirt necklineThere’s little hot-dog men eating hot dogs while their olive-headed wiener dogs loaf around, as they do, and I have to wonder if the hot dog the hot dog is eating is ACTUALLY a barbequed dog?  Or some third-party wiener?

I think of these over-shirts I’ve been making as smocks.  Philip doesn’t like the word “smock”.  He prefers “over-shirt”.  Both the over-shirt and smock are ideal words to describe a garment meant to hide my formidable ass but I like “smock” better because it’s a word of action where-as an over-shirt is an inherently lazy garment.  You put a smock on to DO things in, often creative things.  You put on an over-shirt just to cover yourself.  hot dog shirt front

I think, however, that most people feel that a smock is not a garment you wear out in public whereas I have every intention of wearing mine in public.  So let’s call it either and be done with it.

Again – remember that my dressform is much smaller than me.  My shirt is a little less roomy on me.  From the last version I have added some width to both the front and the back and made the shirt a couple of inches longer.hot dog shirt cuffI cleaned up some pattern issues and changed the back.  This newer version comes together more smoothly.  I trued all the seams – a really important step in pattern drafting.

hot dog shirt buttonThese particular buttons aren’t vintage but are part of my stash.  No button buying for me for a long time.  I’m on a use-what-you-have button diet.

hot dog shirt problemsThis picture illustrates the issues I’m having with my pattern in the front of the shirt.  I need to fix this so that the curves match in the overlapped part.  I also might need to move this button so that it holds the top and bottom more closely aligned.  It’s an easy fix and I’m pretty lazy and not likely to keep the top button buttoned so fat chance I’ll fix it.

hot dog shirt backHere’s the new version of the back.  I definitely considered doing away with the contrasting fabric but my desire to see the hot dogs next to the polka-dot won me over.  I like contrasting fabrics.  I’m happy with this.

hot dog shirt back detailI now have 4 over-shirts done (I’ll do separate posts for the other two) and I have the two linen ones left to do.  Then I have pants and pyjamas to make and I’ll be done sewing clothes at least for a little while.  Which is good because I’m quickly exhausting all the Midsomer Murder videos my video rental place has.

Santa Rosa better get ready because I’m putting this shirt on right now to head to the store!

The Dining Room and Living Room Tour: Unpacked and Settled In

festive lightingRemember when I gave you the house tour right after we moved in and showed you all the scary piles and the crap everywhere?  Well, we finished unpacking long ago and there are still generally piles of scary crap all over our house because I have the equivalent of 3 full time jobs and a very poor relationship with laundry, but when I do clean my house it’s much different than when you saw it the first time.  This first picture is our dining room table.  During the first house tour we were still pretending this was the living room.  We like having festive lights on all year round so Philip decorated our window with them.  We love it!

also the dining roomLook how clean that floor is!  The dining room table has no mail on it!  Chick is running up the stairs to position herself for maximum barking impact when the mailman comes.

stag deco buffetThis is my single most favorite piece of furniture besides my desk.  It’s from the early thirties and was shipped over here from Italy.

dining room other cornerJust another view of my dining room.  I’m only showing you the dining room and living room this time so I want to give you lots of opportunity to enjoy it.  If you ever come to visit me you will not recognize them because they will be covered in crap.

chick guarding everythingLooking from the living room to the dining room.  Chick is not a restful dog.

living room 2I love this picture because of the light streaming in from the ONE window in this room.  The curtains are usually drawn to keep the glare off the tv.

living room 1We like chairs, not couches.  Though I miss having an alternative place to fall asleep if the bedroom is inhospitably loud.  When we hang out together we each like having our own chair.  The purple one is mine, the blue leather one is Philip’s and the dark rose colored one near the floor lamp is Max’s.

tv cabinetLastly – this is the tv cabinet.  It’s my mom’s and she’s taking it back to put in her apartment.  We don’t know what we’ll do.  We’ll have to find some kind of replacement.  I’ll worry about that another day.  The shelf to the right is filled with my cookbooks and gardening books.

Some day the stars will align and the upstairs will be all tidy and looking pretty and I’ll give you the tour of that.  I’m just happy to have it on record that every once in a while my living room and dining room are neat and tidy and pretty and inviting.

Hope you enjoyed the mini-tour!

Stitch Needs a Facelift but Pippa Doesn’t

great pippa sprawl

You may have noticed that my blog is all jacked up?  I have.  My drop-down menu disappeared and there’s a weird overlapping and blacking that happens sometimes when I do a search and scroll down.  It’s weird.  I’ve been wanting to change things a little for a while.  Then I spent two weeks learning to use a new theme over at Better Than Bullets and it exhausted me before I even got it just how I wanted it.

So if things get even funkier and more messed up in the next few weeks – please be patient and don’t give up on Stitch and Boots!  I have some updated pictures of my dining room and living room to share with you and I’ve also got a recipe for laundry detergent to post.  Not only that – but some yard work has happened and this week I’m planting some culinary herbs in pots outside my back door that I’ll want to show you.

Now I just have to get up the nerve to dive into the world of themes and fonts and try to make Stitch both functional and attractive again.  I think I’m going to need a lot more sustaining beverages to accomplish this!

Meanwhile – enjoy Pippa being adorable!  Her new nick name (in case you haven’t already heard) is Squeaky Pumpkin.  You know you want to touch her belly!

The Sherbet Over-Shirt

shirt pattern

I need some over-shirts to cover my fat ass and they need to have pockets so I can take the dog for a walk without having to bring a bag.  I get overheated easily and can’t wear sweaters or jackets for walking.  Searching for a pattern to work with was predictably (and ridiculously) hard.  I wanted set in sleeves and a loose fit and long enough to cover my ass but not fuddy duddy and golf-y looking.  Forget it!  As usual I realized I was going to have to make my own design.  I don’t have slopers for my size and it would just depress me to spend tons of time making them (plus, I lack an obese sized dress form – and I only know how to make slopers using dress forms).  I needed a pattern to alter.  This is the one I chose – I thought it matched most of my starting needs until I got it home and saw that the sleeves aren’t set in.  Drat!

started out as

It was on sale for $1.99 so I didn’t have to worry about cutting up the pattern.  I set about making it wider at the hems in both the front and the back because I am always larger on the bottom than the top (even when I was a regular-sized person).  I lengthened the sleeves a little because I wanted them long enough to roll the cuff up.  Forget about those side vents.  I also drafted pockets (3 tries and I still have to alter the ones you’ll see below) and did away with the collar.

pattern work

This shirt has already taken up quite a bit of dot paper and my re-draft will take even more.  I have to either order it online or beg some off of my friend Autumn who owns the corset company Dark Garden.  Dot paper is the perfect weight for drafting – it’s light enough to allow pleating and folding and then also using to cut fabric from but heavy enough that you can trace around it and it doesn’t tear easily.  The markings on it are  in a grid making it easy to line things up and use your ruler to good effect.  I want a whole roll of it but it weighs a ton so shipping is really expensive.

the sherbet shirt

So here it is!  It bears almost no resemblance to the original pattern.  I’m happy with the front, though I still need to make the hem a little wider.  This looks much better on my dress form because she’s several sizes smaller than me.

whale of a back

That pleat is there because of a pattern problem.  I do NOT like the contrasting back panel.  I’m also not a fan of my curve line there which is not flattering on me.  When I try this shirt on the front looks okay but in the back I look like a whale-backed Alfred Hitchcock shaped sherbet popsicle.  I’m already short-waisted so that curve should be the other way around – or the seam between top and bottom should be straight.

back and cuff detail

I am very pleased with the cuffs.  Though on the next version I think I will make the contrast piece much longer so I can fold up the cuff and still have some of the contrast be on the inside.  I’m not sure how to explain that.

pocket detail

I have rarely intentionally worked with directional patterns for design effects.  I was pleased with this even though my stripes don’t match up perfectly.

clean stitching

Pardon me – this picture is superfluous.  I only include it because I like looking at that clean stitching and how I managed to sew that facing in without this recalcitrant fabric puckering or bunching.

front and button detail

The buttons are vintage.  My button holes are a little shaggy.  My sewing machine (Pfaff 2046) doesn’t like doing button holes so I have to cajole and trick it.  In every other way than that my machine has met my expectations.

facing and button detail

That is my favorite detail.  I’m so pleased with the facing.  I love a stripy surprise!  I often find facings tedious to sew but this one I made myself and it came together so well and I actually enjoyed sewing this one.  It was tricky (as I mentioned above) working with the wrinkly gauze but I managed it.

So it’s back to the drafting table with this pattern.  I will do the next sample in a black with white pin dots and then I will buy some yardage for another couple of them.  I need about 3 of these guys for my wardrobe.

Also finished this week: 4 knit shirts with different hem stitches (I think I’ll post those too)

Still to make after the over-shirt project is done:

1 pair knit pyjama bottoms

1 knit pyjama top

2 pairs knit pants with no over-skirt

2 pairs knit pants WITH over-skirt

2 more knit tops (tunic length this time)

1 coat

That’s a big list.  But it’s necessary.  All my clothes are full of holes and looking embarrassingly shabby.  For me to concentrate on writing and gardening and exercising I need to not have to be depressed about my clothes.  It’s been a long time since Stitch and Boots had any stitches posted on it!

Garden Wish List for 2013

december nasturtium

My mind is turning towards my garden and all that I want to do with it and plant in it and the things I want to change in it.  At the moment I am struggling to make myself new clothes because suddenly everything I wear has holes in it or stains on it and I don’t have a lot of choice and I have decided that since I may be obese for life regardless of good healthy changes I make to my life – I am determined to stop being so drab.  Making clothes requires pattern work and lots of time.  I need to finish this before I get my hands into the yard – but while I’m sewing I keep trying to organize in my head all the things I want to grow.

We mostly have low maintenance shrubs and plants here.  A couple of things we do have that are awesome:

a lemon tree (not a Meyer I’m happy to say)

A white peach

a gardenia

a few roses

freely seeding salvia and alyssum

The trees and roses all need big help.  The peach has been in a barrel for years without the bottom cut out – so it need the bottom cut out as was done for the lemon so it can spread its roots.  It needs a little compost and fertilizer – as does the lemon.  Both produce fruit (I just had broccoli yesterday with lemon juice from our tree!) but need care.  The roses are in dire shape as they’ve been in the shade for years.  They are horribly spindly and thin – they all need to be moved up front to the strip of dirt in front of the porch and they’ll need rose food to help them along.  The wee gardenia has a bud but it is being crowded out by a really big hideous shrub-turned-tree that I am going to completely remove.

What I want:

Culinary herbs: rosemary, lots of thyme, Greek oregano, Mexican oregano, winter savory, French tarragon, dill, parsley, sage, and marjoram.  (I would add basil and cilantro but I’ve never done well with either)

Fruit: a yellow peach tree (or two, dwarf), an orange or tangerine (though orange might get too big), gooseberries, lingonberries, wild strawberries, currants, blueberries, kiwis, and Red Flame grapes.

Flowers (both annuals and perennials): penstemon, scabiosa, lavendar, rudbeckia, cosmos, nigella, bleeding heart, coreopsis, campion, dahlias, nasturtiums, and columbine.  Also hundreds more I can’t think of right now and probably don’t have room to grow.

Medicinals: calendula, comfrey, peppermint, feverfew, catnip, chamomile, and other things I can’t remember right now and need to look up.

Vegetables for this year:  cucumbers (fresh eating), lettuce, Swiss chard, tomatoes, green beans, summer squash.  Just the basics.  Even if I get a couple of raised beds going in the driveway I won’t have much room.  Perhaps snow peas too?  If so I should get those going soon I think.  That would be good for both salads and stir fries.

One last thing I want to grow in this garden if I can are mushrooms.  We have all that shaded area and a big oak – some mushrooms like oak trees.  I want some half rotted logs innoculated with spores to try and acclimate with plenty of mulch and obviously moisture when the season comes.  I must look into this.

So what’s on your garden wish list?

10 Food Blogging Trends That Need to End

bacon mallow pop 1

1.  Rehashing the rehashed recipes ad infinitum…

Here are some food trends that have been done to fucking DEATH: bacon, candied bacon, bacon jam, doughnuts (the new cupcake), kale chips, buffalo anything, pulled pork, quinoa, bacon in desserts, red velvet anything, chocolate chip cookies, cookie dough anything, loaded baked potato soup, green smoothies, anything with chia seeds, s’mores anything, homemade marshmallows, and sweet potato fries just to name a few.  You’re just following the fumes of trends that have been driven into the ground.

2.  Photos of food spilling and dripping over the sides of dishes.

It’s not arty – it’s gross.  It makes my fingers feel sticky and rather than wanting to grab a spoon or fork and eat your food I want to grab a sponge or a dish towel and clean up after you.

3.  Stuffing cookies with candy or other cookies.

Stuffing food inside other food.  This over-the-top stuffing of food inside other food has become one big gluttonous denial that heart attacks and diabetes could happen to YOU.

4. Supporting the packaged crap industry

There is apparently a continuous contest  to see how many ways one can cram processed crap into their home baked goods.  Disposing of whole bags of fun-size candy bars in a cake recipe is sick and needs to stop.  Please refer to #3.

5.  Hyperbolic food writing.

We get it – food can be emotional for some people.  Suggesting that a single dish of food is “life changing” is ridiculous.  Talking about food as though it can heal all the wounds of life is also ridiculous.  Be real.  Stop trying to flog emotions out of us with the promise of life-changing pasta.  We’re not simpletons.

6.  Striped paper straws

Time for a new prop for food photo shoots involving any kind of sweets or sweet beverages.  My eyes are so tired of seeing the same striped straws everywhere.  What annoys me about them aside from their ubiquity is the “old fashioned wholesomeness” bloggers seem to be implying as if jaunty little straws can neutralize the potential for heart disease and obesity represented on the endless parades of plates piled high with processed-crap-stuffed baked goods.

7. Fondant.

Fondant doesn’t taste good.  The first rule of food is that it should nourish your body.  The first rule of food worth talking about is that it also taste good.  If it neither nourishes nor tastes good it doesn’t matter how pretty it is, you may as well be sculpting cakes out of play-dough.

8. The evils of “mouth-feel”

Never describe to me how food will FEEL or ACT in my mouth (or in yours).  The second you start talking about food in people’s mouths I am imagining masticated food and that makes me lose my appetite which is the opposite of what your writing is trying to accomplish.  It’s not funny.  It truly grosses me out.  I don’t want a “party” or an “explosion” of any kind IN MY MOUTH.  So get out of my mouth, please, and keep me out of yours too.

9. Fluffy cake flavored drinks pretending to be martinis

Calling any beverage in a martini glass a martini.  It’s not the glass that makes it a martini – it’s the use of gin + vermouth  that makes it a martini.  The only other version of a martini that’s still a martini is vodka + vermouth.  If your drink contains anything else – it is most definitely NOT a martini so give it a new name.*

10.  The cast of characters ingredient shot.**

Unless you plan to not have an ingredient list with your recipe (which would be a dumb move) no one needs to see the ingredients all grouped together on your kitchen counter.  It adds insult to injury when every item in the photo is labeled – it suggests that your readers are so new to the world that they don’t know what butter looks like.  Trust me – we know it when we’re looking at eggs just like we understood what you meant when you listed “2 eggs” in the ingredient list.

*A splash of olive brine and a garnish of an olive or a lemon twist are the only other variations allowable for the drink to still bear the name “martini”.  If you’re using flavored vodkas – it’s not a martini.

**My friend Sarah’s words for it.  Brilliant.

Sharon’s Mushrooms Unidentified

sharonmushrooms4

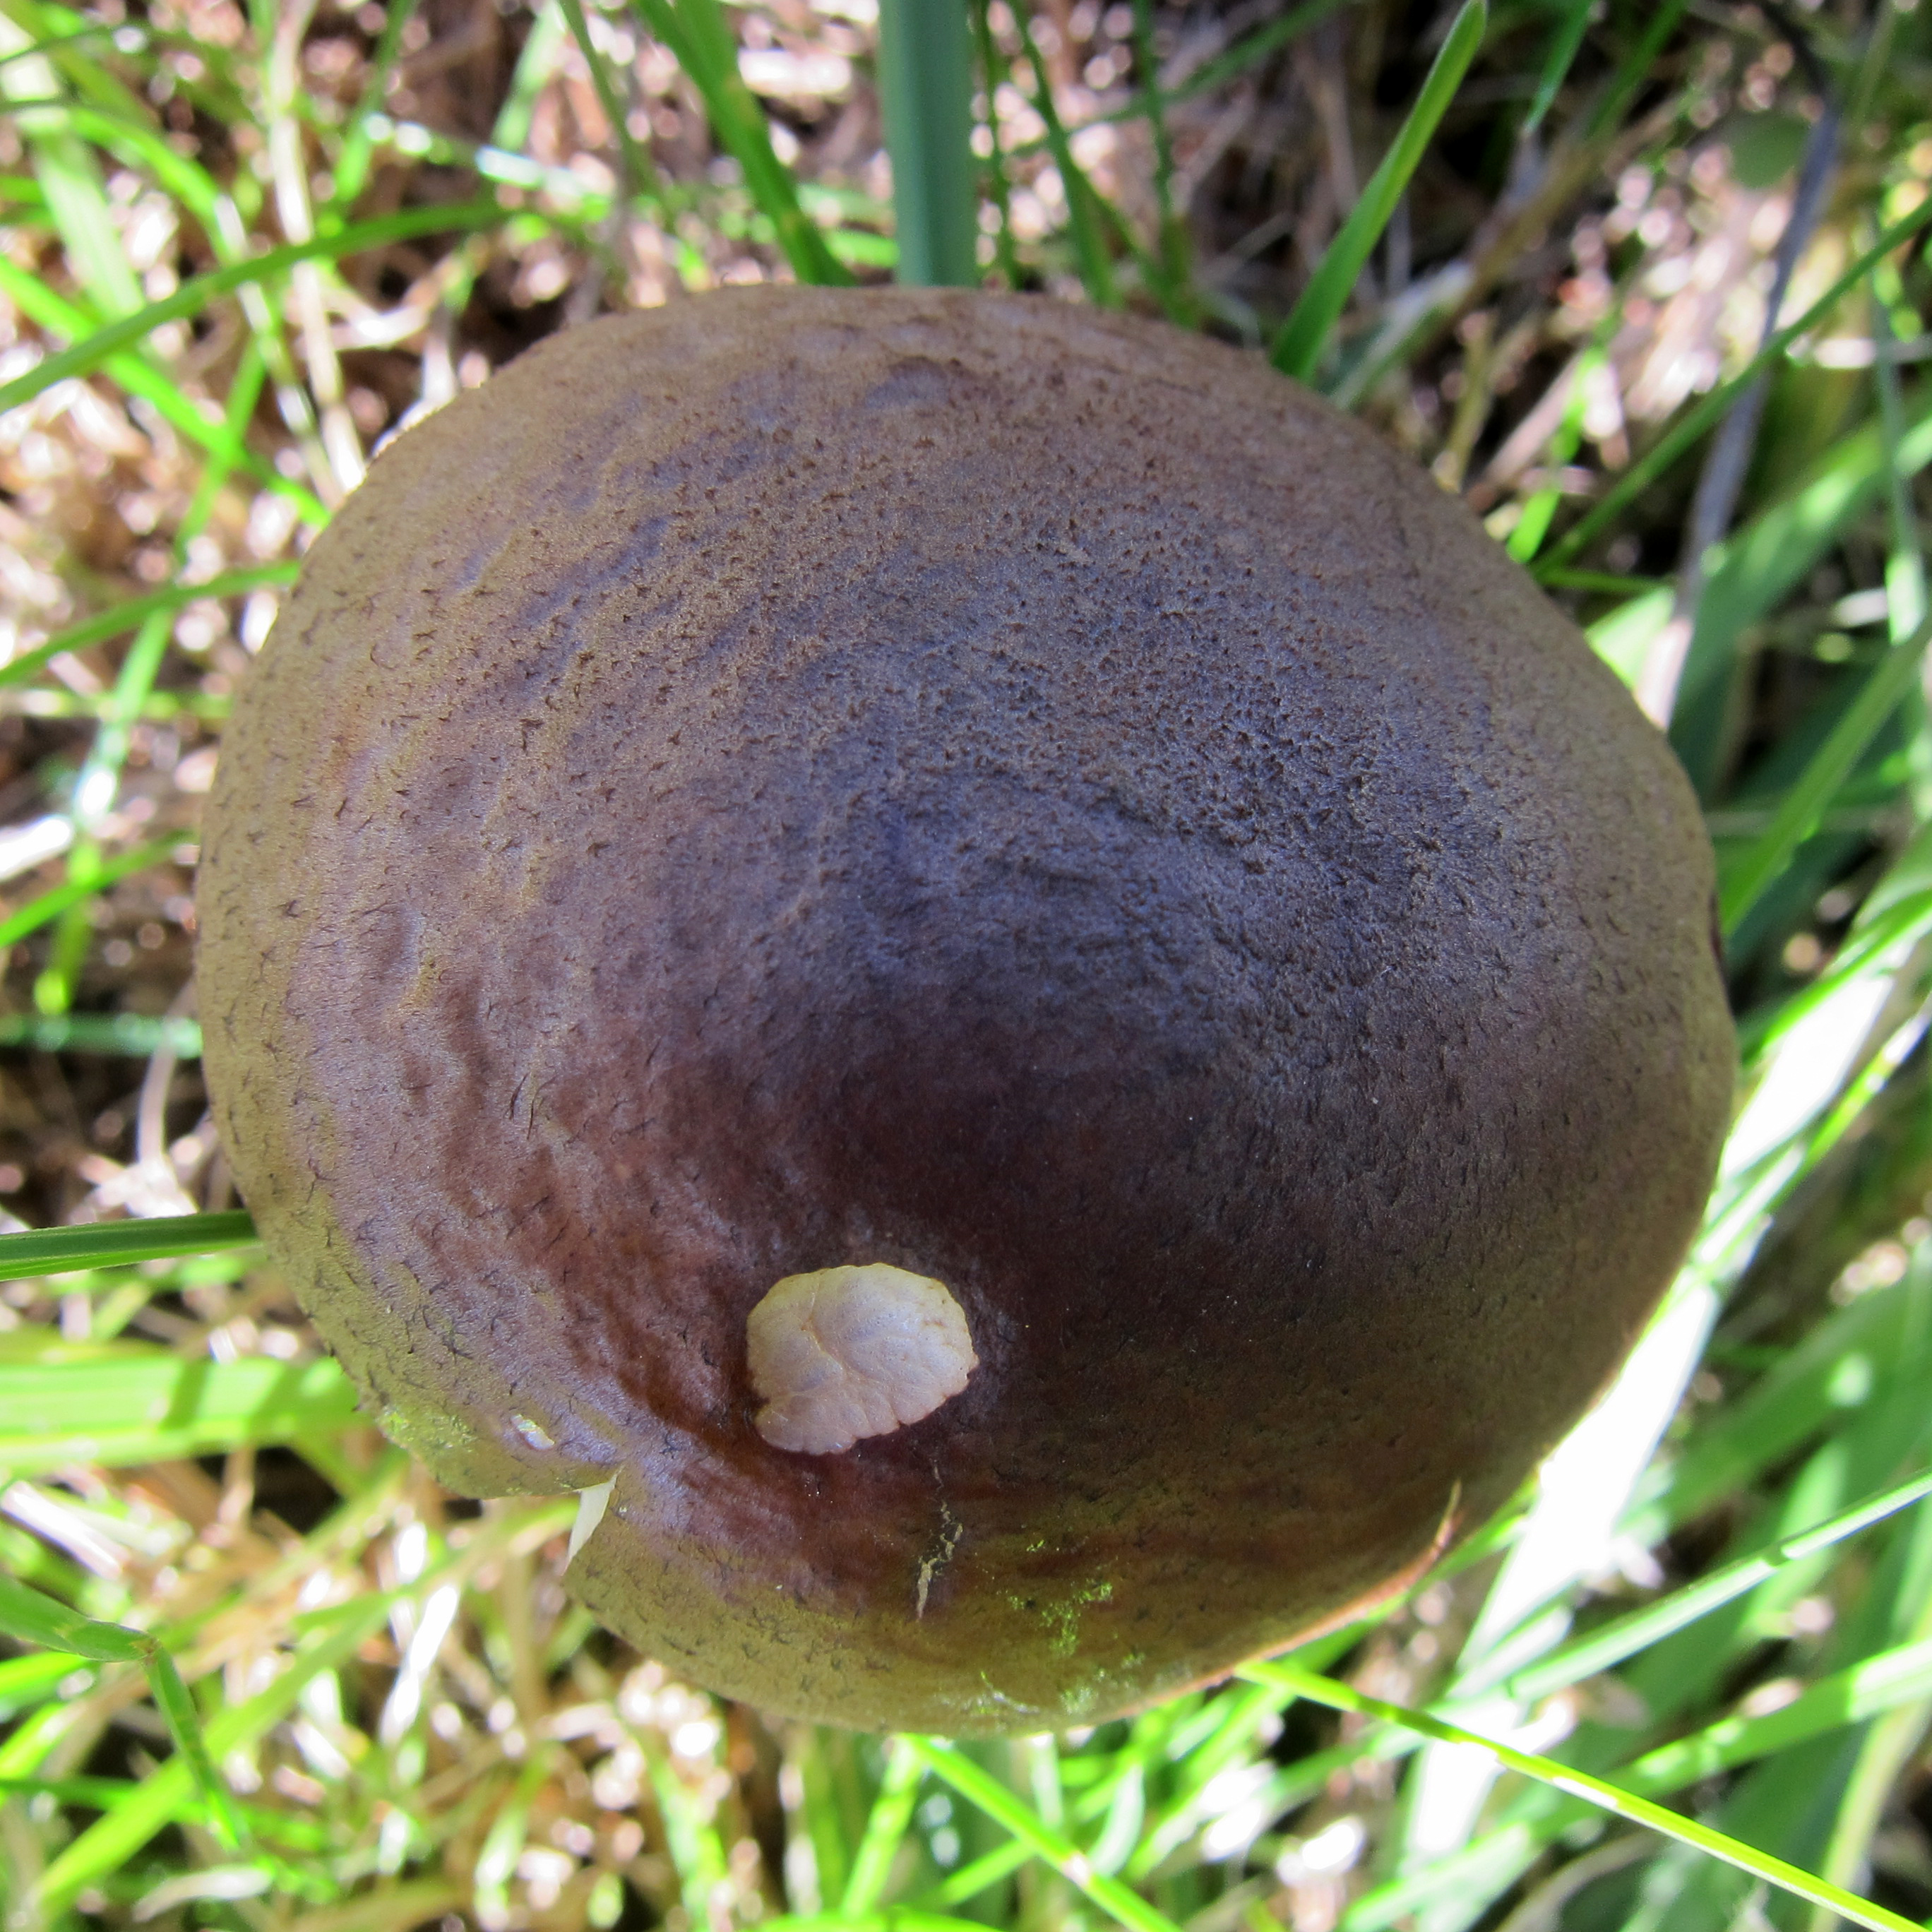
Sharon has some impressive mushrooms growing in her yard.  We wish someone could identify them for us.  It turns out I have the same mushrooms growing in mine.  Are they edible?  I don’t have time to research it right now.

sharonmushrooms7

Even if I did – I’m not sure I would feel comfortable trying to eat these without a mycologist’s identification.  I have read that in some places in France you can bring any mushrooms you find to the local pharmacy and a professional will pick out any inedible ones for you.  People love to forage mushrooms in France, this way fewer people die doing it.  Genius.

sharonmushrooms6

I wish we had that here.  There are people who lead educational mushroom foraging walks in Sonoma County.  I am going to try to find out who to talk to next year when these come back.  Maybe I can get an expert to pronounce on these.

sharonmushrooms3

I am posting an exhaustive number of pictures in order to help identify them later from my books.  Just as an exercise for my own mycological education.

sharonsmushrooms13 If those babies were edible you could make several meals out of that cluster!  And she has two of them in her yard!  No, wait, she has three.  Two big ones and one little one.

sharonmushrooms5

Even if they don’t turn out to be edible, they are COOL.  I’d still like to know what they are.

sharonmushrooms2

I like fungi.  They’re fascinating.

sharonmushrooms9

And beautiful.

sharonmushrooms8

  I want to get some edible fungi growing in the dark dampish corners of my yard.  Make use of all that shade.sharonmushrooms12

I did see chanterelles growing in a really trashy yard down the street from me.  I didn’t know you could grow them in your yard.  From the looks of the house I’m guessing it was an accident of nature.  I’d like to reproduce that happy accident.

sharonmushrooms11

Right after Sharon showed me her mushroom riches I found an enormous clump of the same variety of mushroom growing in my own yard!

So this is something for me to work on some time before next year – trying to identify these beauties.  If you think you know what they are – please share!