Author Archives: angelina

Soup Philosophy

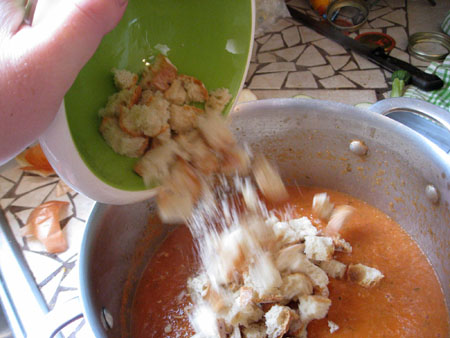
breadsoup2

Every year, just when I’m in the middle of mourning the end of summer tomatoes, wearing my black band and draping my windows with the evidence of my sinking tomatoless spirits, a brisk shiver of cool air brushes across my skin and I drop the banners the flags and the weeds of loss as a single word crosses my mind in a kind of breathless joy:

SOUP!

Suddenly I have forgotten all about the tangy sweet tomatoes I’ve been in love with for weeks and I am happy again.  Soup!  Soup is absolutely one of the very best dishes on earth.  It is everything humble, simple, nourishing, inexpensive, hearty, healthy, uplifting, and homey.  I am aware that a soup can be made of $100 a pound lobsters and mushrooms that people have been shot for.  This doesn’t change its humble nature.  Its simple entreaty to nourish yourself and heal your spirit when the winds are howling and the wolves are baying outside your door.

Soup is a chameleon, changing into whatever you need it to be: you  can devise a torturous 20 step soup that calls for 17 hard to find ingredients and takes 24 hours to make; you can make a soup with 5 ingredients in just a half an hour; you can use up all manner of old-ish vegetables from the cellar and feel like a king.  It’s what you want it to be.  It’s whatever you need it to be.

I’m not sure how old I was when I learned about the magical powers of soup but I do know that it was the first thing I learned to make completely on my own.  Split pea soup is one of my favorites and I have been known to make it when I feel low simply because making it uplifts my spirits, infuses me with renewed hope and calm.  The scent of the garlic and fresh dill is intoxicating and improves my health before it ever reaches my mouth.  Making soup is like  saying a prayer in the kitchen.  It is the only kind of prayer I know.

Soup is not only the first food I learned to make completely on my own, it is the first dish I learned to make by instinct and the first dish that my reputation for being an excellent cook was built on.

I have heard many a novice cook express the opinion that soups are difficult or a mystery to master.  I disagree in spite of the fact that someone once asked me for my recipe for vegetarian split pea soup and reported back to me that it didn’t turn out.  When this curious person described what had happened I realized that there are many things about soup making that I take for granted and therefore don’t think I need to explain.  I learned a lot from that exchange.

I am going to break down some of the components of successful soup making here for anyone who needs a little courage and knowledge.  These are merely my soup making rules and truths.  If you are learning to make soup and you have an excellent soup maker offering to teach you their own magic- trust them and let them teach you!  I am only putting my own soup philosophy here in case someone out there doesn’t have a best friend or a grandmother to help them out.  I will be your guide if you need me.

In the beginning…

There is no soup in my kitchen that doesn’t begin with a tablespoon or two of olive oil and an onion.  I saute the onion until it is slightly browned and transparent.  I often saute it with celery.  The reason I do this is because I often don’t use a stock and browning an onion and celery at the start adds a little depth to whatever soup I’m making.

That’s how all my soups begin.  If you don’t like onions you can do exactly the same thing with leeks, scallions, or skip the alliums all together if you don’t like them or are allergic to them.  If you’re making a soup with many vegetables you can saute them all together at the beginning to get the same effect of deeper broth flavor.  Only do this if you aren’t going to add beans or meat that needs a long cooking time.

The order of all things…

One thing to understand about soup is that most of them take between an hour and two hours to cook so it pays to be mindful of what vegetables should be added and when.  Some vegetables hold their shape longer than others.

Once you’ve sauted your onion and celery you add some water or broth.  If you’re going to add beans to a soup that aren’t pre-cooked then you will want to add the amount you need to the broth and cook them until tender.  You wait to add the other vegetables until they are tender so that you don’t over cook anything.  Onions and celery can take the long cooking times.

Here’s the order of things as they get added to my soup:

1.  Onions, celery, bay leaf, garlic.

2.  Carrots, potatoes, celery root, dried herbs, turnips, yams, rutabagas, parsnips, winter squash.

3.  Broccoli, Cauliflower, green beans, pasta.

4.  Summer squash, leafy greens.

Those lists may not be complete but they illustrate the hierarchy of ingredients and what order they should be added based on how quickly they cook and risk turning to mush.  Some things can be added at any time like fresh herbs.  The only fresh herb that should never be added until the very end is cilantro which tends to lose its flavor when cooked too long.

Liquid Assets: broth or water?

I have been making excellent soup for 20 years and it was only recently that I learned to make my own vegetable broth to use in soups.  You will read absolutely everywhere that using a broth of some kind is so essential to making soup successfully that if you use plain old water you will suffer such a deep disappointment that you will go into an immediate decline.  This is patently untrue.

I promise you: if you don’t have any broth of any kind or any bouillon cubes to add to your soup you can still make soup that everyone will remember for a long time to come.

Don’t be afraid.  Broth is generally made up of many of the same ingredients your soup will have in it anyway.  sauteing vegetables or meat and then deglazing with water will help deepen the flavor.  Use excellent quality herbs because these will also add a lot to the overall flavor.  Using the right amount of each different herb is something you develop an instinct for with experience.  Fresh is often the best.  Garlic is an excellent flavor enhancer in soup (be sure not to use so much of it that it overpowers everything else).

Having said that, I will say that it’s absolutely true that using stock is ideal.  If you have a choice of using broth or using water: always use the broth!  I made two versions of the same soup in one week last year, one using no broth, the other using my homemade stock.  Everything was exactly the same except for that one detail.  Without knowing of my experiment my husband liked the batch made with the stock best.  So it does make soup better.  But he loved the other batch too- just not as much.

If you don’t have broth a close second is to use a bouillon cube or two.  You can get them in beef, chicken, and vegetable flavors.

Then there’s the question of how much to add.  Soup i so flexible that if you add too much liquid to it at first you can cook it a little longer until it steams off and thickens.  If your soup is too thick- add more liquid.  You get a feel for how much to add as you get more experienced but when you’re still a new soup maker it’s wise to add water in 1 or 2 cup quantities.  It is amazingly difficult to translate a soup recipe so that it tells you exactly the right amount of liquid you’ll need to add.  Never assume that the amount the recipe calls for is correct just because it’s printed on paper.  So many factors can influence this such as how hot you’re stove is, how large your vegetables/meat are, and how long you cook it for.

Always add more liquid when you feel the soup has gotten thicker than you want it or let it cook down when it’s too brothy for your taste.  You are in control of this.  Get comfortable winging it.

Size always matters…

The larger you chop your ingredients the longer it will take to cook them.

The smaller they are the faster they cook.

The issue with size is that if you are making a soup that’s going to cook for a long time and you chop all your vegetables really small they will eventually break down into specks.  So if you want them to hold some shape and have a presence…cut them chunky.

For quick vegetable soups it is appropriate to dice your vegetables very small.  This is true of any soup you plan to puree.  No need for chunks then cut them small.

Cream in the pot…

Always add cream to soup as a last step.  If you simmer cream it will curdle.  Curdled soup has little charm.  When you make cream of potato leek soup you cook everything first then you puree it using your blender (not recommended) or an immersion blender (totally recommended) and then you add the amount of cream you want.  To warm it up later be careful not to bring it to a boil.  Heat it up gently stirring frequently.

What substitutions fail?

I’m not sure how many times in this article I have already mentioned the flexibility of soup but it needs saying again.  If you see a soup recipe that sounds great except for one particular spice or one ingredient it is almost always possible to leave it out or substitute it for something you like a lot more.  I would say that this is more true of soups whose whole character doesn’t depend on one particular ingredient.  If you don’t like potatoes you should probably not try to make cream of potato soup…then again…you can substitute the potatoes with celery root and get the same type of soup…so never mind.  Don’t be afraid to experiment.  Experimenting is the very best way to develop your soup skills.  Herbs and spices are like color- develop your personal palette!

A very long time ago I thought lentil soup was always curried or cumined up to its neck and since I am only an occasional curry fan I almost never made lentil soup.  Then one day I was reading a French vegetarian cookbook (yeah, I know!  Crazy!) and it had a recipe for a lentil soup that used thyme instead of curry and it sounded so good.  I made it and it was a revelation!  I loved it so much I have never made a curried lentil soup since because I am in love with thyme as a soup seasoning.

To get a good idea of what kinds of vegetables-meats-and seasonings go well together read a lot of recipes.  I read cookbooks for the joy of it.  It’s where I get a lot of my food inspiration.  Though I rarely follow recipes in them explicitly any more I turn to them to give me ideas of things to pair together and new flavors to try.  There are a gazillion great food blogs online that you can read for free and if you like the old-fashioned feel of paper and enjoy the sound of turning pages- go to your local library and see what they have.  I have collected many cookbooks over the years but I can rarely afford to buy them now and I depend a great deal on my library which has a great cooking section.  Explore yours!

When the love grinds to a halt…

This is my last bit of soup philosophy to offer for the day:  if you make a soup that fails to please on every level, do not let this ruin the magic of soup for you.  Soup is a lot more flexible than gratins, souffles, or bread.  You will have more successes while learning to make soup than you will with any other food but there will still come a soup that stumps you.  I’ve had a few of my own colossal let-downs over the years but I think the most depressing one was a curried cauliflower soup I made that unbelievably ended up having NO flavor.  It’s almost impossible to achieve a flavorless soup- yet I did it.  How is it possible to put curry in a dish and then not at least taste curry?  I don’t know.  I will probably never know how that happened.  You just have to toss it to the pigs or lump it and eat it (this one was really inedible) or pour it down the drain.  I am poor enough now that I would probably eat it anyway.  Or make Mr. Williamson eat it.

The point is- for any failed soup experiment there are hundreds of successes to be had.  Everyone is capable of making a great pot of soup.
When everything else in life feels poor and hopeless, as long as you have a bowl of soup you can be sure you’re going to pull through!

Yam and Kale Soup with Coconut Milk and Curry Recipe Try this great warming soup!

Yam and Kale Soup with Coconut Milk and Curry

yam and kale 2

Sometimes the very best way to stay healthy in the flu season is to eat food that can repel the plague.  Spicy stews and soups are invigorating, warming, and healthy.  This particular soup is a variation on one I made years ago from either Moosewood’s Low Fat cook book, or from Vegetarian Times.  I have forgotten because it’s been so long now.  The original had some fresh Serrano chilis in it and I’m not sure what else since I couldn’t find the original.  I was feeling low this week and wanted to make a soup that could help me bounce back and not get sick.  This soup did the trick!  It is always satisfying that what I want to eat is actually in season, most of the vegetables in this soup came from my organic CSA!


Yam and Kale Soup

Ingredients:

3 onions sliced in thin rounds and then in quarters

2 lbs yams* (sweet potatoes), cut in 1″ pieces

1 large bunch of kale chopped smallish

2 quarts stock or water

1 can coconut milk

2 Tbsp olive oil

1″ piece of fresh ginger peeled and minced

3 garlic cloves minced

1 red dried hot chili such as cayenne

2 tsp curry powder

1 tsp salt

Method:

In a soup pot on medium heat: saute the onions in the olive oil until they caramelize.  This should take about 20 minutes.   When the onions are soft and browned and slightly sticky add the minced garlic and ginger.  Cook for a couple of minutes with the onions, stirring frequently, then add the 2 quarts of water to the pot and turn the heat up until it comes to a boil, then turn down to medium/high.  Add the yams and cover the pot.  Let the yams cook until tender, about 15 to 20 minutes.

When the yams are tender add the curry, salt, chili pepper, and the kale.  Stir well and then cover and let cook until the kale is well-cooked, about five minutes.  Now add the coconut milk and when it is completely blended into the soup it is ready.

This recipe makes approximately 8 servings.

Recipe Notes: If you are short on time you can simply saute the onions until they are transparent rather than caramelize them.  That will save almost 15 minutes off the cooking time.  I like the onions caramelized here because it compliments the spiciness and deepens the flavor of the broth.  If you want to shave even more time off of the cooking time you could cut the yams in smaller cubes which will cook faster (try doing 1/2″ cubes).  This is an easy and versatile soup to make and you can make many substitutions to please your own palate:  chard instead of kale, winter squash instead of yams, and of course if you don’t have coconut milk it is excellent without it.
*When I was growing up my mom cooked with yams a lot.  Our favorite was the “Garnet” variety.  I have always known them as yams…however, what I grew up eating weren’t true yams.  True yams are an African tuber that is very rarely available in the United States.  What I grew up eating are actually orange varieties of sweet potatoes.  This knowledge is becoming more common and now there is almost always someone who feels the need to correct me when I say “yam” instead of “sweet potato”.  So why do I still call them yams?  Because that is what most Americans (particularly in the West) know them as and it’s what I’ve called them my whole life.  I choose to continue to call them yams but if you choose to do as I do, just be prepared to have people pipe up with this information!
Soup Philosophy An article about soup making basics.

Oeuf Cocotte: Eggs Baked In Marinara

oeufs cocotte 2

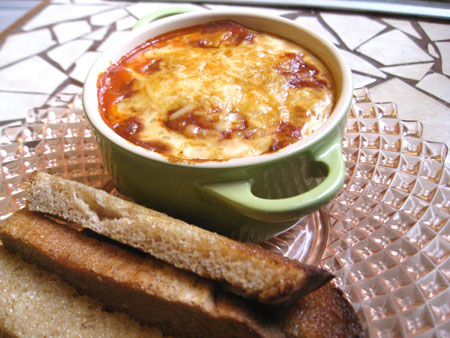
Oeuf Cocotte* is a dish consisting of an egg baked with other ingredients in a ramekin.  Chocolate and Zucchini has a recipe on her site for this dish and explains that it is usually made with ham and creme fraiche, however I first heard of this dish from a French vegetarian cookbook in which the egg was cooked in a mushroom saute.  The recipe I’m giving you here is my current favorite in which an egg is baked in a marinara sauce and topped with parmesean and served with toast fingers.  I will list the ingredients you will need per one 8 ounce ramekin, so if you’re making more than one you need to multiply all ingredients by the number of servings you wish to make.

This recipe doesn’t include the marinara recipe.  You can use any that you have on hand.  This is a simple and satisfying meal.  I especially like to eat it for breakfast.

Ingredients:

3/4 cup marinara sauce (my favorite is a mushroom marinara)

1 egg

1 Tbsp Parmesan cheese

the veriest smear of oil or butter to grease the ramekin

2 slices buttered wheat toast cut into fingers

 breakfast in progress 2

Method:

Preheat your oven to 400°

Grease your ramekin.
Set it in a larger deeper dish (see picture above) and fill halfway with water (this will help heat the dish evenly).  Ladle about a half a cup of the marinara into the ramekin.

 eggs 2

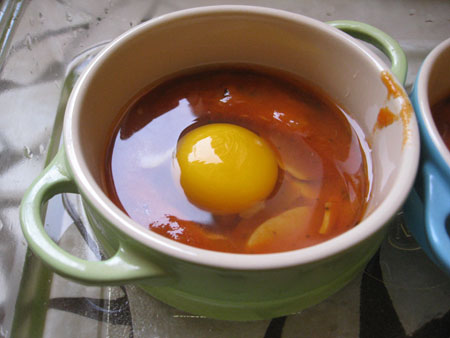
Crack your egg into it then cover the egg with the remaining 1/4 cup marinara.

 breakfast 2

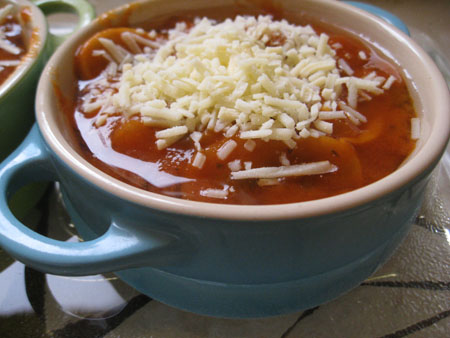
Sprinkle the Parmesan on the top and put in the oven to bake.

Baking times vary depending on your oven and how you like your eggs.  The times I give here are approximate according to how my oven heats:

20 minutes: if you like your egg whites almost runny like Parisians do, this is probably long enough.  They will just barely be set up at this point and the yolk will be very runny.

25 minutes:  the whites should be completely cooked but the yolk will still be runny.

30 minutes:  the yolks will be thick but not completely hard cooked.  This is my favorite way.  I like the yolks to be tender and soft but not runny.

35 minutes:  the yolk should, at this point, be thoroughly hard cooked.
When the dish is almost ready to come out of the oven make the toast.

*I have also seen this spelled “oeufs en cocotte”.

Concord Grape Juice: How To Make Grape Juice

concord 2

Making grape juice isn’t difficult but if you’re doing it without a press (as I must) then it does take some time because the straining process is slow.  You can use any grape varieties you like but if you want the classic grape flavor (like Welch’s makes) the concord variety is the only grape to use.  They are a deep bluish purple color when they’re ripe and the flesh slips out of the skin easily and has two sizable seeds in each one.

This is how you make grape juice but it isn’t a recipe with specific amounts.  Use whatever quantity of grapes you have on hand and if you want to know exactly how many jars you’ll need to heat in your canner you can measure the amount of juice you have before you reheat it to process it in the jars.  You won’t know exactly how much you’ll end up with until you’ve finished straining the pulp out of the liquid.

First step:

Put your grapes in a big enough pot that it won’t boil over.  If you have more than will fit in one pot you can use as many as you need that will fit on your stove.  Don’t add any water.  Before turning the heat on, crush some grapes with a potato masher or the back of a spoon.  This will keep the grapes from burning at the bottom before the juice is boiled out of the grapes.

bubbling hot 2

Second Step:

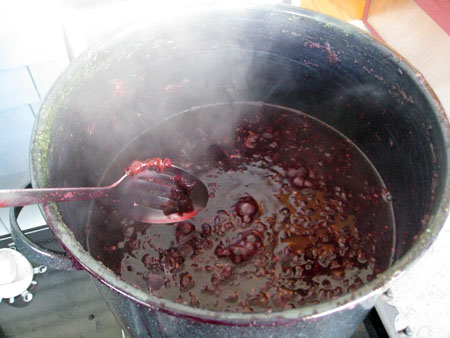
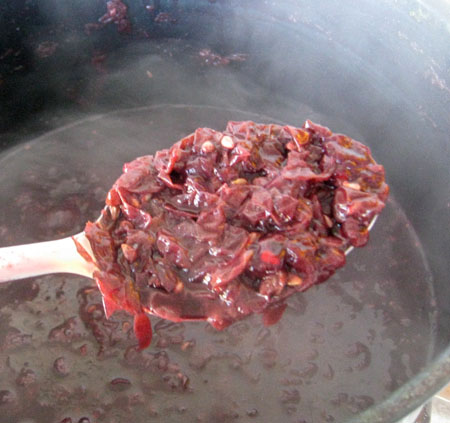
Bring your pot of grapes to a boil.  Boil the grapes for as long as it takes for the grape flesh to reduce to juice leaving mostly grape skins as pulp.  Look at the first picture in this post to see how they start out looking and then look at the picture below to see how your pot of grapes should look when they’re ready to strain:

 grape mash 2

Observe how the slotted spoon brings up only skin and seeds.  There are no more globes of grapes left.  Also notice how the skins look more red than purple now as the pigmentation has been cooked out of them into the juice.

 grape juice drain 2

Third Step:

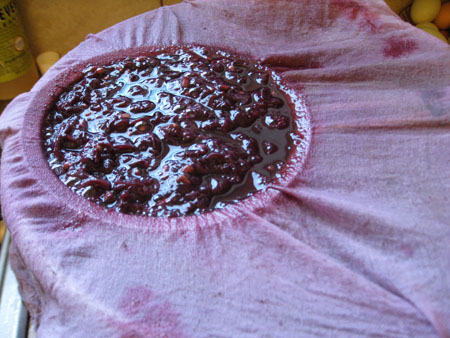
You need a large bowl or pot to strain your juice into, a strainer, and either double layer cheese cloth or butter muslin.  Place your strainer over the top of the bowl or pot and place your straining cloth over it, be sure to push it into the bowl of the strainer before ladling your juice into it.  Now you can fill the strainer to the top with juice and pulp you just cooked.  Let it drip until most of the juice has drained out.

 grape squeeze 2

Fourth Step:

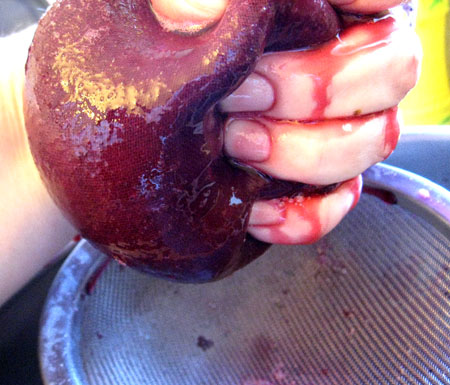
Now gather up your cloth and squeeze all the extra juice you can out of the pulp.  You will be surprised how much you can get out of it- so don’t skip this step for the best yield.  When you’ve gotten all you can out of the pulp, put it in your compost bin, rinse the cloth out well, and set it back into the strainer.  Rinsing the cloth each time is important because if you don’t do it the fine sediment will make the next batch you ladle into the cloth drain even more slowly because it clogs up the cloth.

This is the part that can take a long time.  Just keep straining until all of it is done.  At this point you may wish to restrain it, this time through one extra layer of cloth to strain out even more fine sediment before canning it.  This is up to you.  Once you can your juice and let it sit for a week on a shelf you will see all the sediment sink in a layer at the bottom of your jars.  You can carefully pour your juice out of the jars, when you’re ready to use it, leaving the sediment in the jar, or you can restrain it at that point.  One think I can tell you for sure is that the sediment is not pleasant to drink and kids especially don’t appreciate it.

To Process the Juice:

1.  Heat up the strained juice to boiling point and then turn off the heat.

2.  Ladle the juice into hot pint or quart jars leaving 1/4″ head space.  Adjust the two piece caps.

3.  Process pints or quarts for 15 minutes in a boiling water bath canner making sure to cover the tops of the jars with at least an inch and a half of water.

Special notes: Depending on the sweetness of the grapes and according to personal taste, you may need to add sugar to your juice.  Some years the grapes are sweeter than others.  There is no specific amount for me to recommend.  Taste the juice and add sugar a half a cup at a time to your entire batch, tasting after the sugar has completely dissolved into the juice.  I prefer my juice to be tart but my son has a sweet tooth so I add sugar to mine until it’s sweet enough for him to enjoy, but only just.

You can also freeze juice.  If you freeze it in jars you need to leave a lot more head space for the expansion of the freezing of the juice- leave about two inches room.  You can also freeze in plastic containers.  Juice freezes exceptionally well so this is a good option for people who have room in their freezers.

Winterizing Your Home and Garden: Autumn around the urban homestead

wild spoils 2

What Autumn means to you is probably influenced by your climate.  Some people are already getting snow while others are still fanning the sun off their faces.  Here in Oregon it’s turning cold and rainy.  While Autumn is not my favorite season (winter is) I do love this time of year.  The past several years I spent most of my autumn canning apples, pears, and the last of the summer tomatoes.

I love the change in seasonal produce, seeing the winter squash get piled in my local produce sections and in the farmer’s market stalls for the last couple weeks of market.  I love cooking with potatoes, celery root, and cauliflower.  Soon my local market will have giant stalks of locally grown brussels sprouts and I’ll want to buy more than I can cook.  My CSA will have them too.  Soup is my favorite food and there are endless varieties of soups to make with the produce on hand.

In your garden you are probably harvesting the last of your tomatoes, squash, and beans.  What now?  Here are some things you might do in your garden:

  • Spread compost on your vegetable beds to overwinter.  The fall is the best time to amend your soil because then it is ready for you to use in the spring.  If you have chickens and some beds you won’t be planting in until spring, cover the beds with the hay you clean out from your chicken run.  Chicken manure is excellent for the garden but needs a few months (preferably six) to mellow because it ‘s a “hot” manure and spreading it on a bed with plants could cause the plant roots to burn.  Overwintering your chicken waste gives it plenty of time to mellow and will be safe to plant in by spring.
  • Rip out all the dead vegetable plants from the garden.  I never do this because I’m too lazy but fall is a great time to tidy up your garden and tuck it in for the winter.  Just be sure not to prune anything unless you have extremely mild winters.  Prune in the spring when most of the winter frost damage is done already and you can prune to the undamaged parts.  If you prune now you could lose more of your plants.
  • Winterize your more tender perennials if you live in a climate with a hard winter such as wrapping your roses or your potted fruit trees in insulation or with burlap stuffed with mulch to keep them warm.  In my climate the winter damage is usually pretty mild and fruit trees don’t need to be wrapped.
  • Bring in any tools or garden furniture that might get ruined by the weather.

I don’t do a lot with my garden during the fall but I live in an old house and one of my concerns right now is winterizing my house so that it will retain heat longer and use less energy to keep comfortable.  Last winter we had our kitchen door constantly opening and closing for our dog and cats and often it was simply left open for hours at a time.  We don’t mind a fairly cold house but every late afternoon the temperatures would drop and we’d put the heat on.  This summer my husband installed a dog door and we’ve been training our cats and dog to use it.  It’s harder for the cats to use it because it had to be installed fairly high off the floor level, yet they learned to use it faster than the dog.  Chick was really frightened of it for the last two months.  At last, just this week, all the animals are using it without coaxing and we’re practicing keeping the kitchen door shut. 

Just in time too because this morning was so cold I had to put the heat on for the first time in months!
One of the things people with old houses often do is replace old windows with new ones.  Unfortunately the old wood windows are almost always replaced with vinyl or aluminum windows and though these supposedly come with a warranty far exceeding wood windows I have known fewer old wood windows to leak than vinyl or aluminum.  If you have to replace your windows, consider replacing them with new wood windows.  They cost a lot more but look a million times better and with just a little care I promise they will last longer than your other choices.  I believe in maintaining the integrity of the old homes in our country so I’m passionate about this.
There are other things you can do to reduce the energy use in your house during winter:

  • Curtains.  A lot of people have thin curtains if they have curtains at all.   Consider making or buying lined heavyweight curtains to put up during the winter months.  Even a sturdy cotton will keep out a surprising amount of cold.  Just be sure the curtains completely cover the window when they’re closed.  You can open them during the warmer hours during the day and close them near evening as the temperatures outside drop.
  • Storm windows.  Around my town many old homes have storm windows as an alternative to replacing antique windows.  If installed correctly they serve to make your old single paned windows double paned.  It creates an extra barrier between the wet weather and your windows as well.
  • Weather stripping.  Check all the outside doors for gaps near the floor.  Weather stripping is inexpensive to buy and easy to install.  Our kitchen door which leads outside has gaps so big at the floor that light can be seen to flood through the openings in the morning.  I bought some weather-stripping  for it.  The door is fairly narrow so I’ll either need to cut it down to size or see if my hardware store carries the correct size.
  • Put insulation around any exposed water or sewage pipes if your area gets cold enough to freeze water.  It doesn’t always get that cold here but last winter it got cold enough to freeze one of our pipes and we were without kitchen or bath water for two days.  (This won’t actually reduce your energy usage but is simply a good thing to do before it’s too late.)

If you have the time, now is also a good season to clean your house and get it really well organized.  During the wet and cold months all the little things that irritated you all summer will become more irritating when you’re also having to worry about mud, coats and scarves everywhere, the holidays looming up, and when so much more of your time is centered around indoor activities.  This week end my husband and son agreed to clean up our living room and put everything away.  It was such a huge relief!  We have so far to go getting things around here running smoothly but that is what I’m thinking about now.  Putting things away, making more counter space, cleaning off high piled surfaces, solving little house problems that aren’t a huge deal but add a little constant irritation to my life.

What I am going to do today,  right now,  the second I get done posting:  Our under the sink cupboard, where we keep our kitchen garbage can, doesn’t latch shut.  For months now our dog has been rooting around in it daily for any tasty little crumbs she might find.  She drags empty cracker bags to the already ratty looking lawn and shreds them up and comes back for whatever else she can find.  I’ve been in such a flurry of work and scrambling to get other bigger things taken care of that I have continually put off taking care of this problem.

The funny thing is that it’s a simple fix.  I bought the magnetic hardware already.  It is ridiculous that it’s taken me this long to get around to it.  So I will do that today and not have to get angry when I see this week’s trash spread out across our yard.

What are you doing to winterize your home and garden?

Cooking For Beginners: Cookbooks and Equipment

Joy Of Cooking 2

If you are a real beginner cook you may not know yet what cookbooks are appropriate for you and what equipment is essential.    When I first started learning to cook on my own I had very little kitchen equipment, and in truth you don’t need a ton, but I found that my equipment grew as I read my two cookbooks and decided on things I wanted to make.  People who love to cook tend to collect kitchen gadgets that they really don’t need and I’d like to present here two lists of what I consider the first tier of necessary equipment and then if you become a proficient and passionate cook the second tier of essential equipment.  You should always buy the best quality equipment that you can afford.  Don’t be afraid to look for things you need in thrift stores and in used restaurant supply stores.   Good cookware will last a long time.   Look for 5 ply stainless steel or cast iron (enamel coated or not) for the very best quality pots and pans.

The most necessary items:
1 saute pan: if you only have one make it a 12″ size.

1 medium size sauce pan: a 3 quart size is good.

1 soup/stock pot: 8 quart is perfect.

1 cookie sheet: if you can get one from a restaurant supply place, those are the best.

1 casserole dish: I suggest a glass or ceramic one (Corning makes really good ones).

2-3 wooden spoons: these should not be expensive.  Have one short-handled one and a long-handled one.

1 spatula: I prefer metal ones but either metal or plastic will be fine.

1 colander: any  metal style, don’t buy a plastic one because one of the main uses is for draining hot pasta.  I have one I bought 20 years ago from Cost Plus.  It’s dinged up and still working hard.

1 set mixing bowls: no need to get fancy if you’re on a budget, plain glass ones aren’t hard to find in thrift stores.  Stainless steel mixing bowls are also excellent.  Don’t buy aluminum bowls because some food reacts with aluminum.  It’s very useful to have three bowls in different sizes.

1 set measuring spoons: any kind will do.

1 (2 cup) measuring cup: I suggest glass Pyrex if you only have one.

1 folding steamer basket for sauce pan: these fit into the bottom of your sauce pan allowing you to steam vegetables.  They’re cheap and very handy.

1 pie pan: I suggest you get a glass one.

1 loaf pan: if you can get one from a restaurant supply place that would be best but if not, just get any kind you find, average loaf size.

1 decent knife: don’t worry about fancy.  My favorite knife is one I bought 14 years ago from a health food store.  I sharpen it regularly and it still works perfectly.  You want your main knife to be a chef’s knife.  Shop around and hold the different styles to figure out which kind is comfortable for your hand.

1 paring knife: any kind will do.  I use cheap ones because I lost my nice one.  I have to sharpen them more often but they work fine.
Sharpening steel: whether your knife is cheap or expensive you need to sharpen it regularly.  I didn’t know how to do this for years and chopping with a dull knife is not only more dangerous but much harder.

1 good quality food processor: 11 cup capacity is best for a family but smaller is fine for an individual.  I bought the best Cuisinart processor I could afford almost 12 years ago and it is still working wonderfully well, though I could stand to sharpen or replace the blades.  At the time it really stretched our budget but it has been essential to me in my cooking.

Less necessary appliances that you may want to get eventually:

Stand Mixer: I bought a Kitchenaide (professional series) and I have used it so much over the years that it was worth the expense.  I bought the pasta attachment which I love and use often.

Immersion Blender: Mrs. C had to convince me to get one of these and I resisted for a long time but I can’t imagine making salad dressings without one now.  Though seriously- don’t worry about having one of these if you are just beginning.  I made great dressing before, the thing this does that I love is allow me to make a creamy vinaigrette.    It’s also very handy for pureeing soups and sauces.

With all of the equipment I’ve listed above you should be able to make anything you find in a cookbook.  There are plenty of other things you can add to your kitchen like graters and peelers, for example, but if you have the food processor it will come with a grater function and a paring knife works perfectly well for peeling fruits and vegetables.  I have merely listed the essentials here.  What you need to start off with.

Cookbooks

I love cookbooks.  I have over 40 of them on my bookshelves and that is only half of what I would probably have if I didn’t edit and choose carefully.  I can’t afford to buy them often but I have been collecting them since I bought my very first two cookbooks when I first learned to cook.  Now I rarely use cookbooks for actual recipes but for inspiration.  If I’m in the mood for something Mediterranean I look in my Greek, Italian, and French cookbooks for ideas.  For baking, however, I do follow recipes exactly.  Anyone can learn to cook using just one cookbook provided that cookbook is an excellent all-purpose one.  I am going to recommend the two cookbooks I have used the most, learned the most from, and found to have infallible recipes.  As a beginner you can’t judge whether recipes are infallible or not because you’re own initial lack of skill can make a mess of recipes that are quite good.  As you become more experienced you’ll be able to tell if the reason why your meal didn’t turn out well was because of you or a poorly written recipe.

The Joy Of Cooking, by Irma Rombauer: this is, by far, the most reliable, useful, informative, and complete cookbook in print for cooking everything.  My copy is from 1948 which I love because it has a lot of old fashioned recipes in it, but there are many recent editions that reflect our more modern sophisticated palate.  Ultimately it doesn’t matter which edition you choose, they all have the basics in them such as how to cut meat, how to saute food, and include basics such as pie crusts, measurement conversion charts, and all the essential kitchen methods you might need to reference.  If you only get one cook book, get this one.

Vegetarian Cooking For Everyone, by Deborah Madison: I am a vegetarian and if you can have two cookbooks, this is the other one you should have.  Like Joy Of Cooking, she covers so much basic information for the beginner cook (but her recipes don’t include meat, obviously)- you will have access to information on how to cook all vegetables and grains exceptionally well with her book.  Her directions are clear, her recipes are solid.  If they don’t turn out well I guarantee that it’s something you did wrong, not something wrong with the recipe.  This isn’t just a good book for vegetarians, this is the best resource for everyone when it comes to cooking with produce- because even meat eaters need vegetable sides.  Many of her recipes are vegan or she explains how to make them vegan.

Those are the two best cookbooks I have ever used.  Everyone who cooks has their favorites but here at the Farmhouse Finishing School these would be my textbooks if the school was brick and mortar.

Don’t forget to make good use of your public library’s cook book section.  You can try a lot of cookbooks without having to buy them.  Or you can try cookbooks to see if they’re worth buying.  All of my recommendations below are for vegetarian books.  If you want to find some books that include meat, try out the following well respected cook book authors:  Julia Child, Jacques Pepin, and Mark Bittman.

Mrs. W recommends:

Great Breads, by Martha Rose Shulman: I learned to bake bread with this book.  I tried a number of other books before I found this one and though the others were prettier and full of pictures, this is the one that has proved the easiest and most reliable to learn from.  No one learns to bake breads without some failures but you will have fewer of them if you carefully read and follow Martha’s instructions.  Two of my closest friends also learned to bake bread using her instructions.

“The Vegetarian Table” series: This series is published by Chronicle Books.  They aren’t big books but each one really captures the foods from different countries, both traditional and more modern.  The instructions are clear, each book contains plenty of recipes appropriate for beginners, and they are full of pictures which I find inspiring.   I have The Vegetarian Table France, America, Italy, Mexico, and India.  There is also one for Japan.  Some of my long time meal staples come from these books.

The Complete Italian Vegetarian Cookbook, by Jack Bishop: He has amazing basic Italian recipes such as fresh pasta, almond biscotti, and sauces.  I have used his book for years and his recipes always turn out well for me.

This Good Food, by Brother Victor-Antoine d’Avila-Latourrette: He has written a few cookbooks and I recommend them all.  The dishes in this book are simple, flavorful, and healthy.  They are arranged by season because that’s how monks in monasteries usually eat and it’s really how most of us should be eating too.  This is not fancy French cooking but simple French cooking (many Americans don’t know there is such a thing) and that means that the ingredients are usually easy to come by and not especially costly.


Jump to the second lesson in the “Cooking For Beginners” series:
Cooking For Beginners: Shopping For A Recipe

Muffins: Chelsea’s Master Recipe

Chelsea muffins 2

Muffins are not difficult to make once you understand a couple of basic principles:

1.  Always mix the wet and dry ingredients separately until the very end.

2.  Do not beat the batter to death.  Mix as quickly and gently as you can or the muffins will come out tough.

Behind every excellent muffin baker there is a master batter recipe to be found.  Mrs. C, the other headmistress of the Farmhouse Finishing School, is a superb baker and she has a sense for it that goes beyond precise measurements.  It was therefore a challenge to translate her master recipe- but I managed to do it and practiced using it and I confidently present it here for you.

I have made these muffins with little substitutions and alterations and had great success with them.  I have also made them exactly as written here.  I will share with you the master recipe and then I will tell you what alterations you can make without being disappointed in the results.

Ingredients:

2 1/2 cups all purpose unbleached flour

2/3 cups sugar

2 tsp baking powder

1/4 tsp baking soda

1/2 tsp salt

2 eggs

1 1/4 cup buttermilk (or regular milk)

1/3 cup oil

1 1/2 cup blueberries (or other small fruits or berries)

muffins 2

Method:

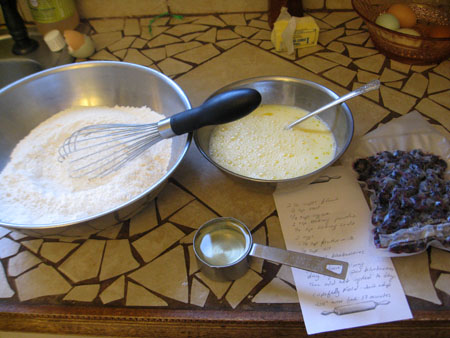
Preheat the oven to 425°.   Mix all the dry ingredients in a medium sized mixing bowl.  In a slightly smaller bowl mix all the wet ingredients together.  If you are using berries or chocolate chips, stir them into the dry ingredients so that they are well covered in flour.  This is important.  Do not mix in after you’ve combined the wet and dry ingredients.  Coating them with the dry flour first will help keep them separate from each other in the batter.

Coat the inside of the muffin tins with butter or oil (I recommend using the butter).

Make a little well in the middle of your dry ingredients and pour the wet ingredients into it.  Quickly and gently stir the wet and dry together just until they are mixed- do not over stir.   Do not whip them together violently or you will end up with tough muffins.

Cook for about 17 minutes, until the tops are lightly golden.


floured berries 2

Here I have added the blueberries to the dry ingredients and stirred them in well.

mixing 2

In this picture I didn’t make a well in the middle of the dry ingredients.  It isn’t necessary, but it’s recommended because it makes the incorporation of the wet and dry ingredients faster to bring together.

batter 2

Every muffin recipe I’ve ever made says to only fill the muffin tins 2/3 full.  This irritates me.  My muffins never seem satisfyingly top lofty.  I fill them mostly full.  To me they are perfect this way.  The yield may vary depending on what you add to the batter- you may get only 12 muffins or you may get 15.

blueberry muffins 2

Recipe Notes: I almost never have buttermilk on hand.  When I do buy it I always have left overs that proceed to go bad.  Mrs. C doesn’t have this problem.  She nearly always has buttermilk on hand.  Instead I use 2% milk and I can say that this substitution does not make an inferior muffin.  There is that pleasant tang when you use the buttermilk but other than a slight flavor difference, the quality of the batter can handle the substitution.
I like a lot of berries in my muffins.  So I used 2 cups of berries.  You can do this too if you like.  I think 1 1/2 might be the most ideal ratio of berries to batter but I always like going over the top.  Using frozen blueberries works exceptionally well, just be sure not to let them defrost before adding them to the batter.  You can also use blackberries, diced peaches, raspberries, or even chocolate chips.  If you use chocolate chips I recommend you only use 1 cup of them.
One last note- you may need to add a little bit more milk/buttermilk to your batter if it’s too stiff when mixed.  Things that can affect your batter are the humidity in the air and the size of your eggs.  If your batter seems too stiff, add 1/4 cup of buttermilk or milk and as gently and quickly as you can,  mix it in.


Evaluating This Year’s Vegetable Cultivars

chard 2

I spend a lot of time thinking about what I want to plant in my garden each year.  I make my decisions based on an ever-evolving criteria which often include these points:

Is it cheaper to grow it than to buy it?

Will it do well in my soil?

If I grow it, will I actually eat it?

If it does so well I can’t keep up with it- can I preserve it?

Is it worth the water it will take to keep it alive?

But there are other considerations as well.  I like to plant a big variety of things but there’s a part of me that is always working towards finding all the “perfect” cultivars of everything I love to eat so that one day I’ll grow only one kind of carrot every single year (from seeds I save myself, I like to think) and I’ll stick with only a couple kinds of lettuce (only my favorites), and I’ll become the gardener famous for that variety of squash she grows every year.  I think it pleases me to imagine having a garden full of vegetables that have been acclimated to my peculiar little lot and become special and I like thinking of lovingly saving the seeds each season to use again and to share with friends.

The reality, of course, is that I love trying new vegetable varieties and I know that I’ll always have something new to try every year.

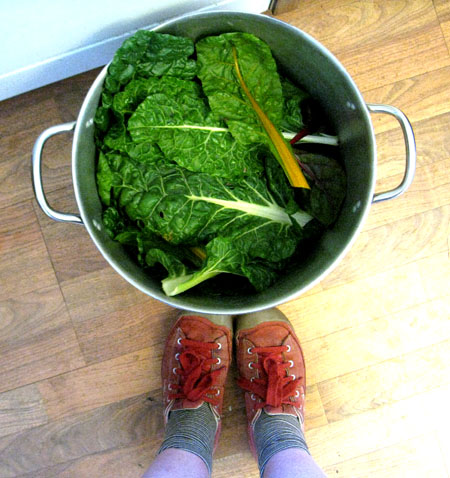
I love this time of year when the garden is finishing up with all the produce, ripening one last bunch of tomatoes before the cold, offering another handful of beans before the vines all dry up.  This is when I start evaluating what worked for me and what didn’t.  Today I was thinking about Swiss Chard versus kale.  I do enjoy eating kale but I don’t ever crave it like I do chard.  Yesterday I cut a huge pot of greens (pictured above) from my garden.  I realized that I hadn’t been harvesting them and most of my kale is about to bolt.  While I was cutting the kale I discovered that most of them were covered in that variety of aphid that matches the silvery green of the leaves and are attracted to all members of the Brassica family.  My chard was untouched by aphids.  As I was picking the two different kinds of greens I was thinking that perhaps I should only grow Swiss chard from now on because I prefer it.  I like how it gets more tender than kale when steamed or sauted.  I like that my chard hardly ever has pest problems (something likes to lay tiny white eggs on the backs of the leaves but these are easily rubbed off).

If you don’t love eating something you shouldn’t be growing it in your yard.   This is what I usually think.

Then I started thinking that I should find out which one is healthiest to eat.  So I pulled out my trusty “Laurel’s Kitchen” with the nutritional tables in the back and had a look.  Both are very high in vitamin A.  Kale has twice the calcium of Swiss chard but half the potassium.  What I got from doing that comparison is that both are very healthy and have different essential things to offer.

Is it better to plant a garden that gives you the broadest spectrum of nutrients your body might need, or better to plant only what you love best?  What do you think?  How do you decide what you will plant again and what you will not bring back to the spring garden?  What were the biggest winners of your garden this year?

Here are a few of my old and new favorites that I will plant again and again:

Forellenschluss Lettuce:  this romaine lettuce does so well for me and is never bitter.  Plus I love the red speckles it’s covered in.

Lazy Housewife Bean: I grew it for the first time this year and it did much better than “Kentucky Wonder” or “Bluelake” have done for me.  They were so flavorful and tender even when large.  It’s a Romano type bean.

Helda Bean:  this one grew right next to the Lazy Housewife and to be honest, I couldn’t tell the difference.  They both grew so well for me and produced such great beans I will plant both again next year.

Sungold Cherry Tomato:  my very favorite cherry tomato.  I always plant this variety every year and couldn’t possibly get tired of them.

Rainbow Chard:  this will always be the variety of chard I grow.  I cannot imagine giving up the brightly colored stems for an all white stemmed variety.  It never fails to taste great and do well for me.

Willamette Tomato:  I generally prefer heirloom tomatoes even though they don’t tend to fruit as prolifically as the more modern hybrids do.  However, I always plant one or two of the hybrids so as insurance if my heirlooms don’t do well.  This one turned out to be not only prolific but had great flavor.  I will grow this one again next year.

Nantes Carrot:  I used up the seeds I had from a previous year.  I can’t remember specifically which Nantes it is but I let one go to seed and will continue planting these because they have done so well for me.  I’m not sure how to get the seeds out of their tiny spiky pods so if anyone knows, please tell me!
Your turn!

Sugar Syrup For Canning

sugar syrup 2
Sugar syrup is used primarily in canning fruits.  It’s easy and fast to make.  I will list the different strengths of syrup you may want to make for different projects and the approximate yield.  Deciding how much you need for a given recipe is (I’ve found) a guessing game.  There are a lot of variables such as how much fruit you put in each jar, whether the fruit is diced or in large chunks, and how many jars you end up filling which depends on the same variables.  When I am going to can a big batch of peaches or pears I start off making a triple batch of syrup because I nearly always need at least that much.  If you run out in the middle of your project it is very easy to make more.  So don’t let yourself get too worried.  If you make too much you can store the extra syrup in the fridge indefinitely or if you prefer you can put the extra in a jar and can it to use later.
I have never used a heavy syrup for my peaches and pears.  I usually use either a light or an extra light syrup.  The sugar syrup helps to maintain the fruit quality and color as it sits in your pantry.  You can also use fruit juice or plain water, but I prefer the more traditional sugar syrup.  It is all a matter for your personal preference.
General instructions:
1.  Choose a pot that will acomodate the quantity of syrup you are going to make.
2.  Measure the sugar into the pot.
3.  Measure the corresponding amount of water into the pot and stir really well.
4.  Put it on the stove on high heat and bring it to a boil while stirring it.
5.  By the time it comes to a boil the sugar should be well dissolved, it is ready for use.
List of syrup types and the ratio of water to sugar for each one:
Type of syrup:     % of sugar     Sugar                    Water                         Yield of syrup
Extra-Light            20                   1 1/4 cups            5 1/2 cups               6 cups
Light                          30                   2 1/4 cups            5 1/4 cups              6 1/2 cups
Medium                    40                   3 1/4 cups            5 cups                      7 cups
Heavy                        50                   4 1/4 cups            4 1/4 cups              7 cups

Elderberry Syrup: DIY Apothecary

bottled syrup 2

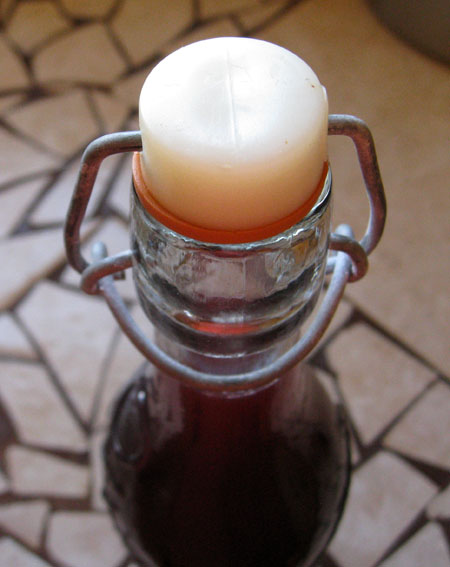
I used a bottle with a swing top closure (with rubber washer).  I’ve had this one for years and have used it to store flavored vinegars, liqueurs, and now elderberry syrup.  I believe I bought it at a Cost Plus.

elderberries macro 2

I foraged these elderberries from my neighborhood.  When foraging for elderberries:  never pick red ones, they are not safe to eat, even when cooked.  The twigs and bark of elderberries are toxic and should never be taken internally and when you’re harvesting the berries, which are very small, be sure not to leave any stems on the fruit as these are also toxic.  The berries should not be eaten raw either*.  Cooking makes them safe to use in pies, jams, liqueurs, wines, and syrups.  They also become more flavorful when cooked.

elderberry syrup 2

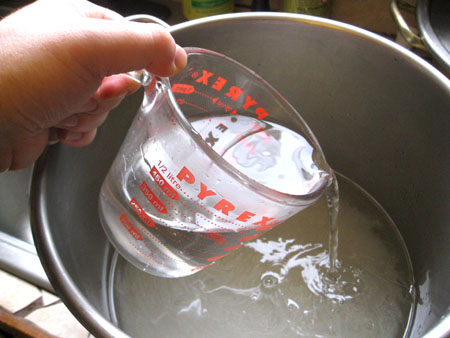
Pouring the water into the pot of berries.

Cold medicine 2

The finished syrup poured into a little shot glass.

Elderberries have been used medicinally for hundreds of years.  The bark,  stems, and leaves have been traditionally used as healing poultices and the berries are used to make syrups to strengthen the immune system, to lessen the symptoms and shorten the durations of colds, coughs, and flus.  The berries have also been used to make jams, jellies, and pies.  It is important to always cook the berries- they are astringent when raw and could potentially make you sick.  Cooking them not only neutralizes the chemicals in them that can make you sick, but it enhances the unique flavor of the berry.  You can use both the American native varieties or the more traditional European varieties to make this recipe.

The proportions of ingredients here come from Rosemary Gladstar’s book “Herbal Recipes for Vibrant Health”.  Rosemary Gladstar is one of the leading herbalists in our country and it was her herbal training books that my mom learned from to get her herbology certificate.

I had to do some considerable research to find out about recommended dosage.  I ended up calling my mom for information and what she told me confirmed the information I found online.  It is not possible to overdose on elderberry syrup.  The only ill effect anyone might experience  is a little diarrhea if you eat/drink too many elderberries**, but only in the same way some people experience this eating too much of any fruit.

  • For boosting your child’s immune system during the cold season take a teaspoon every morning and every night.
  • For lessening the symptoms and durations of coughs, colds, sore throats, and flu: take 1 to 2 teaspoons every couple of hours until you are better.

What my mom said is that you can experiment to find what is most effective for you and your family members.  I found some recommendations on line that suggested taking 2 tablespoons a day for adults and 1 tablespoon a day for children to help avoid colds.  So there is a tremendous amount of flexibility here so that you can find what works.

Elderberry Syrup

Ingredients:

1 cup fresh or 1/2 cup dried elderberries

3 cups of water

1 cup honey

Method:

1.  Put the berries in a medium sized nonreactive sauce pan and cover them with the water.  Bring the water and berries to a boil and then turn the heat down to low and simmer for 30 to 45 minutes.

2.  Smash the berries and then strain them out.  (I use butter muslin over a strainer and then squeeze the muslin to get all the juices I can out of the berries.)

3.  Add the honey and stir well.

4.  When the syrup has cooled put it into bottles (or jars- but bottles will make for easier pouring), label, and store in the refrigerator.   The syrup will keep for 2 to 3 months.

You can freeze any extra elderberries to make additional batches of the syrup as you need it.

*I have seen some extension service information that says you can eat the berries raw, I ate one before I read that they could potentially not be safe to eat raw and was thoroughly unimpressed with the flavor so I am not tempted to eat more raw.  Most sources state that you should cook the berries before eating.

**This is provided you aren’t allergic to elderberries.

If you want to know more about foraging and identifying elderberries read this:

Elderberry: Plant Profile