Author Archives: angelina

Tomatoes: Skinning And Seeding

No matter what you plan to do with your glut of tomatoes, you will need to process them first.  There are many ways of preparing them and Stitch and Boots will work to compile a number of different methods.  This one is a classic and is called for in many canning preparations such as making sauces, juice, and salsas.

Peeling and seeding your tomatoes is ideal if you’re going to make sauce, salsa, or can diced tomatoes.  I didn’t use to think it was necessary to peel or seed my tomatoes (thinking it was a colossal waste of time…) until I made my very first batch of tomato  sauce without doing either.  The seeds are juicy and covered in a gelatinous membrane that doesn’t reduce when being cooked so that a sauce that’s full of them doesn’t ever get that pleasing thick consistency that is the ideal.  I know this because I’ve done it!  Similarly, if you you don’t peel your diced tomatoes you will end up with curls of peel floating in your soup or your casserole which, while not the end of the world, will prevent your food from reaching a state of excellence.

Peeling and seeding your tomatoes does take some time, but is not at all difficult to do.  You’re going to need:

1.  A large pot of water.

2.  A slotted spoon to place and remove tomatoes from the boiling water.

3.  Paring knife.

4.  Lots of ice to put in a big bowl. 

5.  (And a big bowl.)
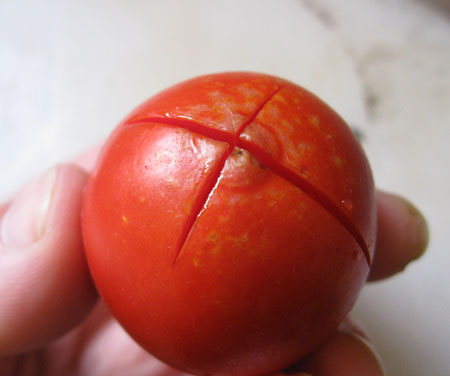
 cross cutting 2

  • I never buy sprayed tomatoes so I don’t wash them first.  They are going to be boiled and skinned so a little dirt isn’t a concern.  However, if your tomatoes are especially dirty, muddy, or coated in pesticides, you will want to wash them first.
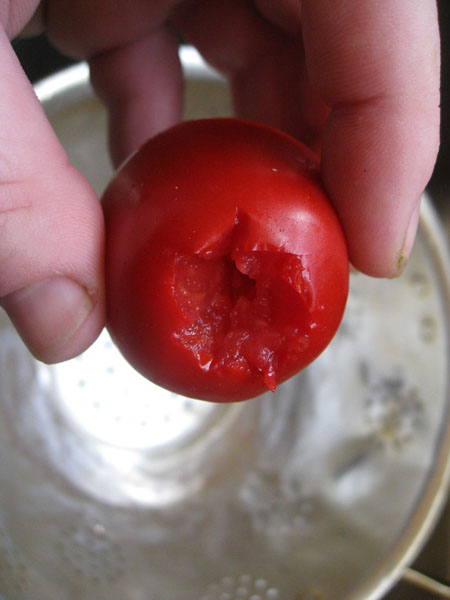
  • Before you set your water to bowl or put the ice out you will want to score the blossom ends of all your tomatoes.  Simply use your paring knife to cut an “x” in the skin.  This will help you slide the skins off easily after blanching the fruits.
coring 2

  • Then you want to core them all.  Some roma tomatoes barely have a core and in this case you may just want to slice the very end off.  If the tomatoes are a little tough further down, definitely core them.  I usually core and score each tomato but you can do all the scoring first and then all the coring- whichever way seems the most streamlined to you.
  • When you get 3/4 of your tomatoes cored and scored, put the pot of water on to boil.  Then fill a bowl with ice and some cold water.
  • When the water is boiling and your tomatoes are all prepared, put a few tomatoes in the pot at a time.  If you are processing slicing tomatoes only put 2 or 3 in the pot at a time, if you are processing romas, put about 6 of them in the pot at a time.  If you put too many in the pot at once it will bring the temperature of the water down so far that it will not start boiling again for longer than you want your tomatoes in the hot water.  When you see the water recover to a boil you let the tomatoes blanch for 30-60*  seconds.  It is good to gently stir them with your spoon to make sure all the skin surface of the tomatoes has been submerged.
icing toms 2

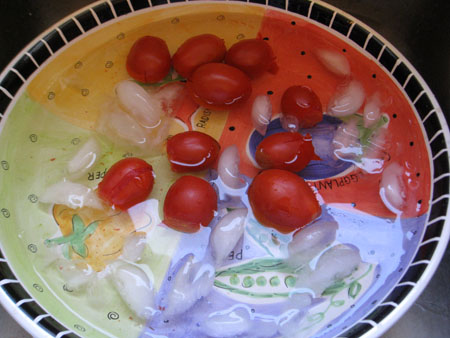
  • Remove each batch from the boiling water straight into the ice bath.  Let them cool down while you put more tomatoes in the pot.  Then remove the cooler ones and put on your counter or in another large bowl.  I like to get all of them blanched before working on slipping the skins off and seeding.
loose skin 2

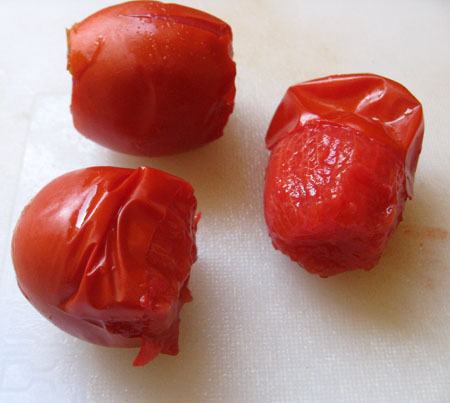
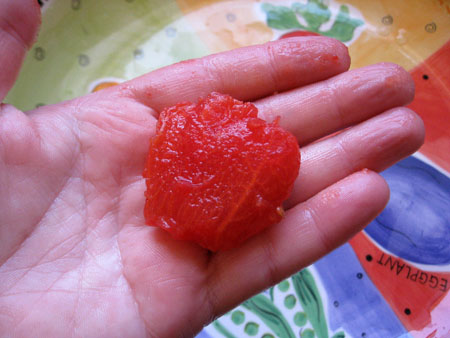
  • Once all your tomatoes are blanched, slip their skins off.  Now put the tomato in the palm of your hand, over the sink or a compost bucket and gently squeeze until most of the seeds have come out.  This can be messy so wearing an apron is recommended.  Don’t worry about getting all of the seeds out.  Just concentrate on getting the bulk of them out.
seeds pressed 2

  • When you have squeezed the seeds out your tomatoes will be a little flat.  This makes them easy to chop.  Now you’re done.  You can either chop them for salsa, sauce, or freezing for later, or you can leave them whole.

It takes some time to process tomatoes but you will find that there are circumstances where you will be well rewarded by your efforts!

*An exact time isn’t important.  If you do a search for information on how to peel tomatoes, you will find all different times being recommended.  15 seconds may not be enough to loosen the skins, and you definitely don’t want your tomatoes boiling for more than 60 seconds or they will really start cooking and breaking down.  Start off timing yourself for about 30 seconds.  Once you have a feel for it, don’t worry too much.

Slow Oven Roasted Tomatoes

roasted toms 2

This method of slow roasting tomatoes comes to me from my good friend Lisa E.. The point isn’t to completely dry the tomatoes, just to concentrate the flavors.  When they’re done they’ll have a thick, sweet, rich tomato flavor and the texture will be moist but not juicy.  Because you aren’t drying them, they can’t be stored in oil or in jars on the pantry shelf as you might do with dried tomatoes.  If you make more than you can use, you can freeze them.  I recommend using a vacuum seal if you have one.  Otherwise just squeeze as much air as you can out of a freezer bag and label it with the date they were frozen.

 thick slices 2

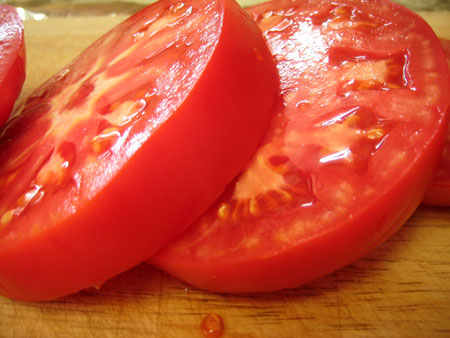
Slice tomatoes thickly (between 3/8″ and 1/2″ thick). They are going to shrink quite a bit.  If you are going to roast romas, trim off the tough stem end and slice them in half length-wise.

 foiled pan with rack 2

Preheat the oven to 325 degrees. Line a baking sheet with aluminum foil to catch all the drippings. Then place a drying rack on top of it. This lets the oven air circulate around the tomatoes for better drying out. If you don’t have one, you can still make these, just put the tomatoes directly on the foil. They won’t dry out as well but you’ll still get the deepened flavor. A great alternative is to use paste tomatoes which don’t drip as much.
Lay the sliced tomatoes out on the rack closely together. (So you can fit as many as possible on one baking sheet). Incidentally, I always do two trays at a time. I do this because I can’t make small batches of things. I like to make as much as possible. Some people call this “greed”, but I prefer to call it SMART.

 oiling toms 2

Brush all top sides of the tomatoes with either olive oil or other cooking oil. This will help develop a rich texture. Everything roasts better with oil.

 sugaring toms 2

Sprinkle with salt.
Then sprinkle with SUGAR. Lisa says this is VERY important. If you have used a slicing tomato then turn them all over and brush the backsides with oil and sprinkle with salt and sugar. You won’t have to do both sides if you use paste tomatoes.

 baking toms 2

Put them in the oven and cook for several hours. Yes, I know, it isn’t a quick recipe, but it is so easy I think you won’t mind the hours they tie up your oven racks. If you do two trays of them at once, I suggest switching the trays between the top and bottom rack every hour or so so that they all bake evenly.

 finished toms 2

They’re done when they are dried out a bit (but aren’t crisp), are half their original size, darkened in color, and smell richly of tomato. There’s no exact baking time.  It should take at least 3 hours.

So what do you do with these now?  You can put them on sandwiches with roasted eggplant, cheese, and pesto.  You can slice them up to add to pasta.  You can eat them just as they are.  You can use them to top pizzas with.  You can use them in a savory tart.  You can add them to soup.  You can use these in almost any recipe that calls for reconstituted sun dried tomatoes.

Urban Homesteading: Doing What You Can

lettuce seeds 2

For the past ten years my summers have been punctuated by preserving projects.  Every summer I make jam, pickles, dry tomatoes, dry herbs, make relishes, and put up dilled beans.  This is the first summer in a decade when I have not had the time or the energy to do my usual preserving projects.  It was my plan to do at least a few of my usual projects and photograph them for tutorials to share with all of you here.  I want you to be able to come here and find all of the basic canning projects you might want to do and feel confident that you can do them with really clear instructions.  I was putting off posting much because I didn’t want to post unless I had a tutorial of use or an informative article.

But then I realized something; I realized that many of you out there are in the same boat as I am in myself: you’re working many hours a week to pay your bills and are scrambling to find the time to do the homesteading projects that you love doing.  I have been lucky to have been able to have stayed home and not worked outside the home for most of the past decade.  I am equally lucky that when the time came that I had to get paid work in order to keep our house and our son clothed, I landed an excellent job.  So I’m not complaining about having to work, but trying to figure out how I can work 30 hours a week and still find time to make my own lip balm, can tomatoes, and sew curtains for my old house.

What I have been telling other people for years is that urban homesteading is about doing things for yourself within a modern and urban context.  It isn’t a contest in self sufficiency.  It’s an exercise in learning to make things that are higher in quality than you can buy.  It’s about empowering yourself with the know how most of our grandparents had because there is something deeply satisfying in being capable of taking flour, water, salt, and yeast and producing a loaf of bread that is as good or (often) better than you can purchase in the store.  When the bread shelves in the grocery store are empty you won’t be afraid, you can make your own.  It’s the spirit of doing things for yourself even though it will take longer than it would to pay someone else to do it.  I have begged people not to feel left out if they live in small apartments in a big city because the spirit of urban homesteading can exist and be satisfying  on all scales.  In a small apartment you may not have room to store a year’s worth of tomato sauce and jam but you can do small batches that will still give you a profound enjoyment and satisfaction.  You can still make your own dinner napkins and you can do all kinds of repurposing projects.

What I realized this week is that no one is reminding me of these things.  No one is telling me to stop worrying about the fact that I am quite possibly not going to have the time or energy to can at all this year and instead just make spectacular use of the seasonal produce we have right now.  I might not be able to make tomato sauce to last me all winter (I usually can about 500 pounds of tomatoes) but I sure as hell can make some tomato sauce from scratch right now while the tomatoes are flavorful, local, fresh, and properly ripe.  It’s so easy to forget that the most natural thing any of us can do is to eat seasonally.  Soon enough I won’t be buying any tomatoes at all because their season will end.  So why waste time fretting over what I can’t do and simply enjoy what’s fresh now?   So this post is to remind myself, and anyone else in my position, to not get overwhelmed by what we don’t have time to do and instead make the very best out of what we do have time for.

I believe that if I prepare better this fall and winter around my house and garden I might be able to make more time next summer for the kinds of projects that I look forward to each year.  If I find good ways to fit more homesteading into my schedule I’m sure you’d all like to hear about it so I promise to share details.

In the meantime I will start posting more often.  It won’t be the preserving tutorials but there are smaller projects I have going on around here like saving carrot seeds from the garden, cooking (more recipes for making the best of seasonal produce) and I realized that it isn’t particularly time consuming for me to write plant profiles.  I want to have a ton of those for people to reference so that you can come here and access a comprehensive volume of information on all the vegetables, fruits, and herbs that an urban homesteader might find useful to grow.

So this post is to remind you and me to go easy on ourselves.  If you are working full time and don’t have a ton of time for homesteading activities, don’t let yourself become mired in frustration.  Rejoice in the things you can do with the time you do have.  It’s the spirit of urban homesteading that feeds our spirits and builds our confidence- it isn’t about doing everything.

On this happy note I’m going to go clean my kitchen and then do an experiment with substituting lemon juice for citric acid for curdling milk.  The question has been asked how this substitution might be achieved and I’d like to discover and share the answer to it which I can do today since I have the milk for making ricotta and plan to make a casserole of grilled vegetables in ricotta. 

Happy homesteading!

Headmistress Mrs. Williamson (Stitchy)

 Homemade Ricotta (A tutorial on making your own ricotta)

Round Pot Holder Tutorial

pot-holder-2.jpg This is a tutorial for making the round pot holders I used to make and sell in my store.  They are easy to make once you’ve gotten the hang of stitching the bias binding in place.  I cannot stress the importance of not skipping the basting and pressing steps.  Your bias binding will look much nicer and the end product will look more professional if you take these steps.  Pot holders might not be the most glamorous item to sew but they can add instant cheer to a kitchen and the truth is that everyone who cooks needs them.  Because cooking is hard on them, you will always need more.  They make great gifts and don’t use a lot of materials.  (Please see the asterisk for information about total yield you can expect from the materials list I’ve given.)

Materials needed for potholder:

Piece of paper

1/4 yard main fabric

1/4 yard contrasting fabric

1/4 yard Insul-brite (insulated batting)

1 yard double width folded bias tape

Method:

1.  Draw a 9″ circle on the piece of paper to use as your pattern.  Cut it out.

2.  Cut one circle out of the main fabric and one circle out of the contrasting fabric.*

3.  Cut 2 circles of the Insul-brite (you need the double layer to protect your hands from the heat properly.)

4.  Cut a 5″ length off of the yard of bias binding and stitch it shut along the open end and then trim the ends with pinking sheers.
 basting-2.jpg
5.  Sandwich the Insul-brite between the front and back fabrics.  Baste all the layers together.  This is important: you must not skip the basting because the layers will certainly shift while you baste the bias binding onto the edge if you don’t do this step.
 bias-binding-2.jpg
6.  Baste the bias binding around the edge of the pot holder pulling gently as you stitch to reduce puckers.  Do the best you can to keep the tape even on both the front and back.
 turned-under-2.jpg
7.  When you get to the end, tuck the raw edge under.  (You may need to trim it if there’s too much left over.  You should only tuck about 1/2″ under.)

 unpressed-3.jpg

8.  Your pot holder should now look like the above picture.  Do you notice that the binding is a little puckered?  At this point you need to iron your potholder making sure to press the binding as smooth as you can.  You need steam to do an effective job.  Do not skip this step.  This will make a big difference in the quality of your finished product.
 pressed-3.jpg

See how much smoother this looks once it’s been pressed?

looped-2.jpg 9.  Carefully stitch the bias binding down.

10.  Remove the basting stitches.

11.  Take your 5″ length of bias binding and put one end on the top front (covering the folded under part of the binding) and one end in the back.  This is easy, but difficult to explain so refer to the picture above to see how to place it.  Stitch it in place.

*1/4 yard of your main fabric will yield 4 potholder fronts, or 2 complete pot holders with the same front and back.  I like doing all my sewing in bulk so my recommendation is to make four pot holders at the same time.  The 1/4 yard of Insul-brite is just enough for four pot holders.  If you decide to make 4 of them at a time you will need 1 yard of bias binding for each additional pot holder.

Fabric note: Because you will be using pot holders to protect your hands from very hot pots and pans, you should only make pot holders from 100% natural fibers.  The best choices are cotton or wool.  Synthetic fibers have a tendency to melt when they come in contact with high heat which, if they melted close to your skin, could cause you some serious injury.
You may also enjoy doing these projects:
Make a mushroom smock
Create a gift larder (includes a different pot holder tutorial)

Pesto: Angelina and Chelsea’s Recipe

pesto 2

Mrs. C and Mrs. W’s Pesto

Ingredients:
2 cups tightly packed basil leaves
1/2 cup olive oil
1/2 cup Parmesan cheese
1/3 cup lightly roasted pine nuts
two or three garlic cloves
1.5 tsp salt*
1/2 tsp pepper

Method: Put all the dry ingredients in a food
processor. Pour in the oil. Blend the heck out of it until it is
precisely the texture you like your pesto to be.  You can also grind
all the ingredients together in a mortar and pestle if you have a good
one.  I don’t.

Recipe notes: Pesto freezes very well so
if you have a ton of basil and can get your hands on all the other
ingredients, I suggest you make as many batches as you can to enjoy
during the cold months of winter when mired in root vegetables and
dreaming of the taste of summer.  I recommend using a vacuum sealer if
you have one for the best possible quality.

*Chelsea and I have a stylistic difference of opinion on the amount
of salt necessary to make this pesto shine…I like one and a half
teaspoons, she likes two. Basically, use as much as you think is best.

Warba Potato Yield: Summer 2009

potatoes 2

I have begun to take better garden notes so that I can share my data here for those who might find it helpful.  Normally I let my potatoes remain in their bed and harvest them as I need them but this year I needed to free up my potato bed for some blueberry bushes.  This gave me the opportunity to weigh them all at once.  The potato plants were already dying and so I stopped watering them anyway.

Here are my notes on this year’s potato planting:

Potato variety: Warba (early season)

Number planted: 24 seed potatoes

Bed size: 4′ x 16′ raised bed

Space between seedlings: 10″ between them in their rows, rows were 24″ apart

Planting date: April 17

Harvest Date: First picking July 3, complete harvest July 12

Growing conditions: typical cold wet spring and cold wet early summer with some brief intermittent heat waves.  Barely watered the bed at all.  Though I planted them in trenches 6″ deep, I failed to continue to cover them as the plants grew which generally gives a higher yield.  Didn’t mulch at all which also tends to produce higher yields.  I would call the growing conditions less than ideal, though the soil they were planted in was very good; loose and full of well composted material.

Total yield: 30 lbs 15 oz

Or you can think of it as 1.29 lbs of potatoes per seed potato planted.  Or you can think of it as a fraction over 1 pound per square foot of garden space.

This is a respectable yield but would have been much better if I had followed good potato growing practices.  I also think it’s important to note that some varieties of potatoes can get much larger and grow a lot longer before harvest which translates to a much greater pound per square foot ratio.  I nearly always harvest my potatoes as “new potatoes” because I like young potatoes best.  So that affects the yield as well.

What this information should do, though, is reassure you that even under less than ideal growing conditions, potatoes do produce well and are rewarding to grow.

Grilled Polenta Rounds With Fava Beans

polenta with fava 2

Fresh fava beans come around only once a year for a very short period of time.   They are difficult to find in stores though they are becoming more readily available at farmer’s markets.  I usually grow my own because they are such an easy crop to grow and yield well even in less than ideal conditions.  They require some preparation for cooking, but are well worth the effort!  This is a recipe I make every single year when the fava beans come in.  I usually serve it with grilled onions, potatoes, and mushrooms, and a marinara sauce.  It makes a great early summer meal.

Ingredients:

1.5 cups polenta/corn meal (I generally use corn meal)

6 cups water

2 cups fresh shelled favas

4 Tbsp butter (optional)

2 cloves garlic (pressed)

1 teaspoon salt

many grinds fresh pepper

Method:

Bring the 6 cups of water to a roiling boil in a larg sauce pan.   Whisk the cornmeal into the water in a steady stream.  When it’s all whisked in and as smooth as you can get it, turn the burner down to low.  Put a lid on the pot, and let it cook until almost ready.  If you’re using a medium grind of polenta it could take 45 minutes to cook.  I use either a finely ground polenta or corn meal which is usually completely cooked in about ten or fifteen minutes.

Add the fava beans, butter, garlic, salt, and pepper to the pot and stir well.  Put the lid back on the pot and let cook for an additional five minutes.  Stir really well a couple of times before removing from the heat.

Pour the polenta onto a cookie sheet and spread it out with a spatula until it is evenly covering the whole cookie sheet.  Let it cool until it has stiffened.  This takes about a half an hour.  You can make this polenta a day in advance of using it if you like.  It will keep for several days in the fridge if properly covered.

Using a biscuit cutter (large size) cut the sheet of polenta into rounds.  You should get between 12 and 14 rounds.  Keep the trimmings to eat for lunch with marinara sauce or to fry up the next morning with eggs.

Coat each side of your rounds with a marinade or oil before grilling.

Recipe Notes: The butter in this recipe is optional.  You can either substitute it with olive oil or you can omit it all together.  I like adding it because it makes the polenta creamier and the butter compliments all the other flavors.  I have made it many times without and loved this recipe just as much.  You can add more salt if you like saltier food.  I tend to use less salt than many people.
Rosemary Marinade

Homemade Ricotta

straining

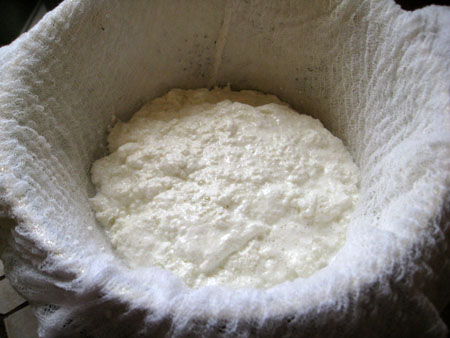
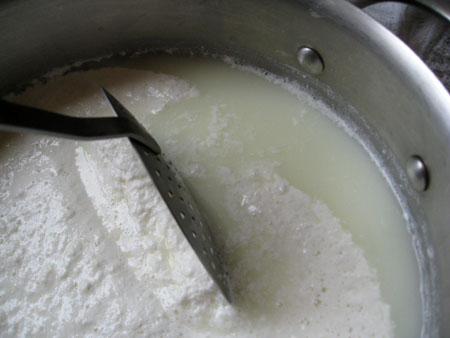
This is the finished batch of ricotta.

thermometer 2

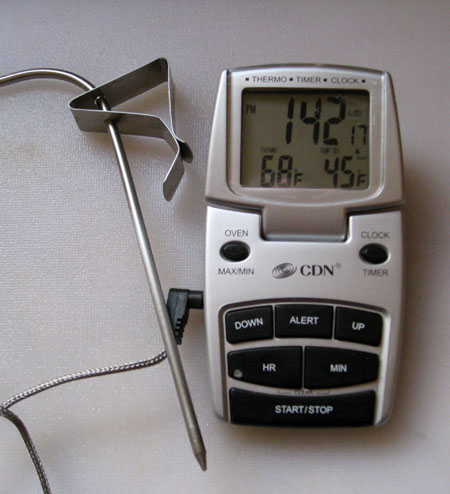
This is the thermometer I use.  You can use any model that allows you to clip it to the side of your pot so that the gauge is in the milk at all times.
 
the set up

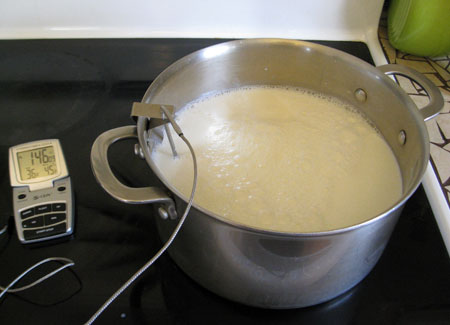
Like this.

curds and whey

This is how your milk should look when it has set for ten minutes.

Making your own ricotta is very easy, doesn’t require expensive equipment, tastes better than store bought, and as though that weren’t enough- it’s possible to make it for half the price of store bought ricotta.  The cost is highly dependent on the milk you buy.  I don’t buy organic milk because I can’t afford it but I do buy locally made milk that doesn’t have any hormones or other undesirable additives in it.  I look for deals on gallons which I take advantage of whenever I can.  I can find my milk for $2.00 per gallon quite often.  If I buy a 16oz tub of ricotta it costs between $4.00 and $6.00.  (I actually almost always seem to pay $4.69)  This may not be the case if you can’t find good deals where you are.

The milk you choose is not vital.  You can make ricotta from raw milk, ( if you’re lucky enough to have a source for it), organic, or non-organic.  The one kind of milk you cannot make ricotta from is “ultra pasteurized”.    You can use low fat, whole fat, or non fat but keep in mind that the lower the fat the less yield you will get*.   One gallon of milk produces about 15 to 16 ounces of ricotta.  You can use the resulting whey for other food preparations if you like.

What you need:
 
thermometer

stock pot

gallon of milk

1/2 tsp citric acid

1/4 cup cool water

strainer or collander

cheese cloth or butter muslin

spoon

Method:

Dissolve the citric acid in the water.

Pour the milk in the pot, gently stir in the water/citric acid, put your thermometer in place,  and put the stove on high heat.

You want to bring the milk to a temperature between 185 and 195.  While the milk is heating up be sure to stir it often to keep it from sticking to the bottom of your pot.   If any milk sticks to the bottom and browns it could impart a bitter or off flavor to your ricotta.

Never let the milk boil.  It shouldn’t do so if you remove it just before it reaches 195 degrees.

When it reaches the necessary temperature, immediately remove it from the heat and let it set for 10 minutes.

Lay your cheese cloth (double layer) or butter muslin (single layer) in the collander and ladle the solid curds into it.

Let the liquid drain off for a few minutes.

Your ricotta is now ready to season as you like it and use!

Project notes: The whole process takes about a half an hour.  I always salt my ricotta after it’s made.  If you let it drain too long it will become dry.  If you want your ricotta to have a creamy consistency, you can add a little milk or cream back into it.  Citric acid is not always easy to find but if you have a wine making store near you they will carry it.  There are places you can order it online. 

*I usually make low fat ricotta and I haven’t really noticed a huge difference in the yield but I have read that the yield an be affected by fat content so I just want to make sure you know it may happen.

Pasta With Fresh Shelled Peas And Fava Beans

peas and favas 2

I look forward to eating this dish all year long.  The window of opportunity for it is very short, so you have to enjoy it while you can.

 pasta peas 2

Ingredients:

Serves 4 generously or 6 moderately

2 large onions

2 cups fresh shelled peas and/or fava beans*

1/4 cup olive oil

8 ounces pasta (I love angel hair but I think any will do)

salt and pepper to taste

Method:

Slice the onions in thin rounds then into quarters.  Heat the olive oil in a large saute pan on med/hi heat, add the onions when the oil is hot.  To caramelize onions you want to stir them frequently and once they begin to clarify, turn the heat down to med.  The onions will be done when they are all caramel colored and soft.  Be careful not to burn them or they will taste bitter.   While your onions are cooking, boil water for pasta.

At the same time your pasta is cooking, add the peas and favas to the saute pan with the onions and cook for 3 to 5 minutes.  You don’t want to over cook the peas and beans.  Drain your pasta and add it to the saute pan with a small amount of the cooking water.  Add salt and pepper to taste (I use about a teaspoon of salt and about 10-15 grinds of fresh pepper, but I think most people would like this better with more salt).  Toss everything together really well.

Optional: add crushed red pepper and Parmesan cheese.

Recipe notes: this is such an easy dish to make and because there are few ingredients it allows the delicate flavor of the fresh shelled peas and the fava beans to shine.  I often like strong flavors such as garlic and herbs but this is an exception.  It only takes me about a half an hour to make.  Shelling the peas and beans takes time but you can do it while the onions are sauteing.

*If you are using fava beans be sure to remove the outer skin first by blanching and then dunking in ice water.

Tomatillo Salsa: A Canning Recipe

husk 2

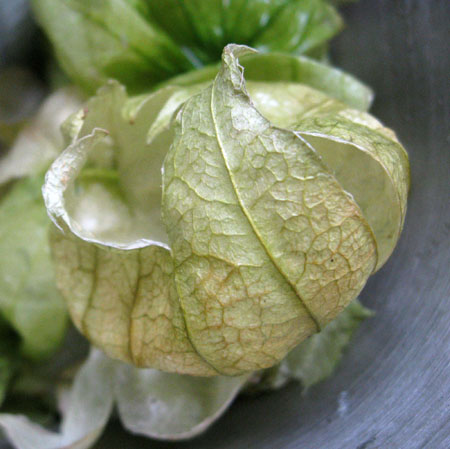
I find the husks on tomatillos charming.  I can’t resist taking photos of them.

studyingreen 2

It takes a lot of chopping and dicing to make this salsa, but it’s worth it!

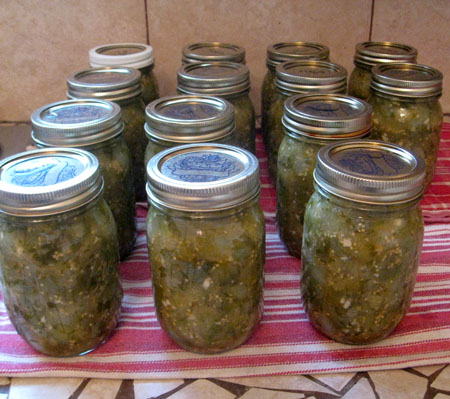
tomatillo salsa jarred 2

Ingredients:
 
5 1/2 cups husked, cored, and chopped tomatillos

1 cup chopped onion

1 cup chopped jalapenos

1/2 cup white vinegar

4 tbsp lime juice

4 cloves garlic, minced

2 tsp ground cumin

1/2 tsp salt

  • Prepare canner, jars, and lids.
  • In a large stainless steel saucepan, combine all of the ingredients. Bring to a boil over a medium high heat, stirring constantly. Reduce heat and boil gently, stirring frequently, for 10 minutes.
  • Ladle hot salsa into jars, leaving 1/2″ head-space. Remove air bubbles and adjust head-space if necessary by adding more hot salsa. Wipe rim. Center lid on jar. Screw band down until resistance is met, then increase to fingertip tight.
  • Place jars in canner, ensuring they are completely covered by at least 1″ of water. Bring to a boil and process both 8 ounce and pint jars for 15 minutes.

You should know that the amounts I’ve given are for one batch, which is ridiculously small. I made 5 batches all at once. If you’re like me and would like to make a lot at once multiply all of the ingredients by five. It’s nice to know you can do smaller batches, though, because if you have a lot of these ingredients in your garden you may only be able to make a little at a time as things ripen.

You can use other types of hot chili peppers, according to your tastes. I only have eyes for jalapenos because they don’t repeat on me as much as other peppers. I like serranos too but they tend to be too hot for me. If you used a cup of serranos per recipe I think you’d be breathing fire and then you might die (mostly just kidding).  So if you like things hotter, try a blend. Just be sure that the total amount of peppers you use remains the same.

You can also use a little more garlic if you like.

This salsa is quite soupy. Mr. W  wanted to know if it can be made thicker. I’m not sure about that yet. I have to do a little canning research before I know how much I can safely adjust the liquid content. (If I was just making it for fresh eating, instead of for canning, I would just cook it down til it was as thick as I liked). Until I find out, or some other experienced canner gives us the answer, don’t mess with it. It’s amazing just as it is.