Author Archives: angelina

Garlic Dill Pickles

picklejars


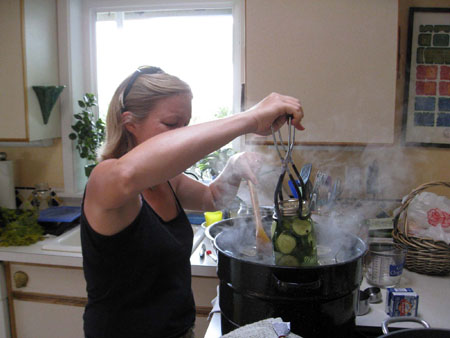
Fresh from the canner, these pickle slices are still turning from bright green to dark green.

raw cucumbers

You can use small, medium, or large cucumbers, but the larger they are (of course) the fewer you can fit in one jar.

filling jars

You can also do some sliced.  I have found that they are a little softer in texture than the ones I can whole but I like these for sandwiches and it doesn’t bother me.

placingjars

My friend Lisa E. (pictured above) and I learned to pickle dills together.  The first recipe we tried called for pickling spices,  so we cooked up a batch of the vinegar with spices and Lisa, smelling the odor coming from the pot, mentioned that she wasn’t enjoying the smell of the spices and was reluctant to use them, wasting a bunch of cucumbers.  Although I hadn’t thought about it, I didn’t like the idea of my pickles tasting of allspice and Cinnamon either.  We looked furiously for a dill pickle recipe that would have a clean garlicky dill flavor.   We found only one that came close to our idea of how a pickle should be and it came from the Sonoma County Extension office.  We tweaked it just a little bit until it was perfect.  My sister, who is a dill pickle connoisseur called it one of the best pickles she’s ever had!  So here’s the recipe for you to try!

Ingredients:

4lbs (2 quarts) freshly picked small to medium sized cucumbers

4 tbsp canning salt

4 cups vinegar

4 cups water

1 fresh head of dill weed per jar

1/2 tsp mustard seeds per jar

1 clove garlic per jar

6 peppercorns per jar

Method:

1.  Wash cucumbers thoroughly.

2.  For whole cucumbers, small sizes up to 4 inches are preferred.  Larger cucumbers should be sliced, quartered, or halved lengthwise.

3.  Combine salt, vinegar, and water in a pot.   Heat to boiling.

4.  Pack cucumbers into hot clean jars.  For each quart jar add: 1 head of dill, 1 clove of garlic, 1/2 tsp mustard seeds, and six peppercorns.  Fill with hot pickling liquid to 1/2 inch of  the top for quart jars, and 1/4 inch for pints.

5.  Process pint or quart jars of whole cucumbers in hot water bath for 10 minutes, jars of slices or halves for five minutes.
6.  Let the pickles cure for 4-6 weeks before opening to taste.

Recipe notes: I have updated this recipe to start off with a larger batch of brine.  Because of the irregularity of cucumber size and shape it is an inexact science to figure out how many jars of pickles you’ll get out of 4 lbs of cucumbers.  Sometimes you can only fit three in a jar, sometimes you can fit six.  So be prepared to whip up another batch of brine.  It’s truly fast and easy to do.  And remember that if you have leftover brine you can save it in the fridge for more pickling projects.


Strawberry Milkshake

strawberry milkshake

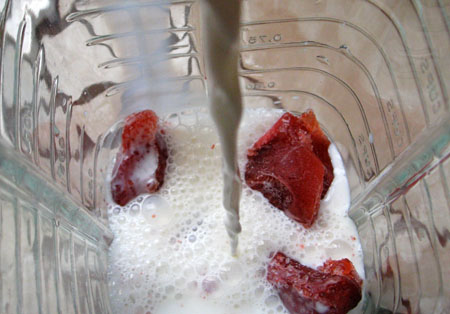
Pouring the milk into the blender.

milkshake 2

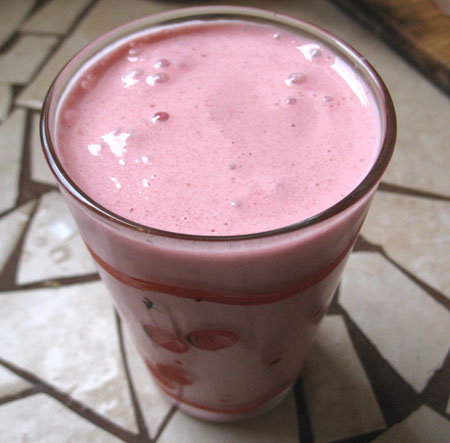
This is a recipe that uses your frozen strawberries to make a milkshake that is low in sugar, high in flavor, and got my picky eater child to get some protein and fruit in his system.  It is simple, fast, and a great alternative to the more traditional shakes made with ice cream.

Ingredients:

8-10 frozen strawberries

1 cup milk (whole or low fat)

1.5 Tbsp sugar

Put everything in your blender and pulverize it until it is completely smooth.  How many strawberries you use depends on how large yours are and how thick you like your shakes.  Start with the proportions here but feel free to improvise until it suits your specific tastes.

This recipe makes 16 ounces of shake.  (One large one, or two medium ones).

Pico de Gallo: Easy, Healthy, Mexican Food

Pico De Gallo2

En la Cocina with Casa de Lulu

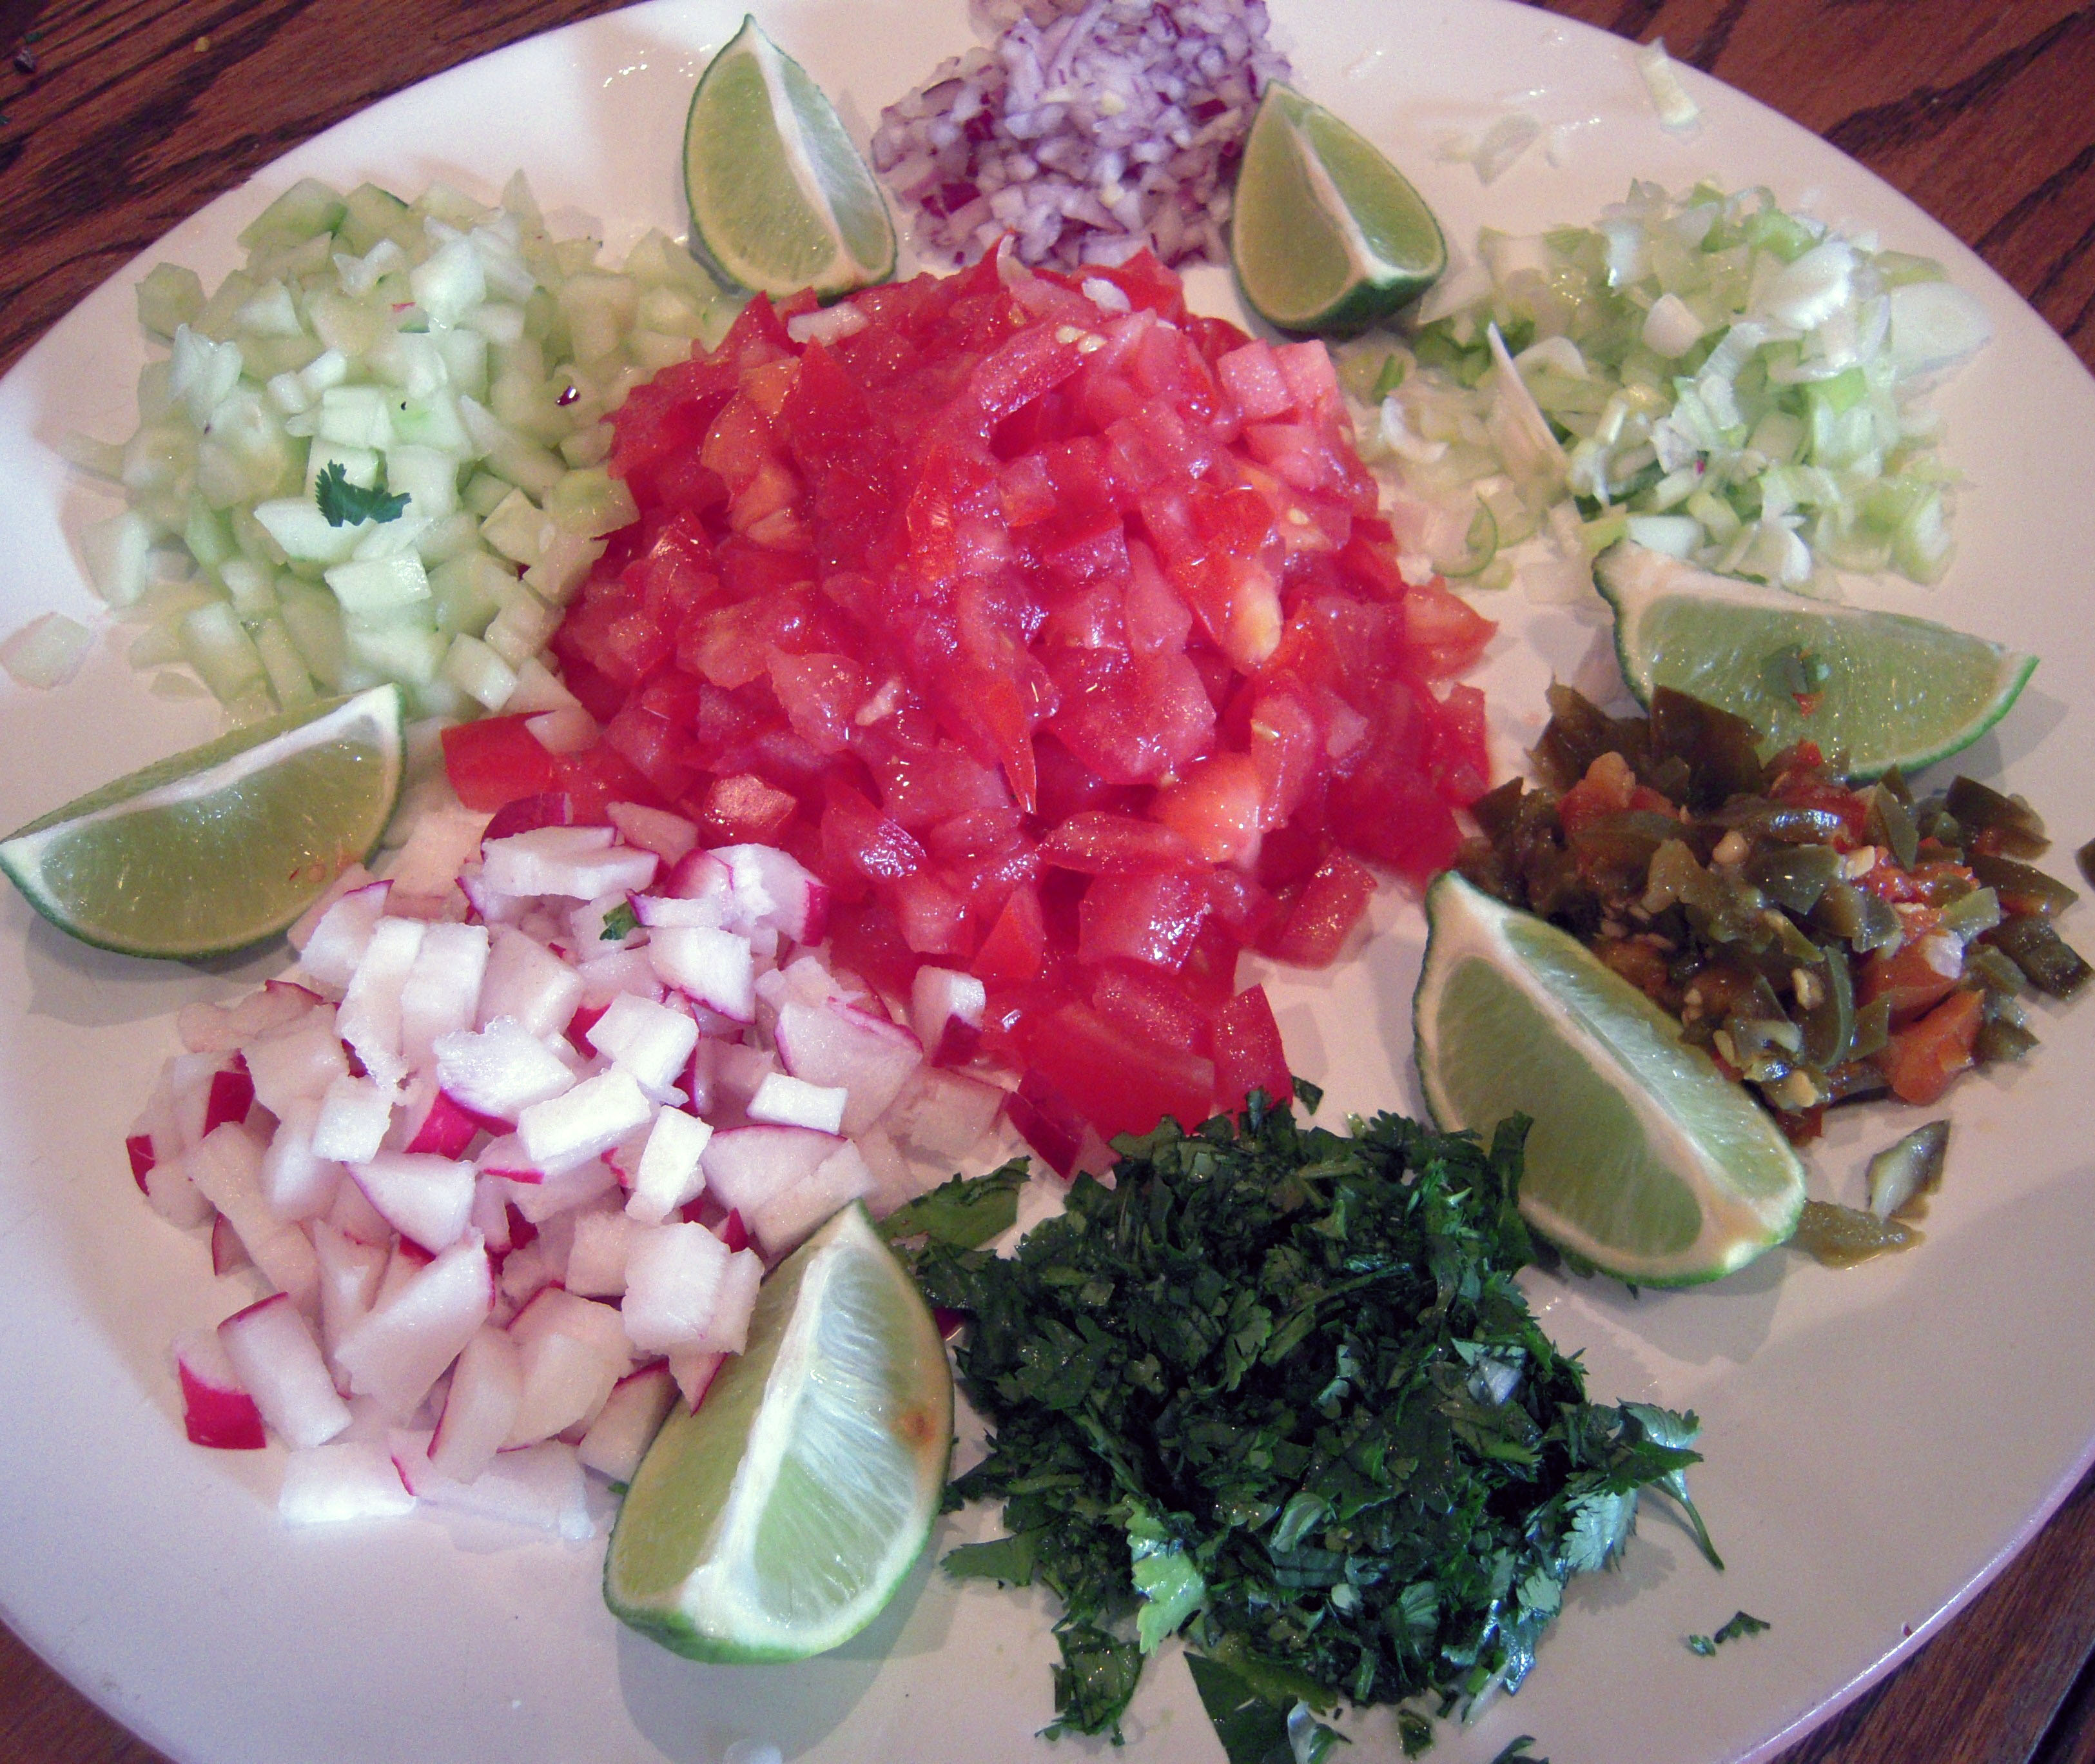
Here in the cocina, we are mixing up a batch of delicious Pico de Gallo today.  We are BIG fans of Mexican food and often prefer to make it rather than run down to the local taqueria.   Mexican food, especially in California, is fresh, delicious and actually very nutritious if you make your own.  We make tacos about  once a week with different fillings and always have fresh pico de gallo or salsa to top it off.  There seems to be some confusion about the difference between to the two, especially in the supermarket.  Salsa is actually sauce and the ingredients are cooked, (or rather roasted), for a smoky spicy flavor.  Pico de gallo is fresh, and can vary depending on the seasons and what you have on hand.

Pico De Gallo 1

So here’s a basic recipe that’s easy to make and delicious to eat.  All the ingredients can be found in any store- super simple.

For 3 generous cups of pico de gallo, you will need:

3 medium ripe tomatoes

2 tbsp minced red or white onion (not yellow!)

½ cup chopped cucumber

½ cup chopped radishes

2 tbsp of minced pickled (in the can) jalapeños

¼ cup minced scallions (optional)

¼ chopped cilantro

Juice of one lime

¼ tsp of granulated garlic powder*

1 tsp kosher salt**

Fresh ground pepper

Pico De Gallo 2

First, take the minced onion and let it soak in water for about 5 minutes- this greatly reduces its potency and allows the flavor to marry well with the other ingredients.  Place all ingredients in a bowl, then add juice and salt and pepper.  That’s it!  Es muy facil, no?

*Heads up all you Twilight fans- notice I add garlic powder not fresh garlic to this recipe.  This is up to you.  I find that fresh garlic is just too potent and overpowers the other flavors.  So if you want to hang out with that pretty boy vampire and knock down some margaritas, you’ll want to go easy on the garlic,  okay?

**Be careful about adding too much salt to this recipe- if you plan on eating this with chips, there’s already plenty of salt on them and you don’t want to sully the flavor too much.

Here’s some variations of the basic recipe that I’ve tried:

  • With beef tacos, I add oregano and lemon juice instead of lime
  • With lamb, I add fresh mint and orange juice
  • With fish, I add some mashed up avocados and chopped red cabbage

Caring For Chicks: The First Six Weeks

chicks 2

How To Care For Chicks For The First Six Weeks

Raising your flock of hens from day old chicks is rewarding, easy, and inexpensive.  A chicken is most vulnerable for the first six weeks of its life which is the general length of time it takes for a chicken to develop their first feathers.  Before they feather out they cannot regulate their own body temperature and are sensitive to both the cold and to overheating.  The most difficult part of raising chicks is managing the temperature in their pen.

To raise chicks you will need:

Housing: Big aluminum tubs are great for raising chicks in but you can also use a large cardboard box, a wire brooder, or a bunny hutch.  If you use a wire cage of any sort you need to make sure the gaps between wires aren’t so large that your chick’s feet can fall through them and get stuck.  I’ve used a large cardboard box (which had to be replaced a couple of times since chicks spill their water frequently) and I’ve used a tin wash tub.  The wash tub was the best.

Heat Lamp: you can get these hat the hardware or feed store for pretty cheap.  You need a lamp that can clamp (or hang) above the chicks’ living space.  The red bulbs that the feed store sell are best but we’ve done fine using regular 100 watt bulbs.

Feeder: I definitely recommend that you buy one of the aluminum feeders that are made for chicks.  It keeps their feed cleaner and makes it harder for the chicks to knock it over.  It’s is a small round (or sometimes long triangular) dish with a top on it with circles cut out so the chicks can get to the feed.  All feed stores carry them and they aren’t expensive.

Waterer: Again, I recommend you get one of the small plastic waterers that are sold in the feed stores.  You don’t want to put a bowl of water in with your chicks for two reasons, the first of which is that they will spill larger quantities of water all at once requiring more frequent litter changes, and the second is that you don’t want to provide water in which the chicks could drown.

Litter: Use only pine shavings.  Cedar is unhealthy for them.

Feed: Buy chick feed from your farm store that is formulated especially for them.

Thermometer: You can get a thermometer at most dollar stores or supermarkets.  You want an outdoor type of thermometer (not a cooking thermometer).  This is the easiest and surest way to manage the temperature in your chicks’ environment.

To set up your chick’s environment you need to clamp the heat lamp to one side of the box, wash tub, or cage in which your chicks will live.  If you’re using a box or a wash tub you need to cover the floor with about an inch of pine shavings.  This will help absorb their droppings and the water they will inevitably spill.  Place their feeder and waterer on the opposite side of the space from the lamp.  If their water gets too warm they won’t drink it.  Chickens are very thirsty creatures and need constant access to fresh cool water.  Place the thermometer somewhere between the side with the lamp and the side with the food.  Now you are ready to add your chicks!

Temperature:  Chicks need access to heat.  For the first week or so of their life they need the temperature to be between 90 and 100 degrees.  After that you should lower the temperature by 5 degrees each week.  You can do this by raising the heat lamp higher each week (you may need to clamp it to something other than the edge of the cage/tub/box in order to lessen the heat enough as they get larger).  You can tell if they are too hot because they will huddle together in the farthest spot away from the heat source.  Likewise, if they are too cold they will all huddle tightly together directly under the lamp.  Ideally you should see your chicks spread out in their pen, some in the warmer spots and some in the cooler moving freely all over their space.

Food and water: It is important to check their water a couple of times a day.  Chicks are messy babies and tend to stand in their water, spill it into their chips, and drink it too.  The water will get dirty frequently so you must keep your eye on it to prevent them from drinking water with their feces in it.  It is sometimes helpful to put their water and food on a brick in their pen to help keep it cleaner by raising it up.

Changing the litter: You should change the litter every other day.  I have always had very messy chicks who spill a lot of their water so if you notice the pine shavings are getting wet near the water you need to remove the wet shavings and add some more dry.  This means I was removing some shavings every day but I only did a full clean out every other day.

Handling Them: Handle your chicks as often as possible.  You can try to train them to perch on your finger (set them on your finger over and over again and eventually as they get used to it they may comfortably stay put).  Small children should be supervised while handling them because they don’t always understand how fragile the chicks are but encourage them to hold the chicks while you are there with them.  Always wash your hands after handling them.  Chicks are birds and everyone likes to eat birds so they will try to get away from you, it’s their instinct.  What you want is for them to eventually feel comfortable enough that when they are full grown it will not be difficult to catch and hold them.  Remember that some chickens are always going to be shy and some will become very curious and friendly.

One of the biggest common dangers that can occur in chicks is “pasting up”.    Pasting up is when a chicks feces sticks to their vent and dries there preventing them from eliminating which, if not caught, will kill them.  So every day you need to check their bottoms for pasting up.  If you see that one of them has poop stuck to their vent gently wash it off using a warm damp washcloth.  It may take some time to clean it up and the chick will not enjoy the activity- but it’s important to take care of it as soon as you see it.

It’s good to remember that sometimes chicks die.  Not because you did something wrong but because they were too weak, or the travel from the hatchery made them sick.  Most vets won’t treat chickens but if you see that any of your chicks aren’t thriving, call the feed store where you got them and ask for the person who is in charge of the chickens.  I have always found those people to be very helpful in determining what’s going on with a chicken’s health.

When your chicks begin to develop their feathers you can let them play a little bit outside on really warm days.  If you do this, be sure that you can pen an area off for them so they are easy to catch and bring inside when it’s time.  Be very careful of predators like your cats and dogs who would love to catch themselves a little chick-snack.  Chicken hawks aren’t uncommon either so don’t leave your chicks unattended!

Chicks are funny to watch.  I never cease to enjoy seeing them fall instantly to sleep no matter what they’re doing or where they are.  They’ll be walking around and suddenly their head will drop to the side and their eyes will close.  The first time I saw my chicks do this I though they were dying or dead!  Spend time with them and enjoy their funny antics.  If you have any questions you can feel free to ask me any time or don’t hesitate to call your feed store.

More information on raising chickens:

Choosing Chicken Breeds For Backyard Flocks

Cherry Liqueur Recipe

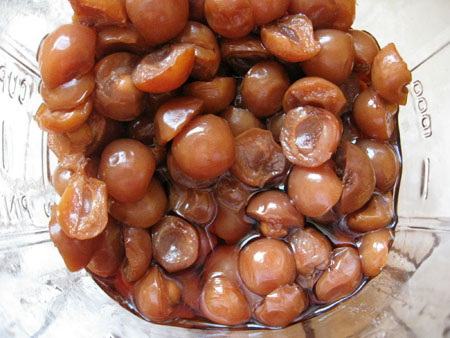
The color is gorgeous.  I especially love using Morello cherries.

imbibe

They are hard to find so you may have to plant your own tree!

inebriated cherries

Cherry Liqueur Recipe

Ingredients:

1.5 pounds sour red cherries, cut in half with the pit left in one side

1.5 cups granulated sugar

2.5 cups 100 proof vodka

small piece of cinnamon

Method: You put a third of the cherries in a half gallon sized jar, then pour a third of the sugar in. Do the next third of the cherries and the next third of the sugar. Then do the last third of both. So it is layered in the jar. If you want to use the cinnamon add it now. Then pour the vodka in. I guess the layering is just for fun because then you stir it all up. Every recipe I’ve read always calls for layering the ingredients in the jar first. Stir it up, cap it, and then put it in a cool, dry, dark place.

For the first two weeks shake the jar up at least once every day. This makes sure that the sugar completely dissolves. After that let it age for 3 months.

Strain out the cherries and pour the liqueur into bottles.

Recipe Notes: I have made many attempts at cherry liqueur and all of them were unsatisfactory until the last batch I made which was perfect!  I confidently recommend that you only make it using a pie (sour) cherry.  It doesn’t matter what kind as long as it has red skin to contribute color.  Definitely leave the pits in, they add a very subtle almond flavor to the drink which makes the flavor more complex.
I also highly recommend that you use 100 proof vodka (or everclear).  If you are using 80 proof I would lower the sugar content or it will be more like cough syrup than a fruity enjoyable beverage.  The next time I make this it will be without the cinnamon.  Although I enjoyed the slight spiciness it added to the flavor, I want a clearer cherry flavor.

Mushrooms, Dandelion Greens, and Pasta in a Cheese Sauce

pasta with chives 2

Ingredients:

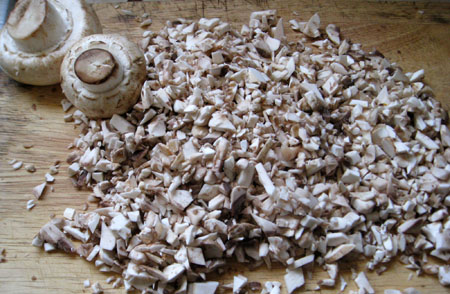
1 lb finely chopped mushrooms (finely chopped)

1 large fistful of dandelion greens (finely chopped)

1 tbsp of olive oil

3 round tbsp flour

3 tbsp butter

2 tsp salt

20-40 grinds of pepper (to your taste)

1/8 tsp cayenne pepper

3 cups milk (I use 2%) (warmed)

2 cups gruyere cheese (grated)

1 lb of Rotelli pasta

 mushrooms 2

Method:

In a sauté pan, on med/high heat, warm the olive oil.  Add the finely chopped mushrooms.  Sauté until the juices are released and have cooked off.  Add the chopped dandelion greens.  Cook just until the greens are wilted.  Remove from heat and set aside.

Put a pot of salted water on to boil in a large pot for the pasta.   Keep your eye on it while making the cheese sauce.

Meanwhile…

Combine the flour, salt, and peppers in a ramekin and mix it together with a spoon (or a tiny whisk if you have one).  Warm the milk either in the microwave or on the stove top so it will be ready when you need it (do not boil it!).  Have the cheese already grated.

(When the salted water boils, add the pasta and cook for the recommended time, usually about 10 minutes for Rotelli, then drain.)

In a medium saucepan, on medium heat, melt the butter.  As soon as the butter begins to bubble whisk the flour into it.  It should have a paste-like consistency.  For two minutes continue to whisk the flour paste in the pan not allowing it to brown.

Now slowly add the warmed milk while continuing to whisk briskly to prevent lumping (be sure to whisk into the corners of the pan too).  Once the milk has been thoroughly combined with the paste, it will begin to thicken.  It is crucial not to let the sauce boil.  Whisk frequently until it has thickened to the consistency you like your cheese sauce to be.

Remove from the heat.  Gently stir the cheese into the sauce until it is all melted.

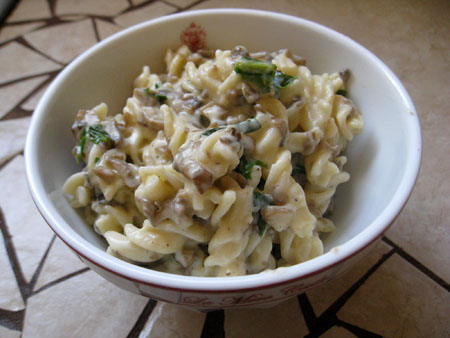
Using the pot you boiled your pasta in, combine your drained pasta, the cheese sauce, and the sautéed mushrooms and greens.  Taste for salt and pepper.

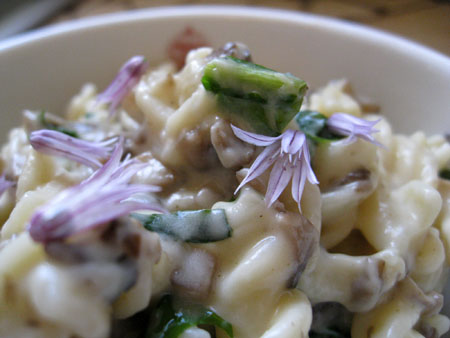
Serve hot with a garnish of chive flowers.

Recipe Notes: Mushrooms- you can use any kind of mushrooms in this recipe.  Use wild ones if you have them, or a combination of wild and cultivated, such as Crimini or white button mushrooms.  Since I don’t know how to forage for them in my region and can’t afford to buy wild, I usually use Crimins which are my favorite.

Cheese- Gruyere or Emmental are fantastic choices to accompany the mushrooms.  However, I can’t afford to buy those here so I generally use a very sharp aged cheddar.  Don’t use a cheese that is too mild (such as jack or medium cheddar) because the flavor will be lost in the cream sauce.
It doesn’t take long to make the cheese sauce so it’s important to have the pasta cooking at the same time.  The only exception to this is if you are using an angel hair pasta that only takes three minutes to cook.  My best advice with this dish is to have all your ingredients out and ready to go so you waste no time looking for things or measuring.

 mushroom cheese pasta 2

Not sure why you would want to use dandelion greens?  Find out here:
Dandelions (Taraxacum officinale): Plant Profile

Create A Gift Larder

canned-goods-2.jpg

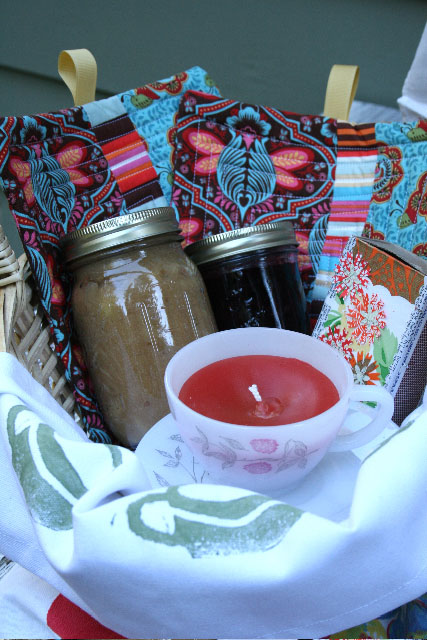
Home canned goods wrapped in a handmade dish towel.

tea-cup-candle.jpg

Beautiful homemade gift basket collection including potholders, decoupaged match boxes, tea cup candle, and home canned goods.

bethanys-gifts-2.jpgBethany's gifts 2

Different presentation from Bethany’s gift larder.

match-books-2.jpg

Close up of decoupaged match boxes and tea cup candle.


Note from the headmistress Mrs. Williamson: Bethany Mann, best known as Bitter Betty from her creative crafting blog Bitter Betty Blogs, spent many years working for Nordstrom’s as the regional manager of the window displays before deciding to leave her career to stay home and pursue a more personally rewarding path of becoming an urban homesteader and professional craftsperson.

On her blog you can find useful craft and homesteading tutorials.  Here she is presenting several projects you can easily make from things you likely already have, or can find inexpensively at thrift stores, to create a gift larder.


Give What You Have

By Bethany Mann

Every Urban Homesteader can appreciate the happiness and security of a full pantry, made by your own hands. It is also a great idea to keep a full gift larder, making gifts in batches, to give for most any occasion. Using what you have on hand and recycling make these gifts both green and affordable, which makes giving and receiving them that much better.
I have started a gift larder of my own. It began with putting up some extra preserves with nicer labels. I have moved on to also putting up a few other items that are great to keep on hand. These projects are ideal to do in the wintertime, while the garden is resting.
I do try and reuse as much as possible and some of these items required little or no new purchases to create.

Thrifted Teacup:
Clean the teacup thoroughly.
Chop up old candles and crayons, or new candle wax, into tiny pieces. I like to use the big pillar candles after the wicks get buried and they are no longer useful… but often still have a pound or so of wax left. Half-burned tapers are even easier to chop up. The wick bits are skimmed off after melting.
Melt in a tin can over a pot of boiling water.
(Do not heat in oven, with direct heat, or in the microwave,
as this is a huge fire hazard.)
Prepare the teacup by putting a new cotton wick into a wick clip and tying to a bamboo skewer that has been laid across the top of the teacup.  The wick should extend up from the bottom of the cup.
Pour the melted wax slowly into the cup to the desired level.
Let cool overnight.
Best given with:

Decoupage Matchboxes:
Take the slider off the box of matches.
Cut paper to fit. Reuse wrapping papers and pretty gift cards or magazines.  You can use just about anything!
Use decorative shears to cut borders.
Punches can add pretty 3-d elements to the boxes.
Coat the flat non-strike surfaces with Mod-Podge.
Place the paper and let dry, pressing out the air bubbles as you go.
You can either add a topcoat or not, as you desire.
Glue the 3-D punch-outs in place.
Another couple of items that always seem to be needed are the ubiquitous pot holders and dish towels. Everyone uses them – and they wear out and get shabby so quickly.
These also make a great extra to add to the jar of jam.  The dishtowel can even be used as wrapping!
I use scraps from my stash to make the potholders and trim the dishtowels.
A day or two at the machine, and you can have a nice little stack ready to give.

Quickie Potholders:
Cut 3 strips of coordinating fabric for each front panel.
Strips should measure 4×9 inches.
Cut one rectangle that is 10×9 inches for back panel.
Sew strips together (1/4 – inch seam allowance) and press open seams.
Place front panel, right sides facing on back panel, and pin if you desire.
Sew around the perimeter leaving a 4 inch opening at the “top” of your potholder.
Layer in 2-3 layers of cotton batting or recycled towel and smooth flat.
Hand stitch (or machine stitch) the opening closed, inserting a loop of ribbon with which to hang the holder.
Machine or tie quilting makes this project even nicer.
I machine quilt mine in a loose square spiral pattern.
Handmade dish towels can be trimmed with patchwork, stamped with potato prints, or embroidered to match.
Often freshly-baked goodies are gift enough, but a sophisticated presentation can be a little tricky. I am trying to avoid using plastics too much and the prints on the average tins are usually “not my style.”
On the upside, that is easily changed.

Peace Tins:
Thrift store purchased tins are cleaned and sanded.
Several coats of a non toxic (check label – some are okay for kids’ rooms) spray paint applied to both top and bottom.
Find a plate that is slightly smaller (by 1.5 to 2 inches) than the lid.
Trace it on the lid, and also on contact paper.
Use blue tape to mark the peace symbol lines on the contact paper and cut out along the lines.
Re-assemble on the lid using the circle line as a guide.
Spray paint the lid white and let dry.
Remove the contact paper.
Wash, line with wax paper, and fill with cookies.
I also keep an eye out for clean baskets while thrift shopping. People donate these like crazy. These are cleaned, sometimes painted and filled as needed for whatever occasion may come up.
Why not give yourself the present of never having to make a mad dash to the mall or pull an all nighter and set up a little gift larder all your own? You’ll probably want to send yourself a Thank You card every time you use it.

Is it cost effective to can your own tomatoes?

home versus store 2

A cost analysis of home canned versus store bought tomatoes.

A question that a lot of people ask about home canned goods is: can you save money by canning your own food?  I think it’s an important question to ask.  I can’t say that I preserve my own food for the possible savings,  I do it because I think it tastes better, I know what’s in it, and best of all, I truly enjoy doing it.

For many people it is only worth their time if they know they are saving money by doing it and I respect that.  So I decided it was time to try and answer that question.

I am starting with an analysis of canned tomato products because I use this more than any other pantry staple that I can make myself.  I can about 36 jars of diced and sauced tomatoes a year and I would like to do more.

I took price notes on two different types of canned tomatoes (diced and sauce) from two very different grocery stores: Winco, the leading bargain grocery store in my town (most things they sell are dirt cheap and close to the expiration dates) and Roth’s, the leading family owned fancy grocery store (where everything is pretty top notch quality and prices reflect this).  And then I calculated the cost of my own home canned diced tomatoes and tomato sauce.

Roth’s:

Diced Tomatoes 28 oz can (Hunt’s brand)- 9¢ per ounce

Diced Tomatoes 28 oz can (Muir Glen Organic brand)- 12¢ per ounce

Tomato Sauce 28 oz can (Hunt’s brand)- 8¢ per ounce

Tomato Sauce 28 oz can (Muir Glen Organic brand)- 12¢ per ounce

Winco:

Diced Tomatoes 28 oz can (S and W brand)- 7¢ per ounce

Tomato Sauce 28 oz can (Hunt’s)- 6¢ per ounce

Home Canned:

Diced Tomatoes 1 quart (using U-pick tomatoes)- 5¢ per ounce

Diced Tomatoes 1 quart (using home grown)- 2¢ per ounce

Tomato Sauce 1 quart (using U-pick tomatoes)- 10¢ per ounce

Tomato Sauce 1 quart (using home grown)- 4¢ per ounce

(homegrown here is assuming you buy the vegetable starts, not grow them from seeds.  Keep reading!)

There were only two choices to include from Winco as they don’t have the widest selection at any given time.  For the homegrown I took into account the price of plants and how much you can generally expect a plant to yield and how many pounds of tomatoes it takes to make diced tomatoes versus how many pounds it takes to make sauce.  For the sauce I chose to use the number of pounds it takes to make a pretty thick sauce rather than a thinner one to maximize the meaning of the numbers here.  I always make a thick sauce, the thicker you make it the more tomatoes it takes to fill a quart.

I didn’t account for the price of canning equipment, jars, the power it takes to can, nor the amount of water it takes to grow your own and here’s why:  with almost any worthy activity you must buy tools.  Tools are a one time cost.  If you really want to add the price in you must make a guess at how many years you think you will be using the tools.  I plan to keep on using my canning tools until I am a grizzled old lady like the ones I meet at the u-pick field who have been canning for over 50 years.

So my canning pot and equipment cost me $1 per year to use.  If you are a stickler, you can do the math and figure out how much it costs per jar (37 quarts per year X 30 years) (Seriously?  You’re going to do the math?)

The cost of the jars if bought brand new and not on sale works out to be about $1 a piece.  So if you want to do the math on that- be my guest.  Figure that each jar is (if treated with reasonable care) likely to last you 30 years.  You will have breakage once in a while but it is rare if you are good at canning.  So, divide $1 by thirty years and you will have the cost you can add to the per ounce prices I’ve listed above.

Some sticklers insist on adding the cost of watering home grown vegetables to the cost of their food.  I don’t do this because I think it’s ridiculous and here’s why: the majority of Americans who have homes (whether rented or owned rarely makes a difference) with yards in them are already watering lawns.  In my master gardening class we were given some astonishing figures on how much water in the US is used to keep lawns looking alive and “nice”.  It’s shocking.  Even if you don’t have lawn you’re already watering (and I bet you do) you’re probably watering a bunch of shrubs and flowers- am I right?

It most certainly doesn’t cost any more to water vegetables than it does to water your lawn.  In fact, if you are using drip irrigation or some other form of water efficient irrigation, you are probably going to save money on your water use.  This is why you should turn your lawn into your own grocery store (thanks, Kathy, that is a lovely way to look at my kitchen garden!).

The power it takes to can vegetables or to freeze them.  Yeah, this is another one that I discount.  If the average person watched less television, used less power lighting their homes, had energy efficient heating, threw away their hair dryers, and used fewer plug in items, the amount of extra power it takes to run a small auxillary freezer or to can your own food could be easily offset.  No need to add that in.  Make some effort and you will see the difference.

During canning season (and I’ve been canning now for 9 years) I have never seen a significant bump in my electricity or gas usage.  It increases a little bit but it is also generally increasing because the lights are being turned on earlier as fall digs in.

Oh, but the biggie that I have heard many people say which never ceases to annoy me is “But my time is money…so when you account for the labor it takes me to make my own food, it isn’t worth it.”  Most of you have already heard my feelings on this issue, but for anyone who has not, let me just ask you if you compare all the time you spend raising your kids against what daycare providers earn and make your decision based on how much money your time is worth?  Because if you do, you have some pretty twisted priorities.  Most people give their children as much personal care as they are able to without once asking themselves if it might be worth just handing them over to the babysitter full time because it just isn’t worth their time.

What makes an activity worth the time and effort you put into it is dependent on more factors than how much your time is professionally worth.  There is pride at stake, there is quality to consider, there is control that adds bonuses most people don’t want to think about when it comes to food preparation (such as not allowing a certain percentage of insects to be cooked with your sauce), and there is enjoyment.

Feeding ourselves and our families is the most important thing we do.

I suggest that all of us work a little less for other people and a little more for ourselves.

Because it does save us money.  (See the numbers above).  And because it enriches more than just the food on our plate.

Let me finish by summarizing my analysis.  If you don’t have a great deal of space (or time) but you want to preserve some of your own tomatoes you will get the most for your time, space, and dollar if you grow roma tomatoes and dice them and then freeze them.  (They should be blanched first).  Doing this is a lot less work than actually jarring them.  Efficient freezers don’t take much energy to run and the quality of frozen tomatoes if cooked first is excellent.

If you can start your own seeds for the tomato plants you will reduce the cost of either diced or sauce by a huge percentage that I have yet to calculate.  (One envelope of tomato seeds costs anywhere between $1 to $3 and will have at least 25 seeds in it.  Germination rates should be at around 85% which means you should be able to get 21 plants out of one package.  Wait, I’m going to do the damn math for you…

If you had room for 21 roma tomato plants and can keep them well irrigated with drip you should expect an average of around 12 pounds of fruit per plant.  At that rate you will yield at least 252 pounds of fruit.  If you made all sauce from that you could get 38 jars of thick tomato sauce a year.  This would cost you 7¢ per jar.*

Did you read that?  Did you take that in yet?

I’m not even sure how to say a fraction of a penny but this makes home made sauce (from home grown plants started from seed) cost .21 of a cent per ounce.

So the next time you ask if it’s worth growing your own and doing all that work?  Well, don’t ask me or I will wither you with my math.

So, go pick out a spot in your lawn to grow some romas!

*I made my calculation based on the most expensive packets of seeds.

A similar article you might enjoy:

Is Making Your Own Clothes Economical?

Rosemary Marinade

marinade 2

Ingredients:

1 cup olive oil

1/2 cup red wine vinegar

3 tbsp mustard (spicy brown or Dijon)

3 cloves peeled garlic, roughly chopped

3 – 4 sprigs fresh rosemary, chopped roughly

1 tsp salt

many grinds of fresh pepper

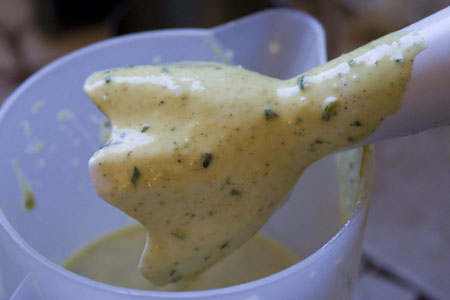
Put all of these ingredients in a deep bowl or measuring cup (large enough to use with an immersion blender*). Blend them until the marinade is thickened and all the rosemary is well chopped.

How to use this marinade: I brush it on everything I grill. It is my standby favorite. It is thick enough that it sticks to my vegetables and I love the rosemary and mustard combination. One of my very favorite ways to use it is to roast the following vegetables:

eggplant

mushrooms

onions

summer squash

Then chop all the roasted vegetables, combine with fettuccine pasta, and add some marinade to the pasta for sauce. Serve with Parmesan.

This would also be great on tofu.


Recipe Note:  I have never used a marinade on meat (because I have never been a meat eater) so I can’t say if the proportions of vinegar and salt are enough to partially cook meat before being grilled as marinades are often used for. I do know that this is a very flavorful way to dress anything you want to grill or broil. I don’t use it as a salad dressing because I don’t like rosemary for my salad as I think it’s too strong.

*If you don’t have an immersion blender, use a regular blender. Or a food processor. And then let me convince you that an immersion blender is so much better than a regular one.

Vanilla Pears: A Home Canned Favorite

pears in syrup 2

This recipe is a safe adaptation of the recipe for canning spiced pears from the Ball Blue Book Of Canning.   When my friend Lisa E and I were making canned pears together she had some vanilla bean pods she needed to use up and she thought it would complement the flavor of the pears, so we used less of the traditional cinnamon and cloves and cooked the pears in a sugar syrup with cut up pieces of vanilla.

The addition of vanilla gives these pears a wonderful delicate taste that can be enjoyed alone, in galettes, or on yogurt (one of my favorite ways to eat them).

In this recipe it is safe to substitute different spices.  If you don’t like cloves, use nutmeg instead.  You can use one spice, two, or  as many as you like for a custom flavor.  I love pears with nutmeg but Lisa prefers hers without.  Don’t be afraid to experiment.*

Ingredients:

2 to 3 pounds pears per quart

sugar syrup

cinnamon sticks

whole vanilla beans

whole cloves

canned pears 2

Instructions:

Hot Pack:  Wash pears; drain. Cut into quarters or halves; core and peel. Treat to prevent darkening (highly recommended – I use “Fruit Fresh” which you can find in almost any store that has a canning supplies section). Make a light syrup (we used a 30% syrup last year and a 20% syrup this year. You don’t have to use a syrup at all, but I recommend it because it helps preserve the texture and the color.) Cut up a whole vanilla bean into approximately 3/8″ pieces and add them to your sugar syrup. Splitting the bean down the center will help release the vanilla seeds into the syrup. Keep syrup hot.

Cook pears one layer at a time in syrup for 5 to 6 minutes or until hot throughout. Put a small piece of cinnamon bark (about a 1/2″ to 5/8″ piece) and 3 to 6* cloves in each hot jar. Pack hot pears into hot jars leaving 1/2″ head space. Remove air bubbles. Adjust two piece caps. Process pints 20 minutes, quarts 25 minutes, in a boiling-water bath canner.


Recipe note:
  Remember that cinnamon and cloves will get stronger the longer they are in the jars so if you like a much spicier flavor, add more, but we used only three cloves per jar so that the vanilla (much more expensive) is the main flavoring. The vanilla accents rather than hides the pear flavor

How to Make Sugar Syrup For Canning
*If you are ever concerned about whether or not a substitution in a canning recipe is safe, always call your local Extension Service to find out.  Generally substitutions are discouraged but with many recipes it is safe to alter spices as they don’t change the PH of the food and account for a very small percentage of the total volume of your ingredients.