Category Archives: DIY journal and projects

Winterizing Your Home: Plugging Up the Small Holes

Our farmhouse is over a hundred years old and consequently it has many funky charms such as several non-standard door sizes (tall people sustain more surprise head injuries in our house than anyone else) and windows installed at floor level upstairs.  We love it.  What’s less charming about a house this old is that it’s had plenty of time to be worked on by all kinds of unskilled people who have made a bungle of things.  This dryer vent is a perfect illustration.  Clearly the house wasn’t originally built to accommodate an automatic washer and dryer.  Some clever jerk decided that this wasn’t a problem.  To install dryer vent: sledgehammer a hole into the outside wall the approximate size of a dryer vent et voila!  All set.  Don’t mind the big gaping corner through which light and air travel freely – this allows you to breath fresh air even in mid winter.

WRONG.  Anyone living in an old house knows that one of the biggest problems is paying to heat them.  They are famous for these “creative” bits of crappy handiwork that let the heat drain out.  You don’t even need gaping holes like this one, there are so many ways the heat gets out.  So this weekend, because we got a really high heating bill we couldn’t afford, we set about identifying some problems and fixing them.  One problem is that we didn’t put all our storm windows down.  Duh.  Let’s not talk about how dumb that was.  All the functioning ones are now in place.  This hole in the laundry room is something I was vaguely aware of but didn’t think too much about until we got our highest ever electric bill.

You probably don’t have this exact problem in your house.  So I’m not offering this up as a tutorial on how to fix the hole around your dryer vent.  You might, however, have some other little gap letting heat out of your house.  If you have the money (or ACTUAL skills to fix holes properly) you will obviously do it the professional way.  We have no money.  We are so strapped for money at this moment I’m stressed out that I’m going to have to buy cat food today*.  So how do you go about plugging up holes in your house with zero money and no professional house-fixing skills?  You get creative is what you do.  Some day I’ll have that gap fixed with plaster or something but this weekend I came up with a good workable solution:

My main concern was that a dryer vent could potentially get hot.  I know it isn’t likely, especially if you dry all your clothes on low heat – but I’ve had a house fire and I’m paranoid about creating flammable situations.  At first I was going to make a cotton tube and fill it with dryer lint.  We thought that had a kind of poetry to it.  However, cotton is quite flammable as far as fibers go.  So is lint, for that matter.  Wool is not very flammable.  You can burn it but the fire goes out very quickly.

Philip told me this and I didn’t actually believe him.  In an effort to locate a piece of 100% wool in my craft room I did burn tests on swatches of what I thought was wool.  I discovered two things, a) most of my wool fabrics are not 100% wool but are wool and synthetic blends and b) real wool doesn’t burn easily.  The real wool I found was a pant leg from an old vintage pair of army pants.  I trimmed it and sewed it into a tube and stuffed it (loosely) with cotton batting.  Then Philip stuffed it around the dryer vent like a collar – pushing it into the gaps.  It worked perfectly.  No more air flow at all and no more light.

So how can you use my solution to help you come up with your own?  If you have the money or skills, fix your holes professionally.  If you are in a similar situation as I am then think about how you might fill small (or big) holes or cracks to stop drafts.  Some ideas to consider:

  • Fabric scraps can be very useful in plugging up holes.  The more dense the fabric, the more effective.  Tight weave fabrics are your best bet.  Wool is a fantastic insulation fiber so if you have any wool scraps on hand, consider them as a great material.  As long as the hole you’re filling isn’t near a heat source (like a heater vent or a fireplace or a stove) cotton is perfectly good too.
  • Another way to stop drafts from coming through doors is to sew tubes of fabric the length of the door and fill it with rice.  You place this along the bottom of the door and it will block drafts.  This will also work for drafts coming through windows.
  • Caulking.  If you find really small holes in your house letting the heat out you may be able to caulk them.  This is cheap and doesn’t take great skill to do.  As you can see, my hole was much too big to fill with caulking and we also needed to be able to take the vent out if necessary.  But there may be other small holes or gaps that can be closed with caulking.

So when you’re looking around at the many ways heat is escaping your old home, consider what materials you have on hand and be creative in thinking about how they might be used.

*Don’t worry, I can cover the cat food.  It’s just THAT tight that it stresses me out every time I see we need something.  If it came down to having to borrow money from a friend to feed my cats I would have no shame in asking for help.

The Handmade Lotion Trials: First Batch

I ran out of my usual lotion last week.  I have been using St. Ives for years.  I’ve enjoyed various formulas they’ve come out with.  Generally speaking they use very mild scents and they’ve always been affordable.  All natural they are NOT.  I have branched out time and time again to find an all natural replacement for it but no formula has met my needs.  My skin is sensitive and very dry.  I use hand lotion obsessively.  I am very picky about what it should feel like and how it should perform.  I think everyone’s skin responds differently to moisturizers and so what works for me will not necessarily work for others.

When I got down to scraping the bottle of my St. Ives lotion I bought a replacement for it, once again telling myself that some day I would just try to make my own lotion.  I had a neighbor once who said she and her mom make their own lotion every year and said it’s really easy.  However, needing lotion RIGHT NOW TODAY THIS MINUTE I brought home a familiar formula of St. Ives called “Intensive Healing” and opened it up and slathered it on my dry legs and was instantly overwhelmed by the most potent fragrance – perfumey and strong enough to knock a horse out.  This was new.  They don’t usually have such obnoxious fragrances and usually the fragrances smell pretty natural.  This scent that accosted me from my own skin reminded me of a certain cologne-stinking produce man I have a secret and strong dislike for.

Not okay.  Not only that, even if I could stomach such a strong scent on myself, I am not okay with accosting other people with chemical fragrances that may give them headaches or worse – make them sick.  So I hit the lotion isle at Rite Aid hoping to find one last bottle of my tried and true lotion.  They didn’t have any.  I read every lotion bottle on the shelf.  Every damn one.  I’m pretty sure I made the Rite Aid employees very nervous.  The ingredients lists, even on the “natural” bottles, read like foreign languages.  Partly this is due to the fact that most of the companies list ingredients like vitamin E in fancy-pants science lingo.  Still, do I need all that crap in my lotion?

Remember: skin is the largest organ of your body and what you put ON it goes IN in it.  Into to your system.  Toxins enter your system easily through skin.

I complained about my lotion problem to my mom and she got all excited to try making our own.  I love this about my mom.  She is the greatest inspiration to me to make my own medicines and go the natural route.  She brought me up that way.  So we consulted our Rosemary Gladstar herbal recipes book and found she has a “perfect” lotion in it.  Last night we made it.

What it has in it: Coconut oil, sweet almond oil, grapeseed oil, 8 vitamin E capsules (emptied), linseed oil (a tiny bit), beeswax (we used 1/2 ounce for this batch, the recipe says 1/2 to 1 ounce), filtered water, aloe vera gel, and some essential oil (grapefruit).

How did it turn out?  It’s thick, which is what I like in a lotion.  It smells like coconut, which I don’t like (though it’s a huge improvement on the nasty loud smelling bottle I have to ditch on someone who likes that kind of thing).  It has a greasy feeling finish, which I don’t like at all.

How hard was it to make?  Easy!  It worked really well following Gladstar’s directions.  It didn’t separate on us and it didn’t require any special equipment.  Cleaning my blender and the bowl we used may require a trip through the scouring hot dishwasher to remove all trace of the beeswax but that’s a small price to pay.

Is it less expensive to make your own than to buy it?  That is highly dependent on what oils you choose to use.  It is also difficult to cost because this recipe called for a tsp of lanolin but we had to fork out $11 for a whole bottle of it.  Stored properly the lanolin will last a very long time and we can use it for many batches (maybe as many as 10) which makes the cost difficult to determine.  We also had to buy vitamin E in capsules, we only needed 8 of them but had to buy a whole bottle.  That was another $10.  I think if you use inexpensive oils you can make a very cheap lotion.  While cheap is good when on a budget like we are, I insist on good quality so I’m willing to spend more for sweet almond oil.  Buying bulk oils online is probably the best way to reduce the cost of making it.

How much does one batch make?  We got a total of about 16 ounces of lotion.

I have two other books with lotion recipes in it and I also have a friend who makes lotion professionally who has offered to let me make some with her.  My plan is to devise a master formula to meet my personal preferences and learn enough about how to adjust it so that I can make suggestions to others who want to try their hand at this but who may want a different sort of performance from their lotion.

Biggest question I need answered: what controls how greasy a lotion feels?  The main ingredient in lotion is oil and obviously oil is grease – is it the amount of water that tempers the greasy feel?  Or does the beeswax also temper it?  Are there certain kinds of oils that are more or less greasy feeling?

I’ll report back when I’ve made my second batch.

Cabbage Garlic Soup Recipe for a Summer Cold

Getting summer colds is the pits.  Just when you think you’re out of the woods you get smacked in the head with congestion, headaches, a sore throat, and low energy.  As everyone knows, you can’t cure a cold.  The strategy should always be to lessen the symptoms and the duration of the cold as much as possible.  So when I woke up at 4am three nights ago with all the symptoms of a cold coming on suddenly, I immediately took a bunch of nasty-huge multi vitamins meant to boost the immune system (the ones I use are “Wellvitamins” and I only use them when coming down with something because they’re very expensive) and I drink lots of elderberry syrup, water, and sometimes I make up some ginger and honey tea or sage and honey tea.

That’s all well and good, but if you feed yourself crap while doing all the other good things you should be doing, it’s like shooting yourself in the foot.  First thing you should do when you feel like you’re coming down with any kind of cold or flu is make soup.  I believe that all soups have healing powers, even the cheesy ones, but if you’re getting sick I’d like to recommend making a vegetable soup full of vitamin C, garlic, and cayenne pepper.  Like this cabbage and garlic soup I’m sharing here.

Cabbage is full of vitamin A, C, calcium, and potassium.  Tomatoes are full of vitamin A (!!!), vitamin C, and (you guessed it) potassium.  Potatoes are full of vitamin C and more Potassium than cabbage and tomatoes combined.  Carrots don’t have much vitamin C to speak of but as everyone knows they are crammed with vitamin A and what many people may not know is that they are also quite rich in potassium.  All the ingredients in this soup will fill you with vitamins and minerals.  The navy beans are rich in calcium, phosphorous, and more potassium than any body could need.

The garlic (there’s a lot of it in this soup) is great for boosting the immune system and cayenne pepper is great for purifying your blood and helping it circulate better.  In addition to that, the cayenne will help loosen phlegm which will help clear your sinuses.

Cabbage Garlic Soup Recipe for a Summer Cold

10 servings

Cabbage Garlic Soup Recipe for a Summer Cold

Ingredients

  • 1/4 cup olive oil
  • 1 large onion, diced
  • 2 bay leaves
  • 4 quarts of water (more if needed)
  • 1 cup navy beans, uncooked
  • 2 tsp salt
  • 4 carrots, chopped med
  • 1/2 head cabbage, chopped
  • 3 med. potatoes, diced med
  • 28 oz can of diced tomatoes (or 1 quart of home canned)
  • 12 cloves garlic, pressed or minced fine
  • 1/8 tsp cayenne
  • 1 1/2 tsp oregano

Instructions

  1. Heat the oil in a large soup pot on med/high heat and add the onion and bay leaves. Saute until the onions lightly brown.
  2. Add the water, beans, and salt. Bring to a boil and then turn heat down to med/low and cook until beans are tender. The time may vary, for me it was about one hour. Be sure to check on them and stir them while cooking.
  3. Add everything else into the pot and turn heat back up to med/high. At this point it should be soupy but the amount of water you need may vary depending on how much of it cooked off while cooking the beans. All the vegetables should be completely covered with broth.
  4. Bring the soup back to a boil and then turn the heat down a little and let it cook until all the vegetables are tender. Probably about 30 minutes.

Notes

This soup makes 10 servings. I don’t make small batches of soup because we eat it for leftovers and sometimes freeze it. You can easily halve this recipe. I used 12 cloves of garlic but you can use more. Do it! The next time I make this soup I plan to increase the garlic up to an entire head. Once the soup is cooked through it doesn’t seem very garlicky.

Play with the amount of cayenne. A very little can be really hot so go cautiously. It should be hot enough to make you sweat a little and make your nose run after you eat it. It should not be so hot that it’s painful to eat and burns a hole in your eye socket. Unless you like pain like that, I won’t judge.

If you are inexperienced making soups I suggest you read my soup philosophy post- it will help you understand soups better and give you the confidence to play with them.

https://stitchandboots.com/2011/06/18/cabbage-garlic-soup-recipe-for-a-summer-cold-2/


Poison Oak Remedy: Green Clay

I have a very low sensitivity to poison oak which means that I can stand in the middle of a big patch of it and not get a rash.  I know this because I have stood, accidentally, in the middle of a big patch of it and didn’t get a rash. I have had a lot of exposure to it in my life and when my mom and brother would come down with horrible allergic reactions, I (who had been in the same places as them) would be spared.  This luck means that I have gone my whole life not having to worry about remedies for poison oak or seek relief for the itching it causes.

That has changed over time as my son got his first poison oak rash when he was three and though that time wasn’t too bad, every time he gets it he has a much worse allergic reaction than the last time.  I did some research the first time he got it and read as much as I could about it and discovered that there are some myths about poison oak that have been busted by science but which are difficult to bust in the minds of many who suffer from it.

The biggest myth is that once you get poison oak your rash is contagious and you can give it to others.  This is NOT true.  What gives people the rash is an oil produced in poison oak, called urushiol, which bonds with the proteins in your skin within the first 10 to 15 minutes of contact and once it has bonded the urushiol is absorbed into your skin and cannot be transferred to anyone else.

I have assembled a number of sources of information about poison oak which explain well that you can’t spread your own poison oak rash by scratching, the oozing that sometimes occurs can’t spread your rash either.  If you suffer from a sensitivity to poison oak and you don’t already know these things, please read up!  It will help you manage your rash exposure to know how you can get reintroduced to the oils through clothes and pet fur and will ease your mind to understand that you aren’t contagious once you’ve gotten the rash.

Once you have it, there’s nothing you can do to get rid of it.  For those who have severe reactions (my mother has been hospitalized from allergic reactions to poison oak) you may need to go to the hospital and get a steroid shot, but this is only done in very severe cases.  For everyone else the only thing you can do is control the itching and promote the healing of your rash by drying the sores and blisters out.

We have used a medicated steroid creme to help control the itching of my son’s poison oak rashes in the past and while it did help, it was not as efficacious as we could have hoped.  We have also resorted to using Itch-x from the pharmacy which does work well to control the itching for short periods of time but fails to help heal the rash itself which needs to be dried out, not kept moist with ointment.  During his most recent rash, which was worse than any of the previous ones he’s gotten, he was itching so much that he was raising big welts on his arms and body and causing his rash to bleed.  We listened to some suggestions from other people (there are soaps meant to help with poison oak) and then my mom asked why we didn’t use Calamine lotion.

I really didn’t know why I hadn’t tried it before.  I remembered that I had some green clay I’d gotten from an herbal shop and decided we’d try that.  Isn’t Calamine lotion mostly clay-like?  Maybe not, but I went home and mixed up some of my green clay and my kid was completely game (desperate) to try it so I covered all his rashes with the clay.  He was really happy with the results.  He told me it helped with the itching better than the ointments and felt more comforting.  We continued to use it for a week, applying it liberally every single night before bed.  Here’s what I used:

Ingredients:

1/3 cup green clay (Montmorillonite)

2 tbsp water

Method:

Measure out the clay into a ramekin and add the water.  Stir it until all the powder is incorporated and you have gotten most of the lumps out.  It should be thick.

The thickness makes it easier to get full coverage over the rash.  Too thin and it won’t work as well.

It should be thick enough that it doesn’t drip or slip when you scoop some up with your finger.

Apply it liberally to every area of your skin affected by the rash.  You may need to undress to do this.  Let it dry before covering it with clothes.

When you’re done applying the first round, you can put the rest of the clay in a small jar with a tightly sealing lid.  It will stay hydrated and ready for your next application if you keep the lid on when not in use.  How much you need will vary greatly depending on the extensiveness of your rash.  We used the clay treatment for a little over a week and I mixed up about this amount three times.  Use the above ingredients as a ratio and multiply to make a bigger batch ahead of time if you think you’ll need it.

An acquaintance of mine told me she uses clay for her son too, but she gets it directly from her property, so if you have clay in your yard do try to use that first!  You won’t even have to mix it up and it will be free!  She says it’s the only remedy that’s given relief to her son who is very sensitive to poison oak just like mine.

I bought my clay from an herb shop online, you may be able to find it at local shops that carry natural herbs and beauty supplies.

Poison oak information:

Poison Ivy, Oak, and Sumac Information Center

Cleveland Clinic: The Poison Plants

Andrew Weil on Poison Oak

Poison Oak FAQ

CDC on Poison Oak and other poisonous plants

Essentials for Every Medicinal Herb Garden


My mother has a certificate in herbology and a lot of experience growing, using, and foraging medicinal herbs.  She’s shown me how to make salves and at one time made me and my siblings all herbal first aid kits which included tinctures and salves she made herself.  My favorite item from that kit was her comfrey salve which I found very useful for many applications.

I believe everyone should grow medicinal herbs in their gardens.  You don’t need to be an herbologist to make use of medicinal herbs safely.  A couple of good herb books is all you need.  I am no enemy to modern medicine and depend on it for a number of things I could never find relief for with herbal medicines.  I believe in an integrated approach to medicines: take the best from the East and the West, take the best from the present and the past.

I always grow medicinals because they are generally gentle, cheap, and can be incorporated into your everyday health regimen.  There’s another reason I think everyone should grow some medicinals: what if commercially produced medicines were to become unavailable to you?

You should have on hand some herbs that you can use in emergencies to do things like reduce fevers, bring swelling down in sprains, heal cuts and bruises, treat burns, calm nerves, detoxify your liver, disinfect wounds, and reduce the symptoms of influenza.  Growing herbs to meet all these basic needs is neither difficult nor need it take up too much space in your garden.

How do you choose the essentials?  My mom and I love this game.  There is a dizzying number of medicinal herbs and plants that you can choose from to grow in your own yard, so how do you narrow it down?

  • Make a list of common issues you and your family experience: skin issues, headaches, colds, anxiety, persistent coughs… think of all the things you routinely find yourself needing to treat and include all first aid things you keep on hand.
    • Consult a reliable herbal book.  Look through the lists of herbs, read what each of them do, and discover which herbs are the most recommended for the needs of your family.  Most libraries will have several you can check out if you don’t have any of your own.  I will list some titles you can rely on for good information (these are all books I personally own and trust):

      “Herbal Remedies for Vibrant Health” by Rosemary Gladstar

      “Desk Reference to Nature’s Medicine” by Steven Foster and Rebecca L. Johnson  (published by National Geographic)

      “The Essential Natural Health Bible” by Nerys Purchon

      “The Complete Herb Book” by Jekka McVicar

      • When you have a list of all the herbs most likely to fulfill your family’s particular needs and those of general first aid, cull the list down to the ones that will grow well in your climate and ones you have room for.  Don’t exclude culinary herbs from this list, many of them have great medicinal qualities that improve your health simply by being used frequently in your cooking.  Thyme, for example, is a powerful antiseptic properties in addition to adding great flavor to soups and other savory dishes.

        While I believe choosing the herbs you grow should be based on your personal needs, there are herbs I believe everyone should be growing in their gardens regardless of who they are.  I’m going to give you two lists to start with.  The first will be a list of the herbs I think every single garden should be growing, this will be the bare essentials.  The second list is the one my mother and I have come up with for our own garden.

        Essentials for Every Medicinal Herb Garden:

        Comfrey – absolutely essential for healing cuts, bruises, burns, and sprains; the roots are great made into tea for your bath as it will soften and heal skin.

        Calendula – great for all skin issues (softens, cleans, heals), anti- inflammatory, antifungal.

        Thyme – strong antiseptic, antibacterial, antifungal, and antispasmodic properties.

        Sage – sore throats, antiseptic, immune booster, colds, and treats nervous exhaustion (I should be drinking this every day!).

        Peppermint – stimulating, refreshing; good for relieving indigestion, tension headaches, and spastic complaints of the gastrointestinal tract.

        Aloe Vera – soothes cuts and burns, nourishes and moisturizes skin.

        Elderberry – reduces severity of influenza symptoms, immune system stimulant, reduces fevers, colds, and ear and throat infections.

        Rosemary – good for digestive ailments, increases circulation, colds and flus, mouthwash, dandruff, and may ease depression and fatigue.

        The only one from that list that not everyone may be able to grow in their own garden due to its size is the elderberry.  Elderberry can be kept pruned to a reasonable size but left to its own devices it will become a big tree.  If you have room: plant it!

        Here is a complete list of what I will have in my own medicinal garden with the items I already have planted asterisked:

        Echinacea, lovage, rosemary*, comfrey*, beebalm, arnica*, calendula, balm of Gilead, borage, sage*, tarragon*, winter savory, feverfew, peppermint*, nasturtiums, parsley*, thyme*, vervain*, elderberry*, mullein*, oregano*, marjoram*, plantain*, roses*(for rosehips), and lavendar*.

        There are so many amazing and useful herbs you can plant in your garden.  Aside from the benefits these herbs offer to you personally they are also great for attracting beneficial insects that will increase pollination in your other plants and help keep in balance the pests that hurt your soil and plant health.

        What herbs do you grow and what are you planning to add to your garden this year?  I want to know!


        Ginger Syrup: DIY Apothecary

        ginger from an angle 2.jpg
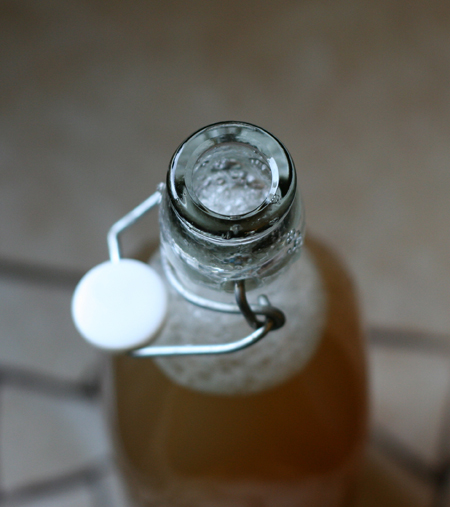
Whenever I feel a cold coming on I grab some fresh ginger, lemons, and honey and make a cup of tea for myself.  It doesn’t always prevent the cold from coming (though it has once or twice) but it eases up the symptoms and makes me feel a lot better.  Ginger is useful for a lot of ailments such as nausea, indigestion, infection, sore throats, and the flu. 

        Although I love making fresh ginger tea I sometimes want something stronger.  This syrup is it.  If you don’t like your ginger too spicy you can reduce the amount of ginger in this recipe, it will still be effective, just more gentle.  Made my way it will burn going down, warming your whole torso.   

        fresh ginger 2.jpg
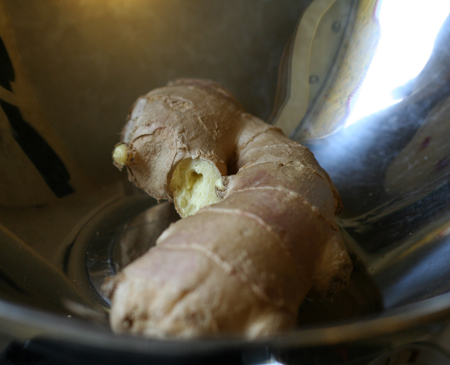
Ginger is usually called a root and though I call it that myself it’s really a tuberous rhizome.  When you buy fresh ginger you want to look for a piece of root that is supple and tan.  Don’t buy any that has a shriveled or grey appearance or has mold on it.

        Ingredients:

        4 ounces of fresh ginger
        1 quart of water
        1 cup raw honey  

        chopped fresh ginger 2.jpg
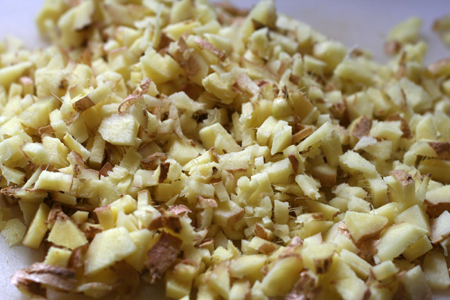
How to make ginger syrup:

        Chop the ginger into small pieces (no need to peel the skin).  Add the ginger to a medium sauce pot with the quart of water and put the stove on high heat until the water boils.

        When the water boils turn down the heat (to med/low or low) so the water is only gently boiling.  Let it boil until the liquid reduces by half.  This will take roughly a half an hour but you should check it every ten minutes to see its progress. 

        straining ginger 2.jpgWhen the liquid has reduced by half, take the pot off the heat and let it cool down for a while.  When it’s cooled enough not to give you third degree burns, strain the solid ginger bits out by pouring it through a piece of butter muslin or doubled up cheese cloth.  Squeeze all the liquid you can out of the ginger and toss it onto your compost pile if you have one.

        At this point you have a ginger decoction.  To make it into a syrup you need to add the honey.  If your decoction has cooled down completely, heat it up again so that it’s warm (but not boiling), then remove from the heat and add the honey.  It’s important that your decoction isn’t boiling at this point because you don’t want to cook the honey.  It has a lot of beneficial qualities in its raw state that it loses when cooked.

        ginger syrup 2.jpg

        Stir the honey until it’s completely incorporated in the liquid.  When it’s completely cool pour it into a bottle or a jar and keep it in the fridge.  It should last up to a month.

        If you want a thicker syrup double the honey.  I didn’t want a really thick syrup but more honey will make it even better suited to soothing a sore throat.

        Dosage:  1 ounce every couple of hours while feeling acutely unwell or when your body feels low from an oncoming cold.  (This is merely my suggestion based on how I’ve found it useful and therapeutic.  You won’t hurt yourself taking more or less ginger syrup.)

        If you’re coughing a lot you can add an ounce of ginger syrup to an ounce of vodka or whiskey.  The alcohol soothes spasms in the lungs.  Plus it soothes the mind at the same time.

        Tip:  This syrup can be made into a lovely cocktail as well: 2 ounces ginger syrup, 1 ounce vodka or other favorite liquor, mineral water, ice, and slice of lemon.  Especially nice on a cold evening!

        Enhanced by Zemanta

        How To: Polish Your Pots And Pans

        dirty pot 2.jpgIf your stainless steel pots or pans ever develop a dull film on them from cooking that regular cleaning won’t remove you should try this method of cleaning them. 

        How To Clean Pots and Pans Using Lemon and Salt

        It’s simple, quick, and inexpensive.

        You will need:
        1 lemon (more acidic varieties are best)
        1 tbsp table salt
        elbow grease, but only a modest amount

        lemon scrub 2.jpg
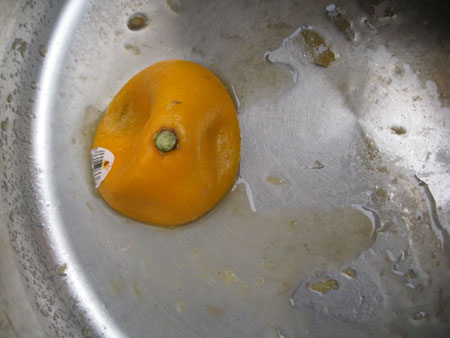
Instructions: cut the lemon in half.  In the bottom of your pan sprinkle half the tablespoon of salt.  Rub the lemon all around the dull stains squeezing as you do it to release the juice and using the salt to scrub the surface of the metal.  When you have scrubbed enough so that no dry salt remains and the lemon is squeezed out.  Let the lemon juice and salt sit for a few minutes.
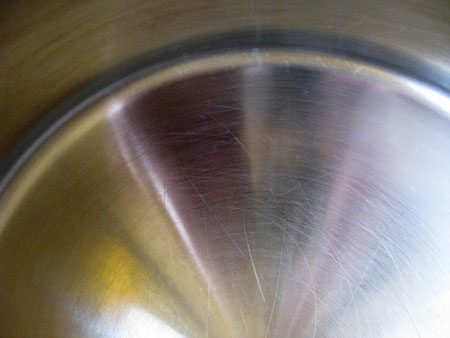
        Next: rinse the pot out and gently scrub at dull stains with a non-scratching scrub sponge.  If it’s come completely clean then you’re done! 

        However, my pot took two passes to get completely shiny clean.

        So if the stains didn’t come completely off the first time: rinse and repeat, as they say.

        clean pot 2.jpg

        See for yourself the difference the lemon and salt made!
        Reblog this post [with Zemanta]

        Sewing Tip: Bobbin Thread Color

        Usually when you thread your machine you use the same color for the top spool as you do for the bobbin.  This is fine when the fabrics you are sewing together are the same or when the underside of your project will never be visible.  However, if you are sewing something like a place mat and the top side is one color and the underside is a different color, it will look more professional if you match the thread on each side.

        This is easy to do: what you need to know is that when you’re top-stitching the thread you see on the right side of the fabric (the side facing up to you) is coming from the top spool of thread and the stitching underneath (the side facing down while
        you’re sewing) is coming from the bobbin.


        Match the bobbin thread as closely as you can to the fabric on the underside of your project.  If there is great contrast between the top and bottom fabrics (as seen in my example) some of the darker thread will still be visible on the underside but it will be a lot more subtle.

        Pantry Shelves: how to clean, store, and organize your kitchen dry-goods.

        One of the goals of the Farmhouse Finishing School is to help people learn better household management skills.  Keeping your spice and dry-goods shelves in your kitchen organized and cleaned out may seem a little too Martha-Stewart-perfect for some people but there are excellent reasons why you should periodically look at the food and spices you’re storing on your kitchen shelves and exert some effort to organize and clean it all up.  This is a primer on pantry management.  Some people have actual pantries, big enclosed rooms in which to store their canned and dry goods for cooking with, but most people have only a few shelves in their kitchen to use as their pantry.  In either case, the place where you store all your bulk long-term storage goods needs to be periodically inspected and cleaned.

        Here are a few reasons to do this:

        • Inspecting your dry-goods closely allows you to identify any pantry pest infestations.
        • Discover what dry-goods you don’t use and don’t buy them in the future.
        • Organizing what you have allows you to remember things you could be using that were hidden from view.
        • Storing your dry-goods properly will allow you to prolong their shelf-life.
        • When you can see what you have on hand you are less likely to buy doubles of anything.

        A view of my kitchen cabinet before the clean-up.  Please observe that many things were shoved on the shelves in plastic bags.  Goods stored in plastic bags are hard to see, vulnerable to pests, and more likely to go stale before being used, and there are health issues to consider as well.  What a mess!

        Over a period of several months I have been negligent about storing my pantry goods properly and this has caused several problems.  I finally got tired of not being able to see at a glance what was on my shelves and I decided to tackle the mess.  It took six hours to tame my spice cabinet and my food shelves, a task which would have taken a lot less time if I had been in a habit of storing things properly in the first place and cleaning my cabinets out more often.  It’s a good idea to do a thorough clean-out at least twice a year.

        I discovered that I had three boxes of powdered sugar, about six packages of mustard seeds, old grains that were stale, and spices with no integrity left they were so old and grey.  Because I have to be careful with what I spend on groceries I see that I have been exercising poor household economy.  If your kitchen cabinets look at all like mine did, then you need to clean them out too.  Where to begin?  It can be a daunting project.  I understand a reluctance to dive in but the rewards are worth it.  Be prepared to clean out a lot of jars.    If you have a working dishwasher this may save quite a bit of time.  I don’t, so I had to wash a ton of them by hand.  The first concept I want to discuss, before you dive in is proper storage containers.

        Out with plastic- in with glass!

        I can’t stress this enough: storing anything long-term in plastic is a practice you must wean yourself off of.  Plastic is an unstable material.  It emits, at different temperatures (most notably in heat) and in reaction to certain foods, molecules into your water and food.  Please feel free to do some research on the subject as I have done. Food kept in plastic containers can take on the smell and taste of plastic.  All plastics off-gas chemicals when new and many plastics off-gas from the time they’re made until they completely biodegrade which could take a few hundred years.    Once plastic molecules enter our water and/or food and we ingest them, they build up in our bodies and studies have shown that these plastic molecules are shared with babies through their mother’s breast milk. Plastics have been implicated in many health issues and continue to be studied.

        If you insist on continuing to use plastics to store food be sure that the plastics you use are Bisphenol-A free, don’t reheat food in plastic in the microwave even if your plastic containers say they are “microwave safe”, and don’t store sauces in plastic as it has been found that the wetter your food the more likely a transference of plastic molecules to your food is.

        Glass is generally more expensive than plastic storage containers but well worth the investment.  Glass is a completely inert material and therefore doesn’t off-gas chemicals into the air or into your food or body.  Cared for properly it can last indefinitely and is therefore will save you money over plastic in the long run.  Glass will never give your food an off flavor.    The number one best pantry container to store your dry-goods in  are swing-top jars.


        Swing-top jars, also called wire bale jars, have a replaceable rubber gasket and a metal clamp which secures the lid tightly onto the jar with and airtight seal.  The gaskets will dry out and crack with age so a part of your cabinet clean-out is to replace old gaskets.

        The disadvantage of swing-top jars is that they can be costly to buy.  If you have a “Cost Plus” near you,  see if they have any on hand.  I have, in the past, found their prices to  be reasonable.  You can also find these at most well stocked kitchen supply stores.  Sometimes you can find them in thrift stores.  If you find them used just be sure to sniff the interior before buying.  It is extremely rare for glass to take on a permanent odor but I had it happen to one jar.  Look for scratches on the interior, scratches compromise the usefulness of a jar rendering it much more likely to break.  Be sure to replace the gasket (if it even has one) with a new one when you get it home.  If you can afford to invest in a larger quantity of these jars at one time you can buy them from manufacturers online.  The best deal I have found so far is from Freund Containers, by the case.  They have a minimum order amount so be sure you are prepared to meet it.  You don’t need a special license to buy from them.  (Just to be clear: I have no affiliation with them at all except as a customer of their goods.  If you buy from them I receive no compensation or benefits.)
         

        The next best storage container for your pantry goods are canning jars.  These come in many different sizes.  They have a two piece lid which creates a good seal if you screw it tightly.  These jars are much less expensive to buy than the swing-top jars.  The disadvantage of these is that it is impractical to screw the lids tight enough to get an airtight seal because if you manage to get the lid on that tightly you may not be able to unscrew them later.  While I have never had a pest invasion in my swing-top jars I have definitely had a breach of my canning jars by pests.  But with good cupboard management you can keep this problem at a minimum.

        Getting Started:

        • Clean up your kitchen before you start this project.  You will need all the counter space and dish-rack space you have.
        • Have a stack of clean dry dish towels ready.
        • Be sure you have a sharpie pen on hand for labeling jars as you go along.
        • Pick one shelf to start working on.

        How to clean and organize the shelves:

        • Pull everything off the shelf you’ve picked to start with.  Everything.  Put it all out on your counter.  If you don’t have enough counter space you may consider dragging a small table into your kitchen temporarily to give you more space to lay it all out.  (If your kitchen is too small for this then even bringing in a chair can give you extra surface space.
        • One jar at a time, examine what you have.  Open each jar and look closely at the contents and give it a smell test.  If you haven’t used the contents in over a year you probably aren’t going to use it this year either. Throw it out.
        • Any herb or plant matter can be dumped on your compost pile.  If you have a hot composting system you can dump everything on the pile.  If you have a cold composting system you will want to avoid putting grains or proteins in it.  If you have hens some of your old grains may be enjoyed by them.  (But don’t give them rancid food.)
        • Clean the jars you empty as you go so they’ll be available for anything that’s been left in plastic bags and needs to be jarred.
        • Any goods still in plastic bags: transfer to jars and label the jars with your sharpie (directly onto the glass).
        • Wipe the empty shelf clean with a damp  dish towel or sponge.  Any spilled food, especially grains, will attract pests.
        • Put everything that has passed inspection back on the shelf.

        Repeat these steps for all of the shelves you need to go through.  Once you have finished throwing old food out and cleaning up what you have you can spend a little time organizing the shelves to make more efficient use of them.
        Here are some guidelines for deciding what to keep and what to toss:

        • Herbs and spices are generally at their best for one year.
        • Herbs and ground spices should have a pleasant strong odor on opening the jar.  If you can’t smell them or if the smell is weak, they are most likely too old to do your food any service.  Toss them out.  Save any glass spice jars and soak them in warm soapy water to remove the labels.
        • Turn the contents of jars around and upside down.  If you can see any webbing the contents have been compromised by a pest and should be thrown out.  If the contents (especially with regard to spices) don’t shift and move when you shake the jar around then they have probably settled from disuse and compacted- this is generally an indication that they are very old and should be discarded.  In some cases this will mean the contents got a little damp and should also be tossed out.
        • Look for any visible weevils or moth larvae.  Toss anything that has them.  (If the item is something your chickens might safely enjoy – give it to them.  They love to eat bugs!)
        • Everything should get the sniff test.  If you don’t have a great sense of smell then have someone in your family who does perform this test.  Flour, nuts, oils, nut butters, and grains can all go rancid.  The smell will be slightly sour and musty.
        • Canned goods, whether made at home or bought from the store, may be capable of lasting 10 years but they don’t actually improve with age and their nutritional integrity, like all stored foods, declines incrementally starting from the moment they are first canned.  In most cases you shouldn’t hold onto canned goods for more than two years.  If you haven’t eaten it by then, you won’t, you’re just hoarding it.  My personal rule of thumb is that if I haven’t eaten it in a year I toss it out.  You can put the contents of most canned goods on your compost pile so that they really aren’t going to waste but will add to your soil.  (Recycling at its best!)  The exceptions I make to my one year rule of thumb is if I preserve way more of something than I need one year and I have lots left over the next.  If I’m making my way through the jars of that item I will keep it, knowing that I’m actually eating it.  This is true of the pickles I made the year before last.  I made twice as many as we could eat in a year and we have been steadily working our way through them.  I still have some left and we’re still eating them.*  On the other hand, I have some jalapeno jelly that I made a year and a half ago that didn’t have any heat to it and so I didn’t really enjoy it and haven’t been eating it.  It’s time to toss it out.
        • Cabinet items that have been stored in their original packaging, such as crackers and cereals, should all be checked for freshness.  They go stale surprisingly fast.  One way to prolong the shelf life of cereals and crackers is to transfer them to swing-top jars when you get them home.  I now do this automatically with most boxed items.
        • Baking soda and baking powder don’t necessarily go stale or rancid but they will become less effective.  It is wise to replace them every six months or so.  You can often buy them from bulk bins and transfer them to permanent jars in your cupboard.  Buy small quantities to reduce possible waste.

        Now that everything is clean and all your food is in labeled jars…how do you organize it all?

        There isn’t one answer to this because how you use your kitchen is highly personal.  You must think about how you cook.  What things do you reach for the most?  Those things should be on the lowest most accessible shelves.  Reserve the top shelves for bulk goods you don’t use as often, or for back up bottles of condiments you buy or make in multiples.

        I have organized my own cabinets so that my son’s snack foods are all in one place on a low shelf.  My other lowest shelf has my baking goods on it (sugars, nuts, raisins, chocolate chips) and the next shelf up has the flours and grains I use the most.  The top shelf has my dried legumes which I only grab for once or twice a week to make big batches of them.  My spice rack is loosely organized by my use of them.  I have all my sweet  baking spices, including baking soda and baking powder, on one shelf.  I have my spicy and savory herbs on another shelf together.  I have all my bulk spices (like black peppercorns and mustard seeds) in large jars on the two shelves they will fit on.  This works for me but perhaps you cook differently and so you need to think about how you grab for things and group your jars together accordingly.

        Pantry organizing tips:

        • Group like things together: it is much easier to make shopping lists when you can easily see all like-items next to each other.  If you know you need more olive oil and you’re looking at the shelf where you keep it but you don’t see any vegetable oil (because you put it somewhere else) you may decide to buy some because you think you’re out.
        • Put the things you use the most on the most accessible shelves.
        • Spices and herbs should be close enough to your stove to be easily grabbed without being stored right above it where the heat and moisture from the stove can degrade them quickly.

        Don’t be afraid to try different ways of organizing your pantry.  Once you’ve already cleaned and sorted through your supplies it is much easier to move them around and play with how best to arrange them all.
        Now, go put on some motivating music, crack open a festive beverage, and get those cabinets looking shiny and fresh!
        *However, they are softer now than they were when under a year old.  They are not getting better with age.  I’m just not going to waste them because they still taste good and we’re still using them up.

        Soap Making: Learning From A Professional

        Last weekend I was able to watch my friend Kari, the owner of the company The Soap Barn, make a batch of soap.  I’m interested in learning to make my own soap and Kari says she’ll teach me.  A lot of people are scared to make soaps using lye  so they stick to melt-and-pour soaps.  Why use lye?  Lye is the ingredient in soap that makes it harden.  You can’t make soap without it.  A reader mentioned this to me and I’ve done further research and even glycerine soaps are made with lye.  In my experience the melt and pour soaps seem to to be softer while the soaps made from scratch are often harder and last longer.  From the reading I’ve been doing there are many factors that control the texture and the hardness of your soap including the proportions of your ingredients, method used, and the length of time you let your soap cure.  The only benefit of using melt and pour soaps, in my opinion, is to avoid having to use the lye yourself because it’s already been added for you.  Otherwise it’s more expensive to use and you have a lot less control over the quality of your finished product.

        • All her soap ingredients are measured by weight on a scale.

        I have never seen a lye based soap being made so it was fascinating and exciting.  One thing Kari pointed out to me is that she usually has all her soap making components ready to go, but because she was going to show me the process she dissolved her lye while I was there and we let it sit for a while.  When you add water to your measured amount of lye the water starts heating up immediately which is really weird and certainly illustrates how caustic it is.  She said she would normally have mixed the lye and water a couple of hours ahead of time because a lot of soap-making is about temperature.

        A tip from Kari: always add your lye to the water, never the other way around.  If you add water to the lye you could make a lye volcano and hurt yourself.

        All the soap making books and on-line instructions I’ve read have you cooking your lye and oils on the stove top.  Kari used to make her soaps this way too but heard of another way of doing it years ago and hasn’t gone back since.   She adds her lye to her oils and then blends it with an immersion blender until it thickens to the trace point.  When it’s reached the proper thickness she pours it into one of her wooden soap molds and puts it in the oven on a low temperature for several hours.

        Doesn’t that sound easier than cooking it on the stove-top?  Watching Kari make this batch made me feel a lot more confident that I can learn to do this too.

        You can see how thick it got just before she poured it into the mold.

        Here’s Kari smoothing the soap into the mold before heating it in the oven.  After about a day in the mold it will be hard enough to remove and cut into bars but you need to let the bars cure for several weeks, even a few months, for the soap to reach its maximum hardness.

        Why should you bother to make your own soap?  I think there are a few compelling reasons to make your own soap.

        Control Of Ingredients: the majority of soaps out there, whether or not they are fancy or cheap, have a lot of ingredients you’d be better off not using on your skin or polluting our waterways with.  Skin is a porous organ and anything you put on it will also go IN it.  Skin absorbs poisons really well.  So whatever you put on your skin should be healthy, gentle, and pesticide free.  The best way in the world to control what’s in your soap is to make it yourself.

        Cost Effectiveness (household economy):  there are some very cheap soaps out there that will fit a frugal budget but in most cases I’m willing to bet they’ve got a lot of stuff in them you wouldn’t really want inside your body.  Natural soaps are expensive.  You can nearly always save money making things yourself.  Not if you buy expensive kits from craft stores or from fancy gift shops, but if you buy bulk ingredients you can save a lot of money.  Sometimes buying bulk isn’t worth it for one family; consider going in on the ingredients with another family and make the soaps together!

        No Packaging Waste: every single time we purchase something it comes in packaging.  It is possible to buy soaps in specialty shops with no packaging, but this is still rare.  More often than not soap comes wrapped in some kind of paper and often it comes in paper and also a box.  It may not seem like much, but it all adds up.  When you make your own soap you don’t need any packaging.

        Personalized: when you make your own bath products half the fun is in being able to make exactly what you want.  You develop herbal combinations that specifically suit your skin type and your individual taste in scents.  Why let soap companies cram more lavender down your nose?*  There are so many essential oils and herbs you can use in your soaps to suit who you are and what your body really wants.  I think we all deserve that.

        We haven’t set a date yet but when Kari teaches me to make my own batch of soap I’ll be writing up a detailed tutorial so that you can make your own too!

        If you have no interest in making your own but would love to have another source for quality hand made natural soaps- check out Kari’s soaps at The Soap Barn!

        *I LOVE lavender but I have a friend who hates it.