Category Archives: Winter Recipes

Buckwheat the Hippie Way: recipe for buckwheat groats

hippie dinner 4
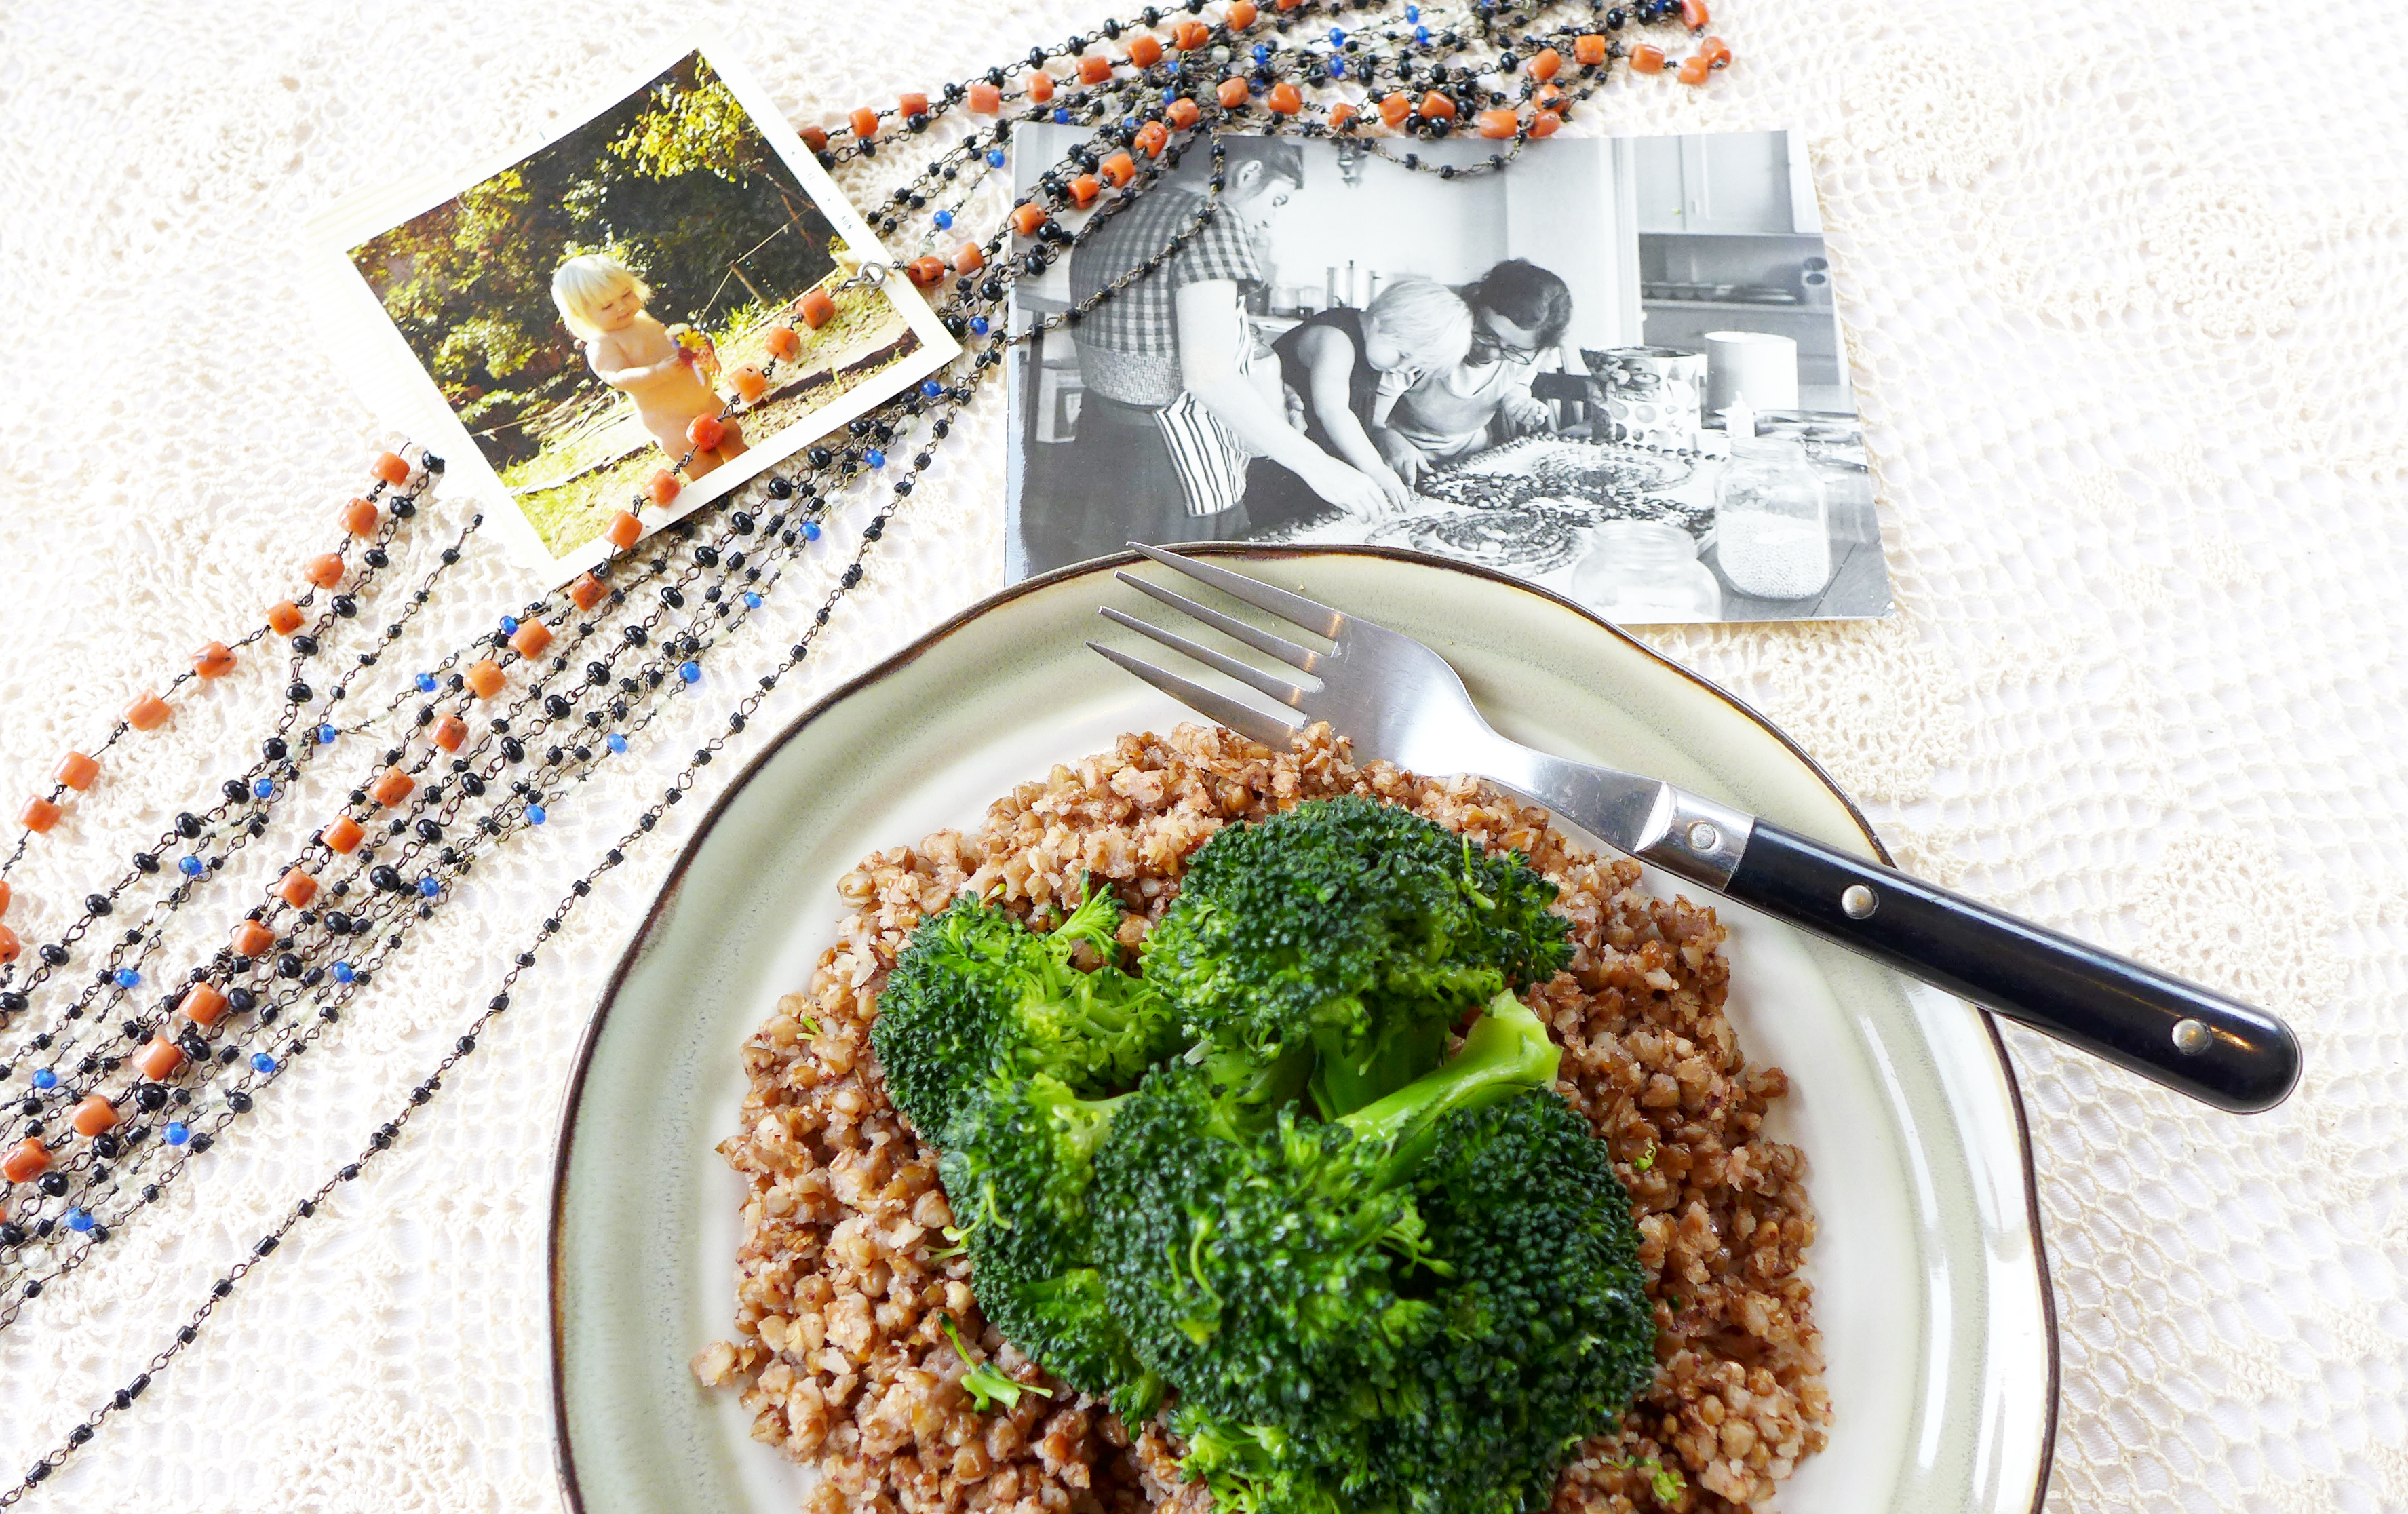
The naked child is me in 1971.  The back of the photo says “flower child” in my mother’s handwriting.  That was probably the last time I was naked in public.  The other picture is of me and my mom making “seed paintings” in the One World Family commune I was born into.  The beads are from my mom, given to her by my dad (I think).  Pretty sure he brought them  back from India himself.

buckwheat 7I grew up eating this stuff.  My peers think they discovered eating whole grains.  Pshaw!  While you were all eating hamburger helper and white rice I was eating this healthy crap.

Being raised by a hippie mother left an indelible mark on my culinary palate.  While my peers are discovering the marvels of millet, raw foods, fasting, and sprouted everything, I have done my best to distance myself from these horrors from my childhood food legacy.  The best use I could come up with for millet, for example, was to pretend it was Kix cereal for my Barbies.  (Though I never got to taste Kix as a child, I knew it had to be less difficult and more pleasant to chew.)  In spite of growing up to dislike brown rice and raw tofu, my mother was a good cook and there are dishes she made that I have fond memories of.  One that I’ve been wanting to recreate is fluffy buckwheat groats with steamed vegetables served with butter and soy sauce.  It’s earthy humble food that is beloved by no one but hippies and Russians, though in Russia the buckwheat is more likely to be the bed upon which a huge roasted pig is served.

The last time I had a craving for this dish from my childhood I followed the directions on the (very expensive) package of buckwheat I bought.  The instructions said to bring the buckwheat groats and water to a boil and then simmer for 20 minutes.  Within five minutes of simmering it I had a pot full of buckwheat mush.  Not to be discouraged, two years later I’ve made a fresh attempt to recreate the buckwheat of happy memory.  This time I followed directions for making it the traditional Russian way.  I brought my buckwheat just to a boil and removed it from the stove and put it in the oven for an hour in a bean pot.  I’m not going to lie, the kitchen smelled wonderful while the groats cooked, but they didn’t look promising having the look of mush in progress.

When I removed them from the oven and fluffed them with a fork I realized that they were almost fluffy, which was encouraging, but when I tasted them they were bitter.  Bitter?  Frugality prevented me from throwing my experiment away.  I put it in the fridge for a day.  Sometimes magic things happen to leftovers, right?  The next day I put on some Simon and Garfunkel, got out my mom’s old Indian beads and, determined not to waste food, I heated up the buckwheat while steaming some broccoli.  I added butter and soy sauce and ate it.  I don’t know if it was the music and beads, or if taking a time out in the fridge sweetened the buckwheat, but suddenly I was taken way back to the good parts of being the child of a Hippie.  It was the perfect fare for an overcast winter day in Northern California.

Buckwheat the Hippie Way

4 to 6 servings, depending on how much pot you smoked

Buckwheat the Hippie Way

Ingredients

  • 2 cups toasted buckwheat groats
  • 4 cups water
  • 2 Tbsp butter
  • 1 tsp salt
  • 1 1/2 lbs broccoli, cut into florets
  • soy sauce

Instructions

  1. Preheat your oven to 350°
  2. Put Simon and Garfunkle's greatest hits on your stereo.
  3. Put your India beads on and don't shave.
  4. Put the buckwheat into a medium saucepan with the water, butter, and salt.
  5. Bring just to a boil, stir it, and then put it in a small baking dish.
  6. Bake groats for 1 to 1 1/2 hours. Hippies aren't specific people. Remove from oven when all the water is absorbed into the grains. If you're antsy for precision, go smoke a joint or have an orgy while you wait to calm you down like my parents did. Fluff grains with a fork.
  7. While the buckwheat is cooling down, steam the broccoli just until tender.
  8. Put a healthy serving of grains down on your plate and top with broccoli and drizzle with soy sauce.
  9. Now you're eating a piece of my authentic hippie childhood. Feel free to rebel, I know I did. But if you grew up with fare like this I promise that no matter how goth or urban chic or sophisticated your tastes become, you'll always come back to this earthy weird food.
https://stitchandboots.com/2014/03/26/buckwheat-the-hippie-way-recipe-for-buckwheat-groats/

Winter Squash Ricotta Pasta Recipe

I love winter squash and don’t get tired of eating it.  I love it roasted, made into smooth soups, or made into chunky Thai soup with tofu and curry, and I love it mashed up with butter, salt, and pepper.  This pasta dish is my new favorite to eat winter squash.  One of its charms is that it doesn’t call for a lot of ingredients and another of its charms is how fast and easy it is to prepare.  I have made it several times in the last few weeks and always in a huge batch because I need leftovers for lunches for three adults.  I give you the recipe for a regular sized batch but if you want a giant pot of this just double the recipe.  The sauce will become very thick after cooling so you can add a little water when reheating if you like.

Winter Squash Ricotta Pasta Recipe

6 servings

Winter Squash Ricotta Pasta Recipe

Ingredients

  • 1 Tbsp olive oil
  • 1 onion
  • 1 cup winter squash (cooked)
  • 1 cup ricotta
  • 1 cup water
  • 2 garlic cloves, finely chopped or pressed
  • 1 tsp salt
  • 1 tsp thyme
  • 1/4 tsp nutmeg
  • 1/8 tsp cayenne
  • black pepper to taste
  • 12 ounces angel hair pasta

Instructions

  1. Heat the olive oil in a pot on med/high heat. Add the onion and saute until translucent and browning slightly. While sauteeing the onion, fill another pot full of water with a pinch of salt and bring to a boil, then add your pasta.
  2. Puree the winter squash, ricotta, water, and all the seasonings in a bowl using an immersion blender (or you can use your food processor for this). When it's completely smooth add it to your onion and let it come to a boil and then turn the heat down to med/low while your pasta is cooking. Stir frequently. Take off the heat when your pasta is done cooking.
  3. Drain the pasta, add it to the pot with the sauce and toss it well.

Notes

This whole recipe comes together within fifteen minutes for me. I suggest having all your ingredients measured out before you begin so you don't have to mess with it while everything is cooking. If your onion is done but you aren't ready to add the sauce to it - be sure to take it off the heat so it doesn't burn. If you want your sauce to be thinner - just add more water. You can use broth, of course, but this recipe doesn't require broth for flavor. One other thing - I've played around with the cayenne amounts and I like it somewhat spicy. If 1/8 tsp seems like too much for you then start with less.

What kind of winter squash you use is up to you. I prefer rich dry squash varieties such as butternut, buttercup, hubbard, or Queensland blue. To bake squash you cut them open, gut them of seeds, halve or quarter them and put on a baking sheet and cook in an oven at 375 degrees until soft. There is no need to cover in foil or oil the baking sheet or the squash.

https://stitchandboots.com/2012/01/29/winter-squash-ricotta-pasta-recipe/

Vegetarian Split Pea Soup Recipe

This soup post is dedicated to the three animals that make our every day life incredibly rich and funny: Pippa, Penny, and Chick.  We love all three of them in spite of the fact that they wake us up in the wee hours for various reasons, they shed, they get fleas, they create enormous inconveniences… and yet:  every single day we have them in our lives they make us laugh, they repay us in kind for the things we do for them, they curl up and keep us warm on cold winter nights, they cheer us up when we’re depressed for no reason.   And Pippa, most especially our funny bow-legged, silly, sweet Pippa who helps Max get to sleep every night and suffers our stifling affections for her and her antics which we know she can’t help, being a little weird in the head from being abandoned at 4 weeks old by her mother and suffering malnutrition (also the cause of the bow legs).  Without Pippa we would be so much less than we are.

I’m linking this post to Branny Boils Over‘s ASPCA donation challenge (for every soup post that’s linked up to theirs dedicated to a loved pet they will donate $1 to the ASPCA).  The deadline to participate is January 31st so there’s plenty of time for you all to join in and raise some money for the care of animals!  Please note that you don’t even have to have a blog (or if you have a blog but it’s not a food blog – no problem) please go over to Branny Boils Over to read how you can be part of this too.

Most people know split pea soup as a smooth porky flavored comfort food.  Not in my house.  Being brought up vegetarian, my mom had veg versions of most of the classics and this is roughly based on the version she made for me growing up.  It’s the first soup I ever mastered on my own.  It has chunky vegetables in it but the peas become smooth as it cooks for a long time.  I prefer to use fresh dill whenever possible but I’ve failed to get it established in my current garden and no one local sells it here.  So I use dry these days.  If you’re looking for something that mimics the taste of ham-hock, this is not the soup for you.  But for everyone else – this is an amazing split pea soup!

Vegetarian Split Pea Soup

8 servings

Vegetarian Split Pea Soup

Ingredients

  • 1/4 cup olive oil
  • 1 onion, diced
  • 3 carrots, chopped
  • 3 stalks celery, chopped
  • 3 quarts stock (or water)
  • 2 1/2 cups split peas
  • 2 potatoes, diced
  • 5 cloves garlic, minced or pressed
  • 2 tsp dill (or one whole bunch fresh, minced)
  • 2 tsp salt
  • pepper to taste
  • 1 head cauliflower, cut in small florets

Instructions

  1. Heat the olive oil in a large soup pot and once it is hot add the onion, celery, and carrots. Saute them until the onions are translucent and the edges starting to brown.
  2. Add the stock and stir in the split peas. Bring the stock to a boil and then turn it down a little to med/high heat. Add the potatoes, garlic, dill, salt and pepper.
  3. Cook the soup for a long time, stirring every five minutes. When the peas begin to break down you need to pay more attention, stir more frequently to keep them from sticking to the bottom of the pan. Turn the heat down to med/low. It usually takes a minimum of an hour for the peas to start breaking down. It will take a minimum of a half an hour after that for them to get silky and fully cooked.
  4. Once the split peas are completely soft add the cauliflower. This will not take long to cook. When the cauliflower is just tender the soup is done.

Notes

It is very important to note that you must be intuitive about the amount of water/stock needed. I've given the minimum amount that I find I need every time I make this. Depending on how quickly the peas break down you may need to add more water. You add more water when it becomes thick and the peas aren't yet done cooking (that means they need to absorb more water to be done or they'll stubbornly adhere to the bottom of your pot) and you add more water if the soup is thicker than you like it once the peas are done cooking.

The smaller you chop your vegetables the more quickly they'll break down and blend with the split peas. If you want to have chunks of vegetables when the soup is done, cut them into larger pieces. This soup usually takes 2 hours to make. I realize that's hard to fathom in this day of FAST recipes. It isn't fast and it's completely worth the time it takes to cook. You can, of course, cook this in a slow cooker but I'll be honest - I've done that and I hated it. So I obviously can't personally recommend that you do that. I add the cauliflower last because it doesn't take long to cook and I like to have whole cauliflower pieces in the soup.

If you want to make a cauliflower garnish as I've done for the picture - cut a 1/4" cross section from the middle of the whole head of cauliflower before cutting it into florets. Brush the cross section with olive oil and broil it in the oven on both sides until browned.

https://stitchandboots.com/2011/12/30/vegetarian-split-pea-soup-recipe/

Russian Pot Pie

cooked Russian 2.jpg

This is the perfect dish to serve after a hard day chasing yak on the tundra!

Eastern Europe isn’t especially famous for its vegetarian food.  Occasionally I like to check out Russian, Ukranian, and Croatian cook books from the library.  Most of them were written and photographed so long ago that the photographs are somewhat dreary.  Still, I am attracted to the culture (and culture clashes), the food, and the architecture of Eastern Europe. 

I did research about Ukranian and Russian food while writing my first (unpublished) novel “Jane Doe” and was fascinated by solyanka, a soup with pickles in it.  I feel sure I will one day make a meatless version of it.

This dish was inspired by a recipe I tried first many years ago from the cookbook “Vegetarian Epicure” by Anna Thomas.  I don’t even have the book anymore and don’t remember how she made it or exactly what was in it but what I got from her recipe for a Russian style pie was the combination of marjoram, cabbage, and mushrooms with hard boiled eggs.  I have been making different versions of this combination for a long time and finally decided to make it into pot pies and change the marjoram to dill.

I don’t have a pie crust recipe prepared for you but if you don’t already have your own favorite try this Simply Recipes pate brisee, it’s almost the same as the one I use.  You need enough pie dough for one crust and you’ll need 6 8 oz ramekins or other single serving dishes if you want to make the pot pies.  If you don’t want little pies you can make this as one single big pie.


Russian Pot Pie

makes 6 pot pies

Ingredients:

Enough pie dough for one crust, portioned into 6 pieces
6 hard boiled eggs

1/4 cup olive oil
1 yellow onion, diced
1 lb button mushrooms, sliced
1 head cabbage, chopped small
1/2 cup water (appx)
1 1/2 tsp dried dill
1 tsp salt
30 grinds fresh pepper
16 oz sour cream

Method:

Preheat oven to 350 degrees.

Heat the olive oil in a large saute pan on med/high, add the onions and cook until they just start to become translucent.  Add all the mushrooms and cook until they are completely soft.  Add the cabbage, dill, salt, pepper, and the water and put the lid on the pan, removing every couple of minutes to stir and make sure the pan hasn’t gone dry.  If the cabbage isn’t tender yet but is starting to brown, add a little more water. 

When the cabbage is tender turn the heat down to low and add the sour cream, stirring it in well.  When heated through, remove from heat.

Put your ramekins on a baking sheet to catch any overflowing juices from the pies.  Fill each ramekin halfway with the cabbage and mushrooms.  Slice and layer a hard boiled egg into it.  Fill to the top with more mushroom and cabbage.  You should have enough to fill all six to a rounded mound, but if not, that’s okay.  It will vary depending on the size of your cabbage.

Roll out the six pieces of dough into circles just a little bit bigger than the circumference of the ramekins.  Lay the dough on top of each one pushing the edges against the edge of each dish to seal it shut.  Use a small sharp knife to make little slashes in the dough to let the steam out while cooking.

Bake in the oven until the crusts are turning golden (about 45 minutes).


Recipe Notes:
  I’ve made this with marjoram instead of dill and loved it both ways.  I have also made it without the sour cream which Philip and I loved but my mom thought it was too dry.  As I’ve mentioned before, I use a light sour cream but only because Tillamook makes a really flavorful one. 

This could be vegan if you use a vegan crust, leave out the egg, and don’t use the sour cream.  That might not sound good to some people but what is most important in this dish is the cabbage, mushrooms, and seasonings- it’s really good right from the pan so I encourage my vegan friends to come up with their own version.  If you wanted it to have some protein I would add some white beans which won’t take away from the other flavors but would make it more hearty. 

Enhanced by Zemanta

Tofu Stroganoff

dressed stroganoff 2.jpg
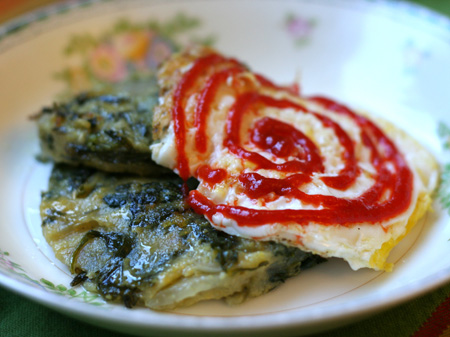
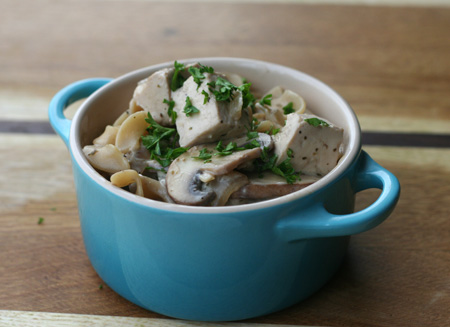
I have never had Beef Stroganoff because my mom raised me as a vegetarian.  I have no idea what the traditional dish should taste like but this recipe is my version of the dish my mom came up with as a vegetarian alternative.  I have settled into a routine of making it without thinking about it and it has quietly evolved over the years.  As I’ve been making it recently I couldn’t remember if I used to put garlic in it.  I love garlic but if it was ever part of the original dish my mom created, I can’t remember.  What I offer here is the version I’m making right now. 

Even if you like to eat meat, why not try this version the next time you need to feed someone who doesn’t?  It’s comforting, satisfying, and easy to make. 

tofu squares 2.jpgTofu Stroganoff Recipe

Ingredients:

1/4 cup olive oil
1 onion, chopped
1 1/2 lbs crimini or button mushrooms, sliced
1 block firm tofu
30 grinds black pepper
1 tsp dried thyme
1 tsp dried marjoram
16 oz sour cream
1/4 cup soy sauce
8 oz whole wheat egg noodles

Method:

In a large pan saute the onion on med/high heat in the olive oil until transparent.  Add the mushrooms and stir occasionally until they are slightly browned.  While the mushrooms are sauteing, boil salted water in a pot for the pasta.

Add the tofu to the saute pan along with the pepper, thyme, and marjoram.  Stir well and cook for about five minutes.  By this time your water should be boiling, add the pasta to it and cook until just tender.

Turn the heat down to low and add sour cream and soy sauce to the mushrooms and tofu and stir in well.  When you’ve drained your pasta add it to the saute pan and stir it all together.  Serve and eat!  But don’t burn your tongue. 


le fake stroganoff 2.jpg

Recipe notes:  I cut my tofu into roughly 3/4″ cubes because I don’t want the tofu hidden.  If you prefer you can cut the tofu much smaller so that it’s not as visibly noticeable.  I would avoid using a soft tofu, however, as it will dissipate.  For those people who like more texture to their tofu an extra firm tofu will work well.  I used whole wheat egg noodles but you can make this dish vegan if you use rotelli pasta and use a sour cream substitute.  If you want to make this dish gluten free, simply use gluten free pasta in place of the wheat pasta.  One last note: I rarely use “lite” versions of products but I accidentally bought Tillamook’s lite sour cream once and it was so good I’ve continued to buy it.  That’s not what my mom used when I was growing up and if the brand of sour cream you buy is mild to begin with the lite version may be too bland for this recipe.     

Vegan Black Bean and Winter Squash Burrito

good burrito 2.jpg
I have never eaten a vegan burrito before in my life.  Burritos are one of those things that may as well say CHEESE in neon above them.  However, I have been wanting to make more vegan meals because having blocks of cheese around the house is not so good for me.  If it’s there I will eat it.  I will snack on it at all hours.  If I’m up and there’s cheese it’s the best thing in the world to snack on.  Except that it isn’t.  That’s not the only reason, cheese is expensive.  I often tell myself that since I don’t buy any meat it’s okay that cheese is expensive, but that’s a lame reason to buy anything.  Lastly, I have a few vegan friends and I want to have a really good collection of recipes I can make for them that will satisfy all of us.

It is hard for me to face a cheese-less burrito.  At least, it was before I made these.  The main thing is to make some chimichurri sauce.  It adds such fantastic flavor and the tanginess completely makes me forget that there is anything else I could want in it.  If you don’t normally eat vegan I suggest you give these a try.  You can easily halve the recipe if you don’t like making large quantities.  I froze most of mine so I can grab a quick healthy lunch when I haven’t got time to cook. 

Vegan Black Bean and Winter Squash Burrito
makes 8 burritos

Ingredients:

2 cups black beans (cooked)
2 cups winter squash (mashed)
1 tsp ground cumin
1/2 tsp salt
2 cups Mexican style rice
1/2 cup chimichurri sauce
8 flour tortillas

Method:

Mix together the black beans, winter squash, cumin, and salt in a medium sized bowl. 

the filling 2.jpg
In a cast iron skillet (or regular large skillet) warm up a tortilla and spread out 1/2 cup of the beans and squash down the middle making sure to leave a couple of inches at either end for folding up.

Add 1/4 cup rice on top of the beans.  Make a little well down the middle of it and add 1 Tbsp of the chimichurri sauce to it.  Putting it in a well in the middle of the ingredients helps prevent it from running out of the burrito as you fold it up.

Folding a burrito is simple but after trying to write instructions out I think it would be easier to provide you with links to instructions.  Please don’t microwave your tortillas.  I have found two videos for different ways to fold them:

The video by David Windsor Foods  http://www.youtube.com/watch?v=rGJHk6BCQF0

This tortilla rolling gem:  http://www.ehow.com/video_2298342_roll-beef-burrito.html

I will take pictures of the process myself and make a separate post for it.

Recipe Notes:  Make the Mexican rice!  You can use plain but if you do, have extra chimichurri sauce on hand and use a little extra in each burrito.  But really, just make the Mexican rice, you won’t regret it.  A bowl of rice with some salsa and maybe a little cheese (or not) is so good to have on hand.  Any kind of rich dry winter squash will do such as butternut, sweetmeat, or hubbard.  And whatever you do, don’t make fun of my burrito photo.  Burritos are not pretty food!

Mexican Style Rice Recipe
Chimichurri Sauce Recipe

Enhanced by Zemanta

Cooking basics: How to Bake Acorn Squash

blond acorn 2.jpg Baking squash might seem too ridiculous to an experienced cook to explain but considering how many people I’ve met who’ve never baked their own pumpkin for pie, I think it’s important to cover the basics.  I like to think that if I died before teaching my son how to cook, he could come to my homesteading blog to learn how to do the basic things that mothers tend to teach their children in the kitchen before they ever set eyes on their first cookbook.

I would like to say, then, that there is no life instruction too ridiculous to teach a person who doesn’t already know it.

cut lengthwise 2.jpgAcorn squash are usually a dark green on the exterior (the ones in these pictures are mutants from a local farmer!) and medium to light yellow on the interior.  Their flesh is somewhat stringy and a little on the watery side compared to sugar pumpkins or other large squash.

1.  Preheat your oven to 375 degrees.

2.  Cut your acorn squash lengthwise.  Try to cut it into two even halves.  You can see that I didn’t completely succeed with one of mine!

stringy 2.jpg3.  Using a strong metal spoon scrape the seeds and the most fibrous part of the squash cavity out.

facing down 2.jpg
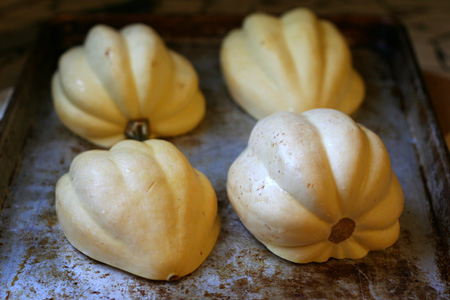
4.  Place face down on a sturdy baking sheet.  Preferably not a non-stick.

baked 2.jpg

5.  Bake until tender.  How long this takes will vary depending on the size of the squash and the thickness of the flesh but it should take somewhere around 45 minutes.  To test done-ness: you will be able to stick a knife into the skin with no resistance when it is done.

Things to consider:

Some people like to brush the undersides of the squash with olive oil.  You may do this if you like but it is unnecessary.

Many people like to cover their squash with aluminum foil.  This is also not necessary and I would recommend you don’t do this to prevent waste in the kitchen.  I’ve heard some people say that it helps cook the squash faster by holding heat in but at least with regards to acorn squash you get the same effect by cooking them face down in halves.

You can cook the squash at 350 degrees and just expect it to take a little longer.  I cook all my squash at 375 degrees which I think lessens the over-all cooking time without overcooking it too fast which a higher temperature might do.

What now?

Stuff them:
  They’re perfect for stuffing because a half a squash is a good single serving size.  If you fill it with grains and beans you will have a complete protein and with some salad on the side you will have a very nutritious meal.

Dress them:  While still hot add a tablespoon of butter, a sprinkling of salt (about five shakes from a shaker) and some grinds of fresh pepper (also about five), then eat it.  Simple good food.  You can do this right in the skin or if you prefer you can scoop the squash out of the skin and then add the butter, salt, and pepper.

Enhanced by Zemanta

Polenta with Spinach, Onion, and Garlic

hot sauce spiral 2.jpg
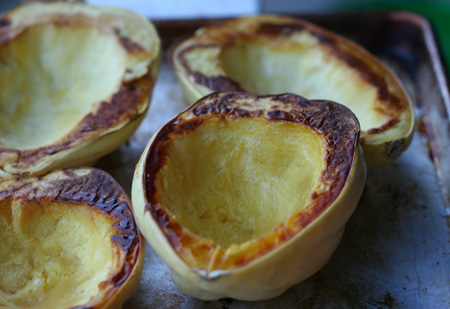
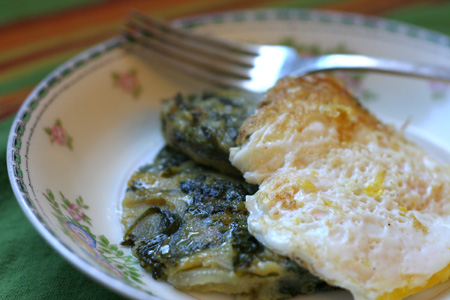
What’s the difference between polenta and cornmeal?  Nothing.  Polenta is boiled cornmeal.  You can make polenta using a fine, medium, or course grind of cornmeal which will determine how long it takes to cook.  The coarsely ground polenta will take at least 45 minutes to cook, sometimes longer.  I personally prefer a medium to fine grind because it’s silkier but a lot of my friends and family prefer the coarser grinds for the grainier texture.

This is a versatile dish.  It goes well with almost anything.  I make my polenta different almost every time using what I have on hand as my inspiration.  When it’s first cooked it’s soft and porridge-like, perfect for spooning into a bowl with a heap of sauteed greens and garlic, but when it cools it firms up so I always pour it out onto a baking sheet, smooth it, and when it’s cooled I cut it into squares or use a biscuit cutter to cut it into circles and store it in the fridge for frying up later.

This particular batch made one dinner and several breakfasts.

best breakfast 2.jpg

Polenta with Spinach, Onion, and Garlic

Ingredients:

1 1/2 cups polenta
6 cups of water
4 cloves of garlic
1 tsp salt
30 grinds fresh pepper

1 lb spinach, washed and chopped
1 onion, diced
2 tbsp olive oil

To prepare leftovers for breakfast:
2 pieces of cut polenta
2 eggs
1 tbsp olive oil
salt and pepper
Sriracha hot sauce

Optional:
two slices of jack cheese

Method:

In a large sauce pan bring the water to a boil.  As soon as it boils turn it down to low heat and whisk the polenta into it, this is important because the whisking keeps the polenta from making lumps in the water.  Whisk really well to incorporate.  Press the garlic into the polenta, stir well, and then put the lid on the pot and let it cook.

Heat the olive oil in a large saute pan on med-high heat.  Add the onion and saute until translucent, then add the spinach and toss until well wilted, turn the heat down a little and put the lid on the pan to encourage steaming and stir every couple of minutes until the spinach is tender.

Stir the onion and spinach into the polenta, add the salt and pepper and stir well.  It is ready to spoon into bowls now unless you are using the coarse grind of cornmeal.

For the coarse grind you will need to let it continue to cook.  Total cooking time for coarse grind should be a minimum of 45 minutes, though some people swear it takes no less than an hour and a half (Italians do, anyway).  To check for done-ness taste a small cooled spoonful, if it’s done it will not be gritty.


To prepare leftovers for breakfast:

Heat the olive oil in a medium saute pan.  When hot, place two slices of polenta (pictured above are rounds I cut with a biscuit cutter) into the pan and crack two eggs next to (not on) the polenta.  The polenta is done when it is heated through and slightly browned.  The eggs are done when you say they are done.  Sprinkle the eggs with some salt and pepper.

If you like cheese you can stack a piece of polenta and and egg with a slice of cheese between them.

I highly recommend eating this with Sriracha hot sauce.

Recipe notes:  To make the breakfast vegan you can eat the sauteed polenta with beans (seasoned black beans would be very good) or with seasoned sauteed tofu.  This is a great and balanced breakfast- grains, greens, and protein.  I ate it for a week and it was the best thing about my day.  Yeah, hard week.


This recipe is vegan (if not using the egg or cheese for the breakfast leftovers)
This recipe is gluten-free.

Grapefruit Avocado Salad

This is a classic winter salad that invites a lot of variations.  The tartness of the citrus is mellowed and complimented by the richness of the avocado.  I am transcribing a very simple version here with almost no adornment because I think it’s always best to start off with something simple and then embellish from there.

I don’t buy a lot of imported produce because I believe it’s important to eat mostly locally grown food but I allow myself a few indulgences and one of the regular indulgences I allow are avocados.  Because I let myself buy quite a lot of avocados I don’t let myself buy citrus very often.  A family friend sent me two boxes full of oranges, lemons, and grapefruits from her own yard that she grew without pesticides- it was a gift  beyond price!  I haven’t had a grapefruit avocado salad in years and it is the perfect antidote to the usual deep winter root vegetable flavors and the grey skies.


Ingredients:

4 cups lettuce

1  large avocado

1 grapefruit

4 tbsp mustard vinaigrette

(Serves 4 as a side salad or 2 as a main salad)

Method:
Divide lettuce onto your plates evenly.  Slice the grapefruit in half and then (using a small sharp knife) cut out the sections and divide the slices evenly between the plates.  Slice your avocado in half, remove the pit, and then slice long narrow slices lengthwise.  If serving only two plates of salad remove all the long slices from one half and arrange on one plate (fanning them out is pretty) and then do the same with the other half.  If making four side salads then I cut the long slices in half and divvy the avocado up between the four plates and arrange neatly.  Drizzle 1 tbsp of dressing on each side salad or 2 tbsp on each main salad.


Variations: Kalamata olives are very good with citrus and avocado.  Feta is wonderful on this salad.  Instead of a mustard vinaigrette you could use a balsamic or a dressing flavored with rosemary.  Slice red onions paper-thin and add to each plate sparingly.  The same can be done with shallots.  If you don’t have grapefruit but you have very good oranges on hand- use them!  Oranges go very well with the avocado too.

Turmeric Roasted Rutabagas

Rutabagas aren’t as commonly used in the US as turnips and yet they are, in my opinion, much more delicious.  In Scotland and other places in Europe rutabagas are known as “yellow turnips” or “Swedes”.  When raw they have a similar sharp peppery bitter smell and a watery crisp consistency but when roasted rutabagas are much richer than regular turnips.  They are a golden color and sweeten with roasting.


In this recipe I have seasoned rutabagas with turmeric which intensify the golden color of the rutabagas and add an additional earthy tone to the flavor.  This is a simple side to make to dinner whether you are having a vegetarian main course or a meat dish.  It is a fall and winter root vegetable which can be stored in root cellars so may also still be available in early spring, but by mid spring should no longer be making appearances on the dinner table.  Enjoy it now!

Turmeric is not a spice I use often but I got inspiration from my friend Riana here on her flickr pages in her series on healing herbs and spices and how to use them in everyday ways.

Ingredients:

4 medium to large rutabagas, trimmed cubed to 1″ pieces

1/4 cup olive oil

1/2 tsp turmeric

a couple of pinches of coarse sea salt

several grinds of pepper

Method:

Preheat oven to 375 degrees.   In a large roasting pan or a large heavy duty baking sheet, spread out the rutabagas.  Sprinkle the salt and turmeric on the rutabagas.  Grind the salt on them.  Drizzle all of the oil on them and then, using a spatula, toss the vegetables in the oil and spices until thoroughly coated.

Put in the oven and every ten minutes turn the rutabagas with a spatula to be sure that all sides have a chance to roast.  When the rutabagas are soft and melting on the inside with crunchy golden roasted edges, they are ready to serve.  At this temperature it should take between 45 minutes and an hour.

Recipe Notes: You can cook these more quickly by increasing the oven heat to 400 degrees, but if you do this you need to check them more frequently to prevent scorching.  I like to use an herbed coarse salt on all my roasted vegetables, if you’d like to do the same but don’t have any you can simply add  1/2 teaspoon of your favorite dried herb combination.