Author Archives: angelina

Vegetarian Split Pea Soup Recipe

This soup post is dedicated to the three animals that make our every day life incredibly rich and funny: Pippa, Penny, and Chick.  We love all three of them in spite of the fact that they wake us up in the wee hours for various reasons, they shed, they get fleas, they create enormous inconveniences… and yet:  every single day we have them in our lives they make us laugh, they repay us in kind for the things we do for them, they curl up and keep us warm on cold winter nights, they cheer us up when we’re depressed for no reason.   And Pippa, most especially our funny bow-legged, silly, sweet Pippa who helps Max get to sleep every night and suffers our stifling affections for her and her antics which we know she can’t help, being a little weird in the head from being abandoned at 4 weeks old by her mother and suffering malnutrition (also the cause of the bow legs).  Without Pippa we would be so much less than we are.

I’m linking this post to Branny Boils Over‘s ASPCA donation challenge (for every soup post that’s linked up to theirs dedicated to a loved pet they will donate $1 to the ASPCA).  The deadline to participate is January 31st so there’s plenty of time for you all to join in and raise some money for the care of animals!  Please note that you don’t even have to have a blog (or if you have a blog but it’s not a food blog – no problem) please go over to Branny Boils Over to read how you can be part of this too.

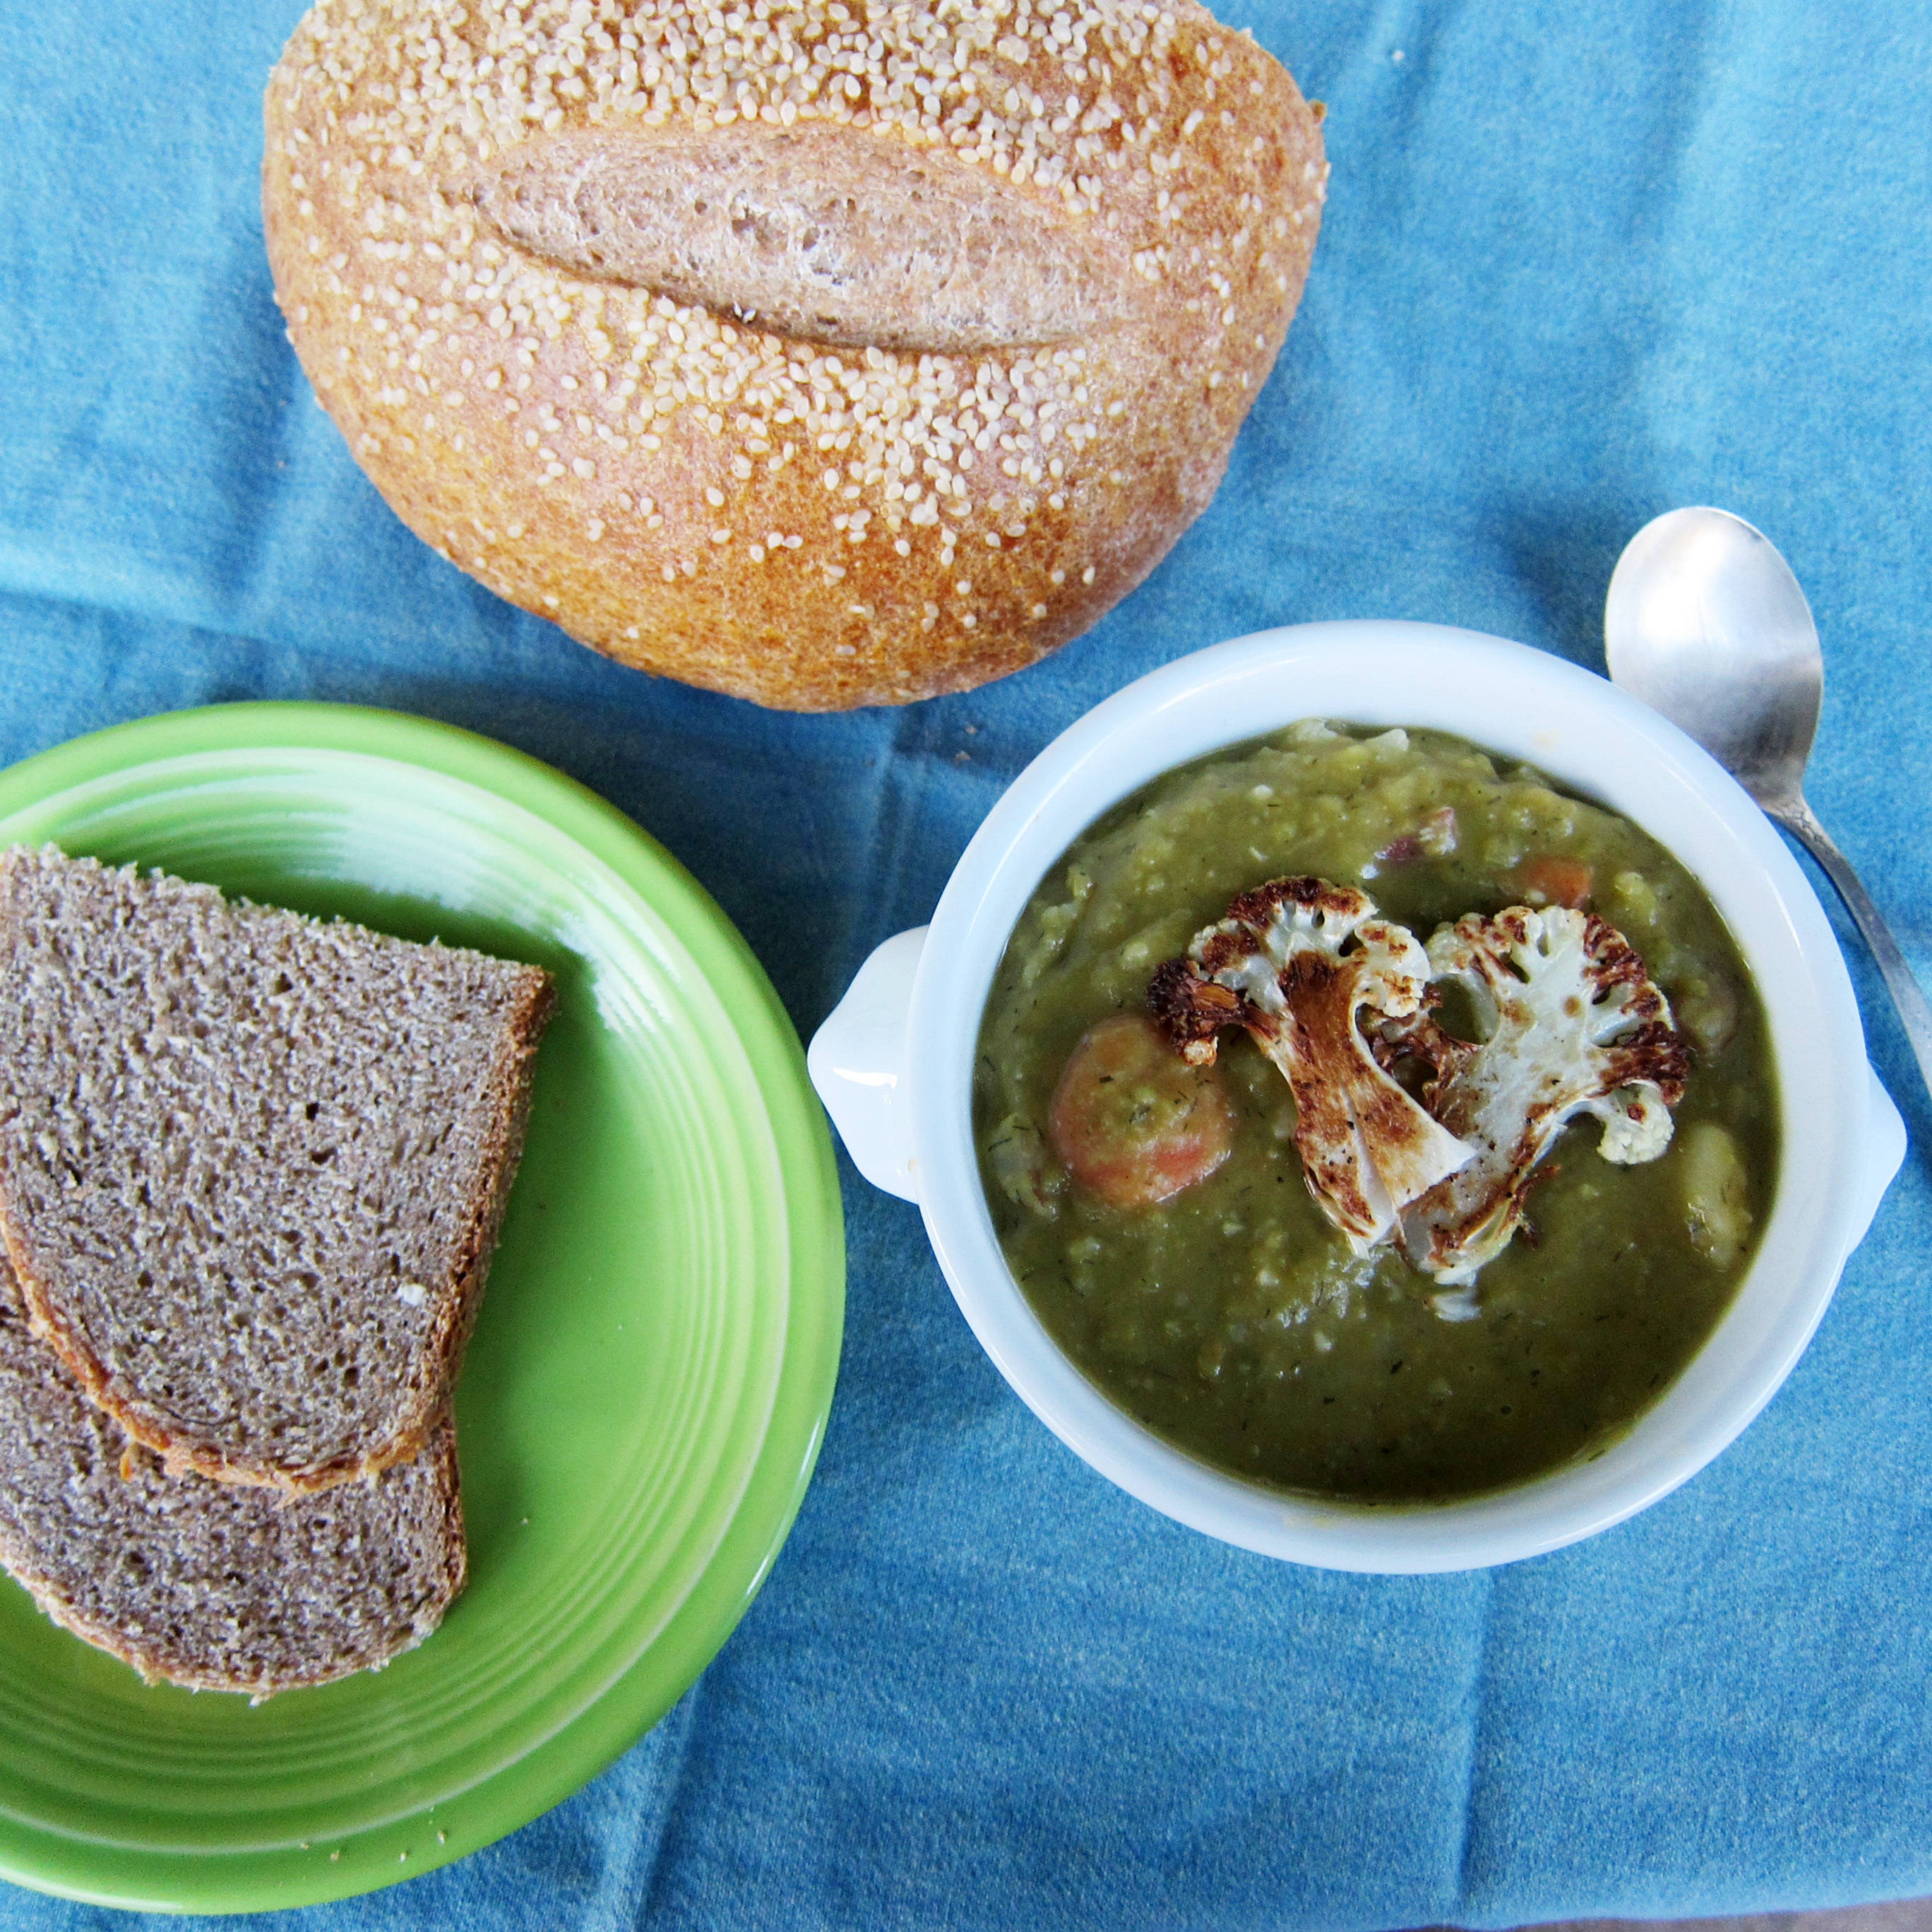
Most people know split pea soup as a smooth porky flavored comfort food.  Not in my house.  Being brought up vegetarian, my mom had veg versions of most of the classics and this is roughly based on the version she made for me growing up.  It’s the first soup I ever mastered on my own.  It has chunky vegetables in it but the peas become smooth as it cooks for a long time.  I prefer to use fresh dill whenever possible but I’ve failed to get it established in my current garden and no one local sells it here.  So I use dry these days.  If you’re looking for something that mimics the taste of ham-hock, this is not the soup for you.  But for everyone else – this is an amazing split pea soup!
Vegetarian Split Pea Soup

8 servings

Vegetarian Split Pea Soup

Ingredients

  • 1/4 cup olive oil
  • 1 onion, diced
  • 3 carrots, chopped
  • 3 stalks celery, chopped
  • 3 quarts stock (or water)
  • 2 1/2 cups split peas
  • 2 potatoes, diced
  • 5 cloves garlic, minced or pressed
  • 2 tsp dill (or one whole bunch fresh, minced)
  • 2 tsp salt
  • pepper to taste
  • 1 head cauliflower, cut in small florets

Instructions

  1. Heat the olive oil in a large soup pot and once it is hot add the onion, celery, and carrots. Saute them until the onions are translucent and the edges starting to brown.
  2. Add the stock and stir in the split peas. Bring the stock to a boil and then turn it down a little to med/high heat. Add the potatoes, garlic, dill, salt and pepper.
  3. Cook the soup for a long time, stirring every five minutes. When the peas begin to break down you need to pay more attention, stir more frequently to keep them from sticking to the bottom of the pan. Turn the heat down to med/low. It usually takes a minimum of an hour for the peas to start breaking down. It will take a minimum of a half an hour after that for them to get silky and fully cooked.
  4. Once the split peas are completely soft add the cauliflower. This will not take long to cook. When the cauliflower is just tender the soup is done.

Notes

It is very important to note that you must be intuitive about the amount of water/stock needed. I've given the minimum amount that I find I need every time I make this. Depending on how quickly the peas break down you may need to add more water. You add more water when it becomes thick and the peas aren't yet done cooking (that means they need to absorb more water to be done or they'll stubbornly adhere to the bottom of your pot) and you add more water if the soup is thicker than you like it once the peas are done cooking.

The smaller you chop your vegetables the more quickly they'll break down and blend with the split peas. If you want to have chunks of vegetables when the soup is done, cut them into larger pieces. This soup usually takes 2 hours to make. I realize that's hard to fathom in this day of FAST recipes. It isn't fast and it's completely worth the time it takes to cook. You can, of course, cook this in a slow cooker but I'll be honest - I've done that and I hated it. So I obviously can't personally recommend that you do that. I add the cauliflower last because it doesn't take long to cook and I like to have whole cauliflower pieces in the soup.

If you want to make a cauliflower garnish as I've done for the picture - cut a 1/4" cross section from the middle of the whole head of cauliflower before cutting it into florets. Brush the cross section with olive oil and broil it in the oven on both sides until browned.

https://stitchandboots.com/2011/12/30/vegetarian-split-pea-soup-recipe/

Rosemary Polenta Recipe

I have made this dish for over 20 years. I never had a recipe to start with. I was inspired to make this by the amazing bowl of rosemary polenta I once had at Kuletto’s Italian restaurant (on Powell Street in San Francisco) back when I was still a fashion design student. It is almost single-handedly responsible for making me get into the kitchen at a time when most of my friends and myself subsisted off of cheap diner food and boxed pasta. This is the perfect warm sustaining dish to eat on cold fall and winter nights. Served with a big pile of sauteed greens or a salad it is absolutely perfect. Obviously, for those of you who eat meat, it can be a great side to a meat dish as well.
Ingredients
  • Rosemary Polenta Recipe

    6 servings

    Rosemary Polenta Recipe

    Ingredients

    • 1 1/2 cups polenta (I use a fine grind)
    • 6 cups water
    • 3 Tbsp olive oil (or butter)
    • 1 Tbsp fresh rosemary, minced
    • 3 cloves garlic, minced or pressed
    • 1 tsp salt
    • freshly ground pepper to taste
    • 1/2 cup Parmesan, grated (optional)

    Instructions

    1. Mix the polenta with 2 cups of the (cool) water.
    2. Bring the rest of the water to a boil, then turn down to low and add the polenta, whisking it as you pour it in.
    3. Add the rest of the ingredients, and mix well.
    4. Cook on low for 20 minutes (if you're using a coarse grind you'll need to cook it for at least 45).
    5. Serve hot in bowls.
    https://stitchandboots.com/2011/12/09/rosemary-polenta-recipe/

Hundred Dollar Vanilla Cookie Recipe

The quest to make Max things he’ll like that have less sugar and more protein in them continues.  This cookie used to be a sugar cookie.  But then I halved the sugar in the recipe.  I added quite a bit of almond flour (Ca-Ching!) to it which lends this cookie a subtle almond flavor.  Alas, it did not meet with Max’s approval but the rest of us loved this cookie enough for me to offer the recipe up for you to try.  I don’t have a big sweet tooth.  I don’t really love cookies, in general.  But this one, well, it’s pretty much perfect.

Hundred Dollar Vanilla Cookie Recipe

Makes 12 cookies.

Hundred Dollar Vanilla Cookie Recipe

Ingredients

  • 3/4 cup whole wheat pastry flour
  • 3/4 cup almond flour
  • 1/2 cup all purpose flour
  • 1/4 tsp baking powder
  • 1/4 tsp salt
  • 7 oz butter, softened
  • 1/2 cup sugar
  • 1tsp vanilla extract
  • 1 egg
  • For the glaze:
  • 2 cups confectioner's sugar
  • 2 tablespoons milk
  • 1/2 tsp vanilla extract

Instructions

  1. In a medium sized bowl whisk together the flours, baking powder, and salt. Set aside.
  2. In another medium bowl beat the butter and sugar together until light and fluffy. Add the egg and vanilla and beat until fully combined.
  3. Add the wet ingredients to the dry and mix well.
  4. Chill the dough while the oven preheats to 350°.
  5. Make balls of dough using a heaping tablespoon and flatten slightly.
  6. Bake for 12 minutes (or until the bottoms are golden, the tops will remain very pale).
  7. Put 2 cups of confectioner’s sugar into a small bowl and add 2 tablespoons of milk, a teaspoon of vanilla extract, and stir vigorously until the sugar is completely dissolved, . If it gets too thin, add a little more sugar, if it’s too thick add small amount of milk to thin it.
  8. When the cookies have cooled, drizzle the glaze over them generously.

Notes

This recipe started off as a sugar cookie that I adapted from America's Test Kitchen (Family Baking Book) but it now bears no resemblance to it at all. You can easily double the recipe, I don't like having lots of cookies sitting around so I made it a one cookie sheet recipe. I called these "hundred dollar vanilla cookies" because almond flour costs almost as much as gold teeth.

https://stitchandboots.com/2011/12/09/hundred-dollar-vanilla-cookie-recipe/

Potato Leek Soup Recipe

Potato leek soup is wholesome good cheap food.  It also happens to be easy and pretty fast to make.  Everyone has their version.  Most versions are ultimately the same.  Variations include whether or not you use butter, olive oil, or a combination of the two.  What type of potato you use and whether or not you put cream or milk in it are other variations.  Proportions of leeks to potatoes as well as thickness and choice of garnishes (if any) are just about the only other variations I can think of.

I didn’t plan on putting my version on this site until I started thinking about the price of food and how useful it is to show people what home cooking really costs.  It is ridiculous (but widely believed) that eating fast food is cheaper than eating home cooked food.  Obviously, if the food you’re cooking at home is lobster and steak all week, and if you garnish your food with gold, that might be true.  But then you have to compare eating at a pricey restaurant to your cooking.  Fast food is basic food.  There is nothing fancy (or healthy) about it.  It’s frozen beef patties, cheap cheese, out of season never really ripe vegetables, and the cheapest kind of bread imaginable.  Still, you generally pay $3 to $7 for those meals, right?  Can people really suppose that simple home cooking costs more per serving than fast food?

A while ago I priced out one of my favorite bean and vegetable soups to see what it cost me per serving to make.  The Tenement Stew was .53 cents per big bowl.  With some toast it is easily as filling as a flimsy fast food burger and regular order of fries.  Two slices of toast might add about .50 to your meal.  Plus a pat of butter would add .10 cents (or let’s be generous and say you need two whole pats of butter) so for one wholesome and filling meal of homemade soup and toast you spend $1.23.  That’s a cheap meal.  Considering how much better it is for you than fast food your money is going a lot further nutritionally.

I’ve  been seeing more food writers costing out their recipes and I really like that, I find it useful, especially for people who are just learning to cook from scratch.  It’s also great for making comparisons like these – to show people that if you want to eat fast food, that’s your business, but don’t say it’s because it’s cheaper than cooking from scratch.

Potato Leek Soup Recipe

Potato Leek Soup Recipe

Ingredients

  • 1/4 cup olive oil
  • 3 leeks, sliced thin (the white and pale green parts)
  • 8 round potatoes, cut in half then sliced thin
  • 2 tsp salt
  • 1/2 tsp pepper

Instructions

  1. Heat olive oil in a soup pot and add the leeks. Saute the leeks for a few minutes by themselves, just until they are slightly browned. Add the potatoes and saute for a few more minutes. Add 2 quarts of water and bring to a boil.
  2. Add the salt and pepper. Turn heat down to medium and cook until the potatoes are falling apart (about 30 minutes). Take off the heat and puree with an immersion blender (or you can blend it in an actual blender).

Notes

In the past I used to add a little cream at the end to finish this off but I haven’t done that in ages. I love to eat this soup with buttered toast. I suggest, if you aren’t already a master with your own potato leek soup recipe, that you play around with the salt and pepper. It’s the only seasoning in this soup and it matters. Sometimes I use butter instead of olive oil, and sometimes I even use a combination but it’s always a quarter cup of whatever fat I’m using to saute.

https://stitchandboots.com/2011/12/07/potato-leek-soup-recipe/


McMinnville Saturday Market: Late Fall

This is Tara from Denison Farms weighing my ENORMOUS sweet potatos.

I go to the McMinnville Saturday Market every weekend to buy my produce for the week.  There are two produce vendors there: Growing Wild Farm and Denison Farms.  Growing Wild sells out early so I often don’t get much from them.  I have a horrible tendency to sleep in on Saturdays.  Between the two farms (both certified organic) I manage to buy about 90% of the produce I use each week.  When I talk to people about eating locally and seasonally people ask about both the expense of it and the difficulty of cooking with so few ingredients.  Few ingredients?!  Check out what I find just at Denison Farms alone!

Please do not buy out of season tomatoes.  Look at all the other amazing things they have to offer that ARE in season!

This week I spent $43 dollars and this is what I got: 4 enormous sweet potatoes, 2 giant leeks, 2 heads of cauliflower, big bag of potatoes, 2 bags of prewashed lettuce mix, 1 bunch cilantro, 4 heads of garlic, 2 bunches of collards, 1 bunch of celery, and 2 yellow onions.  That will get us through a week of excellent vegetable eating.  When I got home I made potato leek soup and a pan of roasted sweet potatoes, fennel (from last week’s purchase), garlic, tofu, and potatoes.  That was dinner and it was amazing!

How I shop: most people I know decide what food they’re going to make and then go to the store to buy the things they need.  When you shop farmer’s markets you need to do the opposite; go to the market to see what’s available that looks good to you and then figure out what you will do with it.  You don’t need to know the exact amounts needed for recipes ahead of time.  Generally speaking you won’t need more than one head of cauliflower per cauliflower recipe.  One bunch of collards is generally enough for anything it’s going into.

If you’re not used to shopping this way it may take a little getting used to, but I’m the queen of anxiety (I have trouble with changes in routine and I get very set in my way of doing things) and even I hardly needed to adjust to this.  It’s actually a much more pleasant way of shopping and planning meals.  It’s also the way people have been doing it for thousands of years up until after World War ll.  You cooked what what was available and in season or in your pantry – no one decided ahead of time what they would be cooking because they didn’t have access to whatever they wanted all year long in a store.  Food stores were a lot less stable.

Please consider getting one of these gorgeous cutting boards from Growing Wild Farm!  I have two of them and they are well made by farmer Andre from white oak fallen on his own property as well as walnut and other woods from his friends.  The rustic board in this picture is new and Andre says it’s not suitable as a cutting board but is meant to be a serving board for things like cheeses.  I covet it!

There are a lot of other things at our Saturday Market: duck eggs, chicken eggs, meat, teas, spices, some packaged spreads, honey, bread and pastries, sometimes wild mushroom vendors, chocolates, hand made soaps, used books, art, crafts, vintage clothes, jewelry, knitted goods, sometimes flowers and hand carved spoons.  It’s becoming better and better all the time and I want my community to support it more strongly.  It’s such a pleasant way to do some of your food shopping every week.  It goes all year round and has made my town so much better.

If you have a similar market, especially one that goes all year round, be sure to support it.  Even if you can’t afford to buy all your produce, meat, and eggs from local sources, set aside a small portion of your budget to spend on at the local market.  Every dollar you spend locally makes your community economy stronger, your local food security stronger, and you are directly supporting your neighbors.

Most of my readers here at Stitch and Boots already support their local food producers as much as they can.  I am writing these things because if there’s even one person who comes along who doesn’t already shop their local farmer’s market that can be inspired to?  WIN.  Coming up soon – I’ve got a couple of recipes and will start costing out some of them to show what the food I eat actually costs.

Have a lovely weekend!

GMO Foods: JUST LABEL IT

If I put two heads of broccoli in front of you and I told you that one of them was from GMO seed and the other wasn’t, which would you choose?  Given a choice, would you actually pick the one that is a genetically modified organism with pesticides built into its dna that can’t be washed off?  This head of broccoli is NOT grown from genetically engineered seed.  How do I know?  Because my mom grew it herself in our garden using seeds from a company that has taken the Safe Seed Pledge.

Having a choice is the quintessential American way.  Having a choice in religion, politics, how you deal with your own body, what state you live in, what job you have, and who you marry.  I am aware that a couple of those issues are things we’re still grappling with as a country.  My point is that Americans, when they’re feeling most prideful, love to boast about how our country is so FREE.

So why is it so hard to convince the FDA that we should have a choice in whether or not we consume GMO foods?  All foods should be clearly labeled.  Labeling is how we already choose whether or not to consume foods that have been sprayed with the nasty pesticides that are currently killing off all the fertility in the land.  It’s how we decide whether or not we eat red dye #40, monosodium glutamate, high fructose corn syrup, or propylene glycol (used in both food and antifreeze).  It is vital that all produce and foods that contain GMOs be labeled too.

Here’s a petition to the FDA that you can sign in 15 seconds that demands that all foods containing GMOs be labeled so that Americans can make a choice to eat them or not.

LABEL MY FOOD

Please sign it today.

Thank you.

Fill Your Pantry Event: making local grains available

A few weeks ago my friend Nicole and I went to an event called “Fill Your Pantry” in Shedd, Oregon, hosted by  Greenwillow Grains and Willamette Seed and Grain.  The event brings local farmers together directly with buyers to strengthen our region’s foodshed.   The event especially highlights the availability of grains grown in Oregon which it’s difficult for consumers to buy directly from farmers.  In fact, the majority of grain grown in Oregon is soft wheat which is exported.  People who want local sources for soft wheat, hard wheat, rye, barley, and oats don’t often have access to such products in retail outlets.  Like most events in Oregon it was earthy, funky (held in an old restored church), full of vibrant people, and fiddle music filled the air.  I couldn’t have been more at home.  A building full of bulk grains, legumes in brown bags, garlic, pressed cider, and a truck full of winter squash for 19¢ a pound?  Count me in!  I was in food heaven.  The event was well attended and the energy was great.  Nicole bought a bucket of wheat berries from Lonesome Whistle Farm and I bought a small bag of milled dark rye from them.

Open Oak Farm‘s table of goods.

I bought 20 lbs of milled (organic!) hard wheat from Greenwillow Grains for $15 which is an amazing price.  I bought several winter squash (I’m sorry to say I didn’t note the farm that was selling those), a small package of fresh milled corn flour, and some apple cider.

Nicole browsing the goods at the Lonesome Whistle Farm table.

I couldn’t afford to buy any of the beans as they were much too expensive per pound for my budget but I was happy to read in an article by Spencer Masterson that there were some people there making connections between local food and low income families.  Linn County Gleaners volunteered at the event in exchange for donations from some of the venders.

I’m painfully aware of how many people have yet to understand how important it is to support your local food producers to create a sustainable and solid food system.  People in our country have become so used to the convenience and luxury of buying whatever food they need whenever they want from all over the world.  It’s been a long time since this country has had a war on its own shore.  It’s been a long time since you had to depend on your local growers to supply your most basic pantry needs.  I know that many people can’t imagine anything preventing them from continuing on exactly as they are.

All over the world people understand the importance of maintaining a strong connection with their local growers and producers because they have longer memories than we do and because they have had more wars and natural disasters to teach them this lesson.  I read about the shortage of produce in the areas of Japan directly affected by the earthquake of 2011 and it reminded me of the Loma Prieta earthquake in San Francisco.  The San San francisco earthquake was obviously minor in comparison with the Tohoku quake of earlier this year but I was reminded of the most surreal and profound experience during that disaster: grocery shopping.  My apartment was a wreckage of broken cabinet glass, broken everything, no water for at least a day, spotty phone line access, and two freaked out kittens.  I lived on 27th and Geary right across the street from a Cala Foods grocery store.  I didn’t have much food in my pantry so I ventured to the grocery store the day after the quake and discovered shelves stripped nearly bare of canned foods and bottled water.  I knew I wasn’t in grave danger of starving but it struck me, for the first time in my young adult life, that even in cosmopolitan cities absolutely full of giant grocery stores things other than poverty can happen to disconnect people from sources of food and water.  I remember all the news stories about the fires, the power outages, the destroyed roads with trapped people, the downtown looting, and the fears that food supplies might be cut off from the city for several days and what that would mean.

The farther your food has to travel to get to you and the fewer resources you have in your own back yard the more vulnerable your community is to starvation during natural disasters and human disasters like war.

Nicole, who started the Yamhill County Slow Food Chapter, is as passionate as I am about supporting as many local food growers and producers as we can.  This event was fun and it was productive.  If your own community doesn’t have anything like this, consider starting your own Fill Your Pantry event.

How To Remove Blackberry Bushes Without Pesticides

As I have written here before, I love blackberries and I have let them go wild in my yard.  The vines that are choking my porch to death produce wonderful berries in the summer and it was my intention to continue to let them cultivate themselves.  However, these vigorous vines crawl up onto the floor of the porch where unwary people are given an unpleasant surprise.

If we were training with Cato Fong to stay on our toes and be Kung Fu all the time, we would not let such surprises daunt us.  But, Inspector Clouseau we are not.

My mom told me that if I wanted to keep the blackberries I would need to get rid of the bushes underneath them and stake them in an orderly fashion so we can easily keep the blackberries off of the porch.

Wait.  I have bushes under there?!

If you’ve ever had blackberries muscling their way into your garden, then you know they are very hard to get rid of.  Most people soak them in pesticides and this works like a dream.  Plus, then you get to help poison the watershed in your area.  We choose not to use pesticides.  Admittedly, this is the hard road in the short term, but poisoning our water supply will make for a much harder road down the line and I don’t mind a little work.

Here are some tips for getting rid of brambles without using pesticides:

  • Don’t let them attain mass in the first place.  If you see a wee baby cane pop up in your garden anywhere, pull it up immediately.  If you do this religiously, you will not find it necessary to read any of the following tips.
  • If, like me, you engage in lazy gardening habits (otherwise known as a crazy busy life) and your brambles have become the size of trees, you will need to grab yourself the sharpest pair of long handled bypass loppers you can find, leather gauntlet gloves*, thick pants, and some really motivating music on a portable MP3 player.
  • First cut off any obvious and easy to get at canes.  Be sure to cut them in manageable pieces as you pile them up.  You will be thankful not to be whipped by recalcitrant canes when you try to gather up your pile of trimmings to the yard waste container or compost pile.  Speaking of compost piles, blackberries thrive in them and unless the canes are 100% dead before you put them in there (brown all through, no green in any part of them) they will take root with joy.  So unless your compost pile is very hot, let the county take them to the dump or let them die before adding to your compost.
  • You work your way from the outside of the blackberries towards the inner tangles. This isn’t a tip, so much as a fact.  If your blackberries are growing over other plants you actually want to keep, you must take care not to prune out the wrong branches.  As you work your way inwards, you may need to take a band-aid break.  Or, if you’re a tough broad like me, you can ignore the blood that is inevitably dripping from your arms and legs at this point.
  • Once you’ve gotten a third of the length of the canes cut back you will find yourself reaching into the shrubbery to find the origins and this is delicate work.  There are insects in there with all that foliage.  They don’t like you shaking them down.  If your blackberries aren’t growing on anything else you may, at this point, start digging up the roots. If digging up the roots – dig DEEP. Blackberries are hearty plants with scrappy tough roots that are hard to pull up so they can survive your attack.
  • If still struggling with a bush situation, you want to get as much of the blackberry canes cut back before you deal with the roots.  Don’t cut them all the way back though because you need some leverage when tugging the roots out.  They do not come out willingly.  Don’t mind that the thorns near the base of the root are big enough to impale birds.  I promise that you will barely notice the scars in a couple of months.
  • Clean-up is very important.  Do not leave any blackberry debris behind in ground containing 5% or more soil.  Leaves, stems, and canes can all root themselves if left for more than four hours**.  The only part of a blackberry plant that can’t root itself are the thorns.   (I think)  Be sure to check back in a week to continue pulling up surprise canes.
  • Continue to do this for the rest of your life.  Consider it a zen workout.  The blackberries aren’t your enemy and they aren’t evil.  They are a fecund plant that gives free luscious fruit to humans, birds, and other enterprising animals.  You do not eradicate them completely, the goal is to keep them in balance with the rest of your garden.  Good luck!

*I never have these on hand.  I bought a pair, as I often do, and then they sit around in spidery corners.  I have OCD and issues with gloves.  In fact, I keep my own pair of garden gloves inside where I can keep an eye on them.  Then I perform a thorough examination of them before putting them on my hands which involves not just shaking them out but also crushing the full length of the fingers in case any insects happen to be great at hanging on.  I then ignore the thought of crushed insects, compel my rising panic to remain quiet, and carry on.  In any case, the times I have used long gauntleted gloves I have found that thorns still find their way through.  Whether you bother to use them or not is up to you, I merely felt compelled to mention them in case you didn’t know you could get them.  You can.

**Inaccurate information.  It seems like only four hours when in fact, it’s more like 12.

Dill Cabbage With Navy Beans Soup Recipe

I recommend you use dried beans.  You don’t have to.  But you should.  Why?  Because they’re cheaper than canned, because you should not be making your food in a hurry.  If you don’t like to be bothered, you can always make this in a crock pot.  Though I doubt it will all fit in one.  So don’t do that.  Really, bother with it.  This soup is so easy on the budget, so wonderfully healing and warming, and stirring soup over the stove for two hours settles nerves, makes you slow down, and if you like you can read a favorite book while you stir, or talk to your pets (or children).  Or read them your favorite book.  Unless your favorite book is Anna Karenina.  No one needs to read that when the fall hours grow dark, unless you have a pack of Galois cigarettes and bitter black coffee at your elbow.

This soup has everything you need in a meal if you can’t pull anything else together.  It isn’t heavy but it’s substantial enough to hold you up.  The cabbage cooks so long that it becomes unbelievably tender.  It’s excellent with some Parmesan and toast.

Dill Cabbage With Navy Beans Soup Recipe

Serves About A Million

Dill Cabbage With Navy Beans Soup Recipe

Ingredients

  • 2 tbsp olive oil
  • 1 yellow onion, diced
  • 3 carrots, sliced
  • 3 quarts water (or vegetable, beef, or chicken stock)
  • 6 garlic cloves, minced or pressed
  • 5 med. potatoes of any variety, diced into 1/2? cubes
  • 1 cup navy beans (or 1 can prepared navy beans/northern beans)
  • 1 head of cabbage, cored and chopped to 1? size pieces
  • 2 tsp dried dill
  • 2 tsp salt
  • lots of freshly ground black pepper

Instructions

  1. In a large soup pot warm the olive oil and add the onion and carrots. Saute them until they begin to brown a little.
  2. Add 3 quarts of water, bring to a boil.
  3. Add everything else. (If you’re using canned beans you can add these near the end).
  4. Cook for a really long time, stirring occasionally and making sure nothing sticks to the bottom. Keep your eye on the thickness of the soup, the water will cook down and you may need to add a little water from time to time. You want the soup to have some body so add water two cups at a time, as needed.
  5. This soup took two hours to cook. (If you use canned beans it will take only 45 minutes.) The soup is done when the beans are tender.

Notes

If you aren’t used to winging it with water quantities in soup then I think you should read my post about soup philosophy. It will help you. Soup is a flexible and incredibly personal dish. There is no soup recipe that can’t be altered to your personal tastes. All soup recipes are merely suggestions. Guidelines. Never be afraid to adjust it.

https://stitchandboots.com/2011/11/11/dill-cabbage-with-navy-beans-soup-recipe/

Other great cabbage recipes to try:

Cabbage Garlic Soup For A Summer Cold

Russian Pot Pie Recipe

Tenement Stew (Cabbage Alphabet Soup Recipe)

Gingerbread Recipe

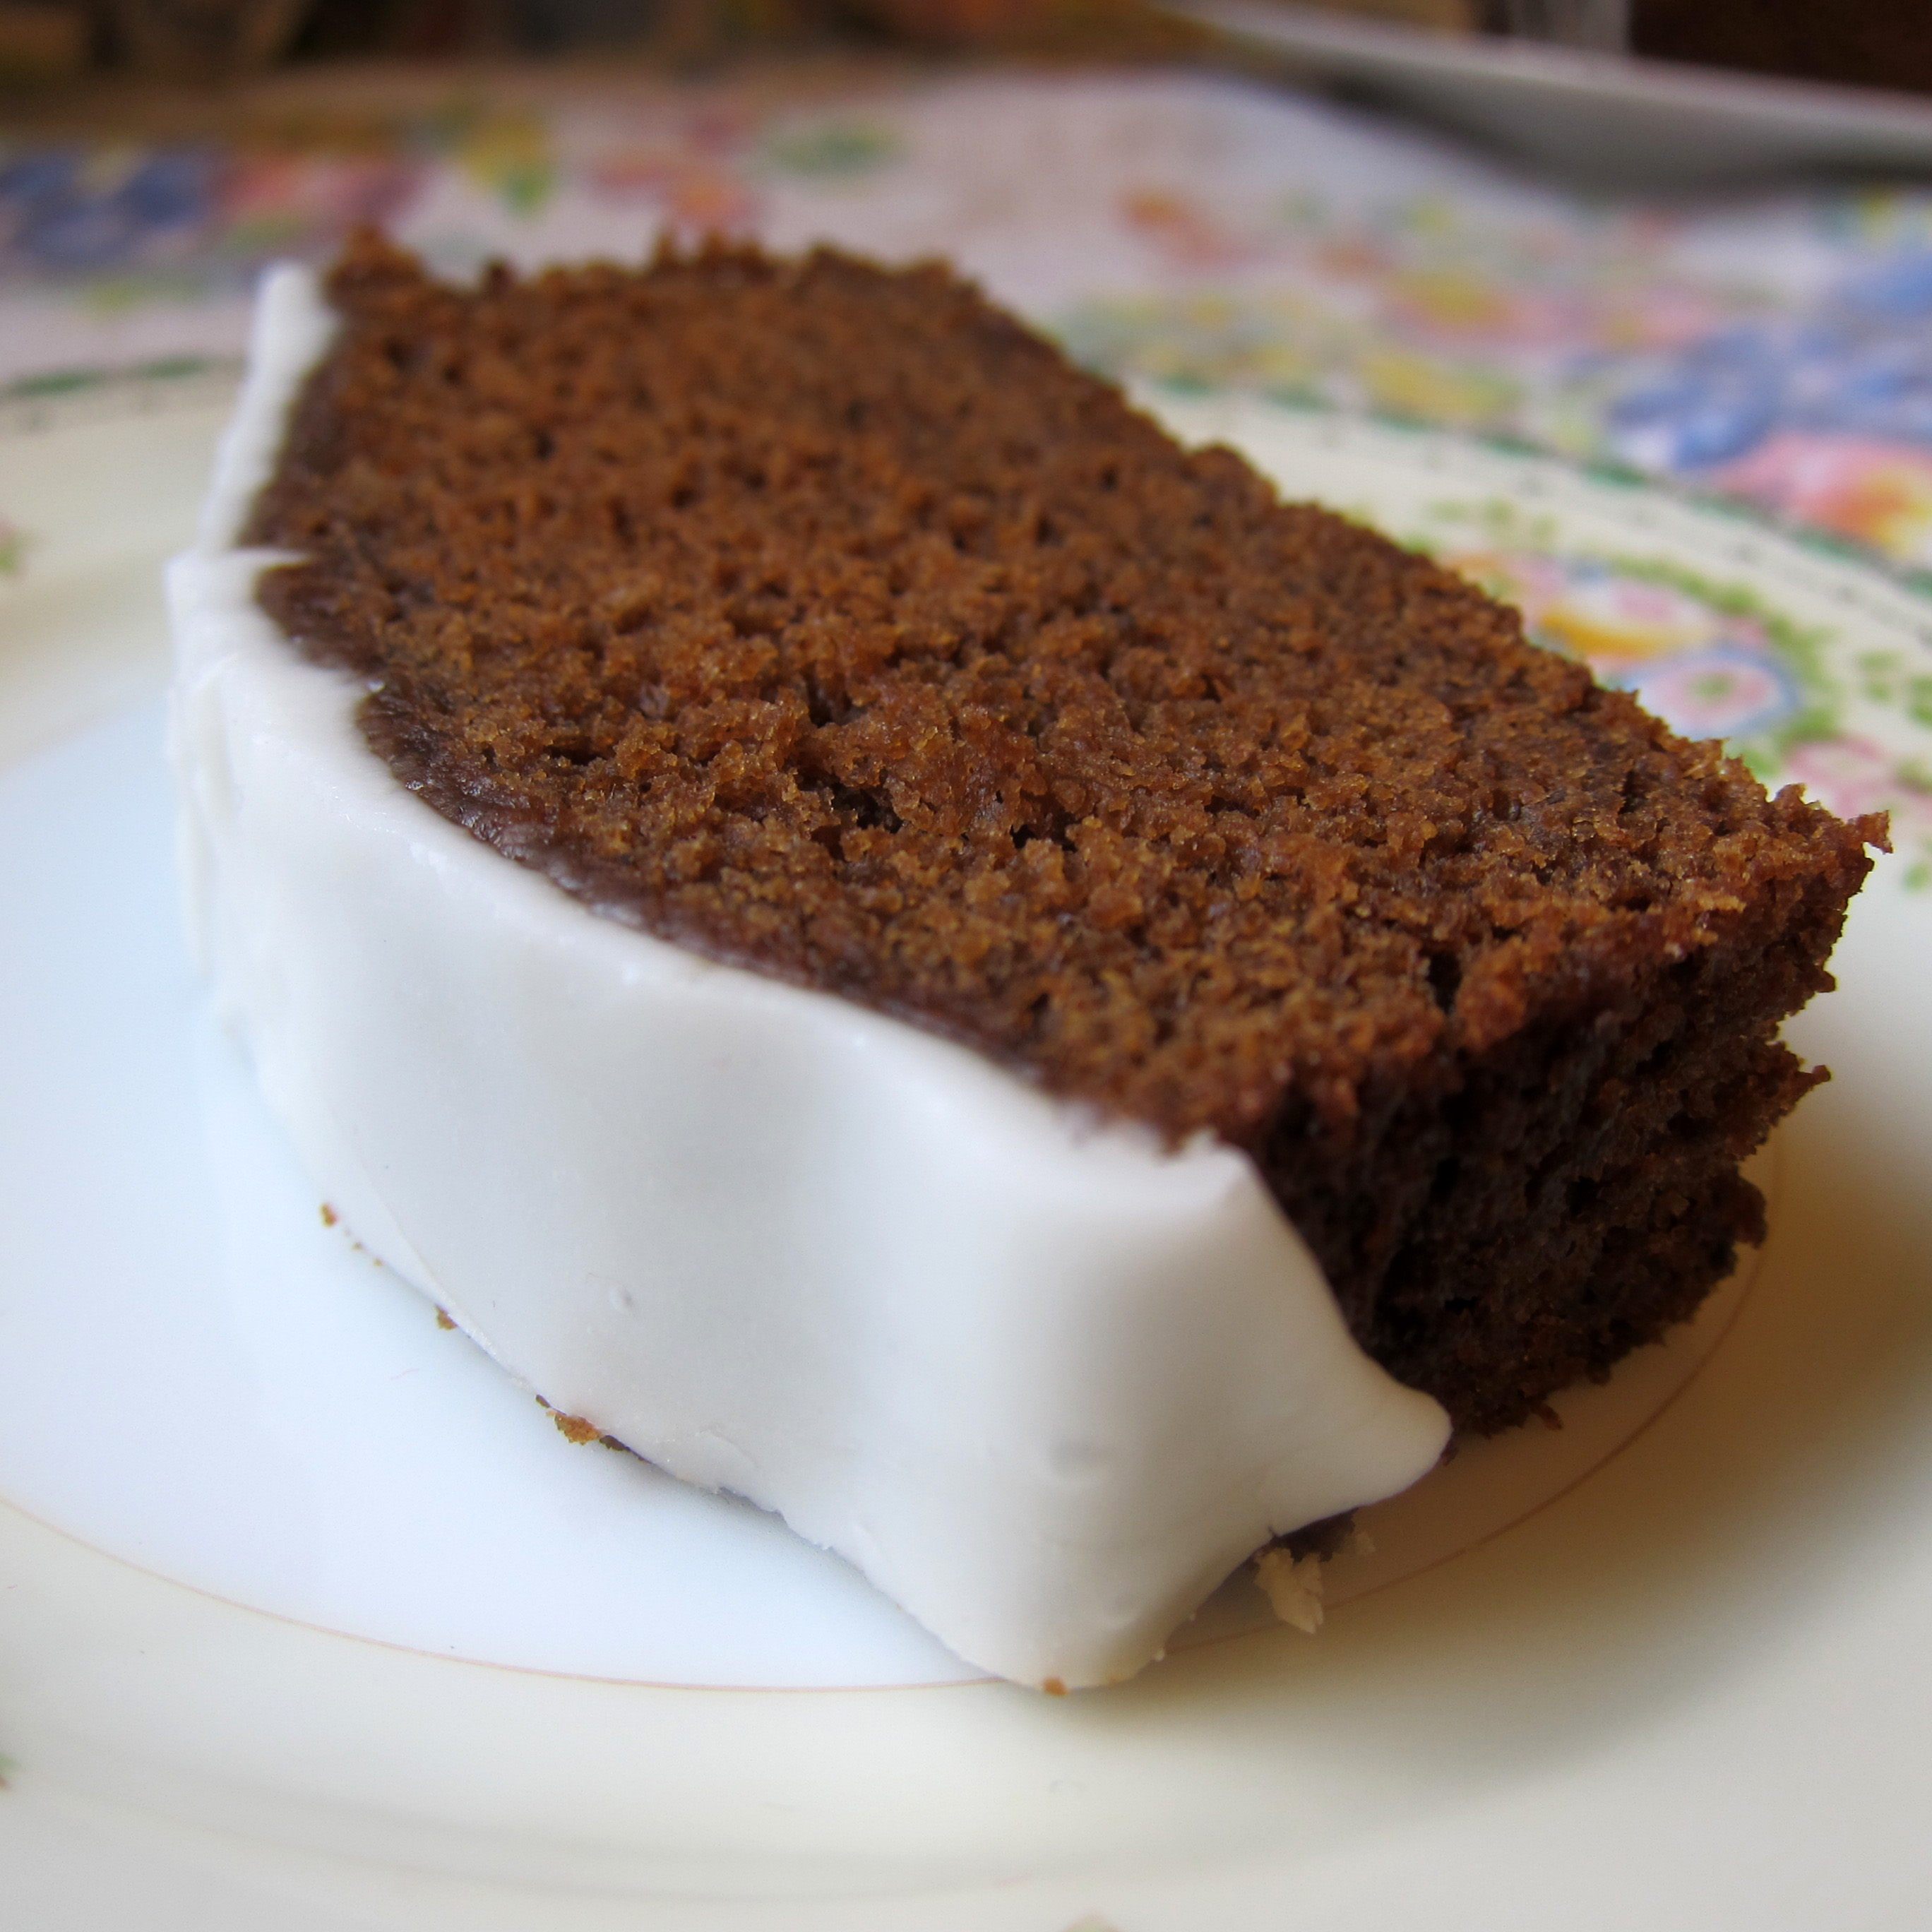
In my search to find things my son will eat that I can make from scratch I’ve tried all sorts of recipes for tea breads and quick breads.  He likes cornbread, which is great, but nothing else passed muster until I made the gingerbread cake from “The Family Baking Book” by America’s Test Kitchen.  This surprised me, actually, but pleased me.  I made changes to the recipe based on my own tastes such as omitting allspice which I don’t care for.  I reduced the sugar a bit and also used blackstrap molasses instead of light molasses because blackstrap is more nutrient dense.  I also played around with using whole wheat flour but the result was not good – it was slightly bitter, so I went back to using all purpose.  The original recipe calls for buttermilk but I never have that sitting around so I use regular milk.  I offer you my version of gingerbread, Max approved.

Gingerbread Recipe

Makes 2 Loaves

Gingerbread Recipe

Ingredients

  • 1 3/4 cup all purpose flour
  • 2 tsp ginger
  • 1 tsp Dutch processed cocoa
  • 1 tsp cinnamon
  • 1/2 tsp cloves
  • 1/2 tsp nutmeg
  • 1/2 tsp baking soda
  • 1/2 tsp salt
  • 3/4 cup blackstrap molasses
  • 1/2 cup sugar
  • 8 Tbsp butter (1 stick), melted and cooled
  • 1 large egg
  • 1 cup milk (I usually use 2%)

Instructions

  1. Preheat oven to 350°.
  2. Generously grease two small loaf pans.
  3. Whisk all the dry ingredients together in a medium sized bowl.
  4. In either a large bowl or in the bowl of a stand mixer (I use my stand mixer for this one) beat the molasses, sugar, and melted butter together. Beat in the egg until well incorporated. Add the milk and mix until combined.
  5. Add the dry ingredients to the wet and mix just until well combined, don’t beat into a pulp. Divide the batter between the two loaf pans and shake gently to distribute the batter evenly.
  6. Bake the bread until a toothpick inserted in the center comes out with a few moist crumbs attached, 35 to 40 minutes. Let it cool completely before removing from the pan.
  7. If you’d like to ice the gingerbread, as I have done in the picture above, put 2 cups of confectioner’s sugar into a small bowl and add 2 tablespoons of milk, a teaspoon of vanilla extract, and stir vigorously until the sugar is completely dissolved, . If it gets too thin, add a little more sugar, if it’s too thick add small amount of milk to thin it.
https://stitchandboots.com/2011/11/11/gingerbread-recipe/