Author Archives: angelina

Extreme Picky Eating: The Beginning

Max thanksgiving 2.jpg

Max’s Thanksgiving Dinner

For most parents what picky eating means is that their kids don’t like broccoli or spinach or papaya.  For the privilege of being able to complain that my child won’t eat a few vegetables or exotic fruits I would happily amputate my foot.  You think I am being melodramatic but I assure you that missing my foot would be worth the pain in exchange for my kid eating most things besides a few vegetables or fruits that most children don’t like.  To me that is not picky eating.

For some parents picky eating means their kids won’t eat most vegetables or fruits and prefer a steady diet of pasta with butter, potatoes in any form, chicken, beef, cheese, milk, cereals, breads, rice, eggs, and sandwiches.  I definitely feel for parents with kids who won’t eat any produce but will eat grains and meat and dairy.  I still envy them enough that if I had a ransom to give in exchange for my kid eating such a wide variety of foods, I would happily be poor but able to feed my child.  Sadly, I’m already poor and my child won’t eat most of those foods.

Then there’s the few of us with kids who eat 10 or less food items at any given period of time.  Think about what that would mean to you.  What if your child didn’t like meat, hated nearly all dairy, choked on almost all fresh produce, disliked most cereals, bars, nuts, and grains?  What would you feed your kid?  How would your kid grow up to be healthy?  How would you deal with the fact that your child would prefer it if all food but dessert and a select few other items could simply be swallowed in gel-cap form?  How would you feel?  How capable of a parent would you consider yourself?  Would you blame your child?  Would you fight your child over food every single day?  Would you give up trying?

When my kid first started eating food as a baby he ate almost everything.  He ate pureed greens, carrots, squash, fruit, and cereals.  There were few things I put in front of him that he wasn’t willing to eat.  I mashed bananas until he could eat them himself, he ate almost a banana a day until he was two years old.  He liked peanut butter and jam sandwiches, baked beans with grilled cheese sandwiches, lentil and chard soup pureed and scooped up on crackers, feta cheese, avocado, melon, pears, peaches, and he would even eat potatoes.

The change happened so gradually I can’t possibly say exactly when we realized Max’s palate was changing.  It wasn’t overnight.  Slowly he started rejecting foods he previously liked and no power on earth could make him swallow a banana by the time he was two.  Other things were happening at the same time but the most dramatic was his powerful refusal to wear denim.  Later, when he could talk, he told me it was because it didn’t feel good.  It was rough.  Anyway, slowly his diet whittled down to mostly carbohydrates and we consulted our pediatrician.

The pediatrician said it was a fairly normal stage many children go through.  Her advice was to continue to offer healthy foods at every meal and he would probably grow out of it.  He did not grow out of it.  Another year and another pediatrician visit and more advice to always offer healthy food but not to freak out if Max only wanted to eat crackers.  We already noticed other troubling trends in our child and considering these the doctor told us that we had a choice to make food a daily battle (I was making it a daily battle and crying all the time over the fact that he wouldn’t eat much of what I offered) but warned that I could potentially create an eating disorder by fighting at every meal with my child. 

A child like Max.

She suggested we be careful about choosing our battles with him.  She told me that my job was to never give up offering him wholesome food.  If he chose only to eat crackers he probably wouldn’t die, would most likely grow out of it, and we could give him multivitamins. 

I have never given up trying to get him to eat wholesome food.  I am an excellent cook and the biggest crime I commit in my diet is too much fat.  We eat a lot of fresh produce, whole grains, not much packaged crap, not too much salt or sugar, and we eat a truly varied diet.  To have an extreme picky eater for a child has been an enormous emotional strain on us and on our budget.  Packaged crackers aren’t cheap.  Instead of growing out of the picky eating it has simply grown worse. 

I started writing about this issue on Dustpan Alley and have realized that it’s time I write about it here.  Not for people with kids who will eat some things they don’t like with some applied parental pressure or threats or promise of dessert, I want to write about it for those parents like us, who have struggled so hard over the basic job of feeding our child, who have shed a lot of tears, torn out a lot of hair, and thrown out a shameful quantity of rejected food. 

I get so angry listening to parents telling me how to get my kid over his picky eating.  There is a general assumption out there that if you just keep forcing your kid to try something (they say it takes twelve times) they will eventually like it.  Or that if you just refuse to feed them outside the meals you cook for yourself they will eventually just choose to eat what you put in front of them (“no child will ever choose to starve themselves”).  Or that if a child doesn’t like much food it’s because the parents don’t eat good wholesome food themselves.  Or that they aren’t good cooks. 

There are a lot of assumptions out there about picky eating and most of them are made by people who don’t have picky eaters for children.


I would like to address a lot of these assumptions and offer encouragement to other parents with extreme picky eaters because I need it myself and there’s precious little of it out there.  I can’t do it all in one post.  I will tackle it in several.  In the next post I will write out every single eating issue my kid has so that anyone who doesn’t know the full scope may learn what my kid goes through and consequently what I go through trying to feed him.

I would like to offer some general advice right now:

1.  Never stop offering healthy food for your child to eat no matter how exhausting it is and how frustrated you are.

2.  Give your kid a multivitamin that includes iron.*

3.  If your kid only likes packaged food (crackers and things like that) be careful to read labels and don’t allow any high fructose corn syrup, preservatives, food coloring, or other harmful ingredients into your cupboards. 

4.  Don’t let other parents make you feel like a failure.  I once had a neighbor suggest that the reason my kid didn’t eat healthily was because I wasn’t cooking good enough food.  I have rarely had such a terrible urge to slap another woman as I did at that moment.  Her kids would eat kale raw and she assumed it was her awesomeness as a mother that made her kids like everything.  Most people will view picking eating as a failing of the parents or of the child or both.  Don’t let them get under your skin.

5.  Be compassionate with your picky eater and with yourself. 

*Even finding  multi-vitamin my kid will take has been a miserable ever changing drag.  The flavors of
most multi-vitamins are repugnant to him.  He finally begged for a pill to swallow but the one I found was enormous and the serving size was three a day and he could taste them going down.  I have finally found a multi-vitamin in a gel-cap which goes down more easily and he can’t taste.
Tofu Stroganoff

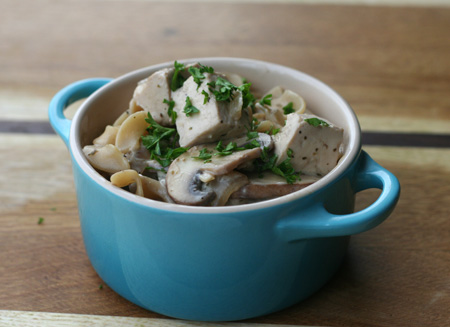
dressed stroganoff 2.jpgI have never had Beef Stroganoff because my mom raised me as a vegetarian.  I have no idea what the traditional dish should taste like but this recipe is my version of the dish my mom came up with as a vegetarian alternative.  I have settled into a routine of making it without thinking about it and it has quietly evolved over the years.  As I’ve been making it recently I couldn’t remember if I used to put garlic in it.  I love garlic but if it was ever part of the original dish my mom created, I can’t remember.  What I offer here is the version I’m making right now. 

Even if you like to eat meat, why not try this version the next time you need to feed someone who doesn’t?  It’s comforting, satisfying, and easy to make. 

tofu squares 2.jpgTofu Stroganoff Recipe

Ingredients:

1/4 cup olive oil
1 onion, chopped
1 1/2 lbs crimini or button mushrooms, sliced
1 block firm tofu
30 grinds black pepper
1 tsp dried thyme
1 tsp dried marjoram
16 oz sour cream
1/4 cup soy sauce
8 oz whole wheat egg noodles

Method:

In a large pan saute the onion on med/high heat in the olive oil until transparent.  Add the mushrooms and stir occasionally until they are slightly browned.  While the mushrooms are sauteing, boil salted water in a pot for the pasta.

Add the tofu to the saute pan along with the pepper, thyme, and marjoram.  Stir well and cook for about five minutes.  By this time your water should be boiling, add the pasta to it and cook until just tender.

Turn the heat down to low and add sour cream and soy sauce to the mushrooms and tofu and stir in well.  When you’ve drained your pasta add it to the saute pan and stir it all together.  Serve and eat!  But don’t burn your tongue. 


le fake stroganoff 2.jpg

Recipe notes:  I cut my tofu into roughly 3/4″ cubes because I don’t want the tofu hidden.  If you prefer you can cut the tofu much smaller so that it’s not as visibly noticeable.  I would avoid using a soft tofu, however, as it will dissipate.  For those people who like more texture to their tofu an extra firm tofu will work well.  I used whole wheat egg noodles but you can make this dish vegan if you use rotelli pasta and use a sour cream substitute.  If you want to make this dish gluten free, simply use gluten free pasta in place of the wheat pasta.  One last note: I rarely use “lite” versions of products but I accidentally bought Tillamook’s lite sour cream once and it was so good I’ve continued to buy it.  That’s not what my mom used when I was growing up and if the brand of sour cream you buy is mild to begin with the lite version may be too bland for this recipe.     

Vegan Black Bean and Winter Squash Burrito

good burrito 2.jpg
I have never eaten a vegan burrito before in my life.  Burritos are one of those things that may as well say CHEESE in neon above them.  However, I have been wanting to make more vegan meals because having blocks of cheese around the house is not so good for me.  If it’s there I will eat it.  I will snack on it at all hours.  If I’m up and there’s cheese it’s the best thing in the world to snack on.  Except that it isn’t.  That’s not the only reason, cheese is expensive.  I often tell myself that since I don’t buy any meat it’s okay that cheese is expensive, but that’s a lame reason to buy anything.  Lastly, I have a few vegan friends and I want to have a really good collection of recipes I can make for them that will satisfy all of us.

It is hard for me to face a cheese-less burrito.  At least, it was before I made these.  The main thing is to make some chimichurri sauce.  It adds such fantastic flavor and the tanginess completely makes me forget that there is anything else I could want in it.  If you don’t normally eat vegan I suggest you give these a try.  You can easily halve the recipe if you don’t like making large quantities.  I froze most of mine so I can grab a quick healthy lunch when I haven’t got time to cook. 

Vegan Black Bean and Winter Squash Burrito
makes 8 burritos

Ingredients:

2 cups black beans (cooked)
2 cups winter squash (mashed)
1 tsp ground cumin
1/2 tsp salt
2 cups Mexican style rice
1/2 cup chimichurri sauce
8 flour tortillas

Method:

Mix together the black beans, winter squash, cumin, and salt in a medium sized bowl. 

the filling 2.jpg
In a cast iron skillet (or regular large skillet) warm up a tortilla and spread out 1/2 cup of the beans and squash down the middle making sure to leave a couple of inches at either end for folding up.

Add 1/4 cup rice on top of the beans.  Make a little well down the middle of it and add 1 Tbsp of the chimichurri sauce to it.  Putting it in a well in the middle of the ingredients helps prevent it from running out of the burrito as you fold it up.

Folding a burrito is simple but after trying to write instructions out I think it would be easier to provide you with links to instructions.  Please don’t microwave your tortillas.  I have found two videos for different ways to fold them:

The video by David Windsor Foods  http://www.youtube.com/watch?v=rGJHk6BCQF0

This tortilla rolling gem:  http://www.ehow.com/video_2298342_roll-beef-burrito.html

I will take pictures of the process myself and make a separate post for it.

Recipe Notes:  Make the Mexican rice!  You can use plain but if you do, have extra chimichurri sauce on hand and use a little extra in each burrito.  But really, just make the Mexican rice, you won’t regret it.  A bowl of rice with some salsa and maybe a little cheese (or not) is so good to have on hand.  Any kind of rich dry winter squash will do such as butternut, sweetmeat, or hubbard.  And whatever you do, don’t make fun of my burrito photo.  Burritos are not pretty food!

Mexican Style Rice Recipe
Chimichurri Sauce Recipe

Enhanced by Zemanta

Chimichurri Sauce Recipe

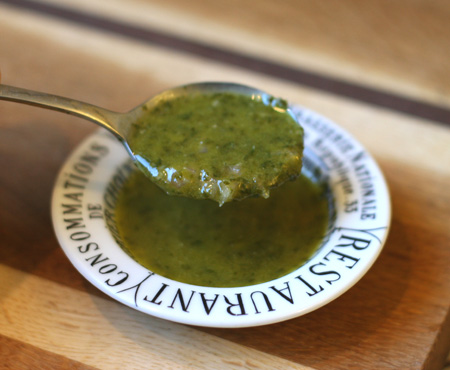
chimichurri sauce 2.jpgMost chimichurri sauce has either a little or a lot of parsley, many have cilantro in varying amounts, and a few even have oregano or other curious herbs.  This chimichurri sauce is the closest I could come to recreating one from memory that I had at a catered birthday party which then haunted me for weeks; it has more cilantro than parsley and no other green herbs.
 

This bright tart sauce is an excellent foil for beans and rice, which is how I like to eat it, but is most commonly used to accompany meat such as steak.  I plan to try it brush on grilled vegetables and as a marinade for tofu. 


Chimichurri Sauce

Ingredients:

1 cup cilantro, finely minced
1/4 cup parsley, finely minced
2 garlic cloves, finely minced
1/2 cup olive oil
1/3 cup red wine vinegar
1/2 tsp ground cumin
1/2 tsp salt
1/4 small red onion very finely diced  

Method:

Combine all ingredients in a jar or a dressing bottle and shake well.  That’s it. 

Alternatively you can make a slightly creamier version by using an immersion blender.  Blend everything but the onion together.  Once it has achieved a creamy texture add the onion and shake well before using to make sure the onion is evenly distributed.


Recipe notes:  don’t double this unless you think you can use it fairly quickly.  The pretty bright green will darken, as it has in my photograph, by the next day.  Fresh herb dressings are best used within a couple of days.  If you like things spicy you can add a tsp of crushed red pepper or a pinch of ground cayenne.

This recipe is gluten free only if your vinegar is specifically gluten free.
This recipe is vegan.

Enhanced by Zemanta

Mexican Style Rice

close bright mex rice 2.jpgLast year I learned to make Mexican style rice from a cookbook called “The Vegtetarian Table; Mexico” by Victoria Wise.  Since then I have adapted it and this summer I managed to freeze a few batches of the tomato puree that goes into to make it easier to make on a whim.  It’s easy to adapt this to your own tastes by omitting the cilantro, for example, or making it spicier. 

One of the main things I changed with this recipe is the method for cooking the rice.  I tried it Wise’s way a few times but I dislike the results when rinsing the rice first so I simply make my rice the way I’ve been making rice for twenty years now except for the one step of adding the puree to the rice before the water.

This Mexican style rice is very clean tasting, unmuddled by too much oil, salt, or any lard, yet it has full flavor and is satisfying to eat with just a little chimichurri sauce.

mex rice plain 2.jpgThis picture was taken before adding the cilantro- it’s very good this way too but I can’t get enough cilantro so I prefer adding it in.  Plus-green is pretty!

Mexican Style Rice

Ingredients:

2 med sized tomatoes
1/2 yellow onion
1 jalapeno pepper (can use a whole pickled one if you don’t have fresh)
1 garlic clove
1/2 tsp salt
1 cup long grain Basmati rice
1 Tbsp olive oil
2 cups water or broth
1 bunch cilantro, minced

Method:

In a food processor puree the tomatoes, onion, pepper, garlic, and salt until completely smooth.

In a medium sauce pan heat up the olive oil on medium high heat and add the rice to it.  Stir the rice continually for a few minutes until you see the grains turning a little white (don’t let them brown!), then add the puree and keep stirring so it doesn’t stick to the bottom of the pan.  When most of the liquid is absorbed into the rice, add the water. 

Turn the heat up to high until the water reaches a boil then turn it down to a simmer (low heat), cover, and let it cook for 20 minutes. 

Remove the lid and if all the liquid has been absorbed* remove from the heat.  Add the minced cilantro and fluff the rice with a fork.

mex rice first view 2.jpg

More recipe notes:  I always make rice with plain water but if you like you can use vegetable, chicken, or beef broth.  This is an all season recipe if you use canned tomatoes in the winter and spring.  If you preserve your own whole tomatoes and have medium sized ones then simply substitute those for the fresh.  Most tomatoes that are canned whole are roma tomatoes which are smallish, so if you’re using commercially canned tomatoes use four of them instead of just two.  I don’t buy fresh hot peppers in the winter or spring so I usually use pickled jalapenos in place of them which I really enjoy for their slight tang. 

This recipe is gluten free
This recipe is vegan

*When I cook rice with plain water the cooking time is always exactly 20 minutes but because of the slightly variable nature of the size of tomatoes and onions I have found that occasionally this recipe needs a little extra time to cook off all the liquid.  Mexican rice is supposed to be moist but there shouldn’t be any water in the bottom of the pan.
Enhanced by Zemanta

Cooking basics: How to Bake Acorn Squash

blond acorn 2.jpg Baking squash might seem too ridiculous to an experienced cook to explain but considering how many people I’ve met who’ve never baked their own pumpkin for pie, I think it’s important to cover the basics.  I like to think that if I died before teaching my son how to cook, he could come to my homesteading blog to learn how to do the basic things that mothers tend to teach their children in the kitchen before they ever set eyes on their first cookbook.

I would like to say, then, that there is no life instruction too ridiculous to teach a person who doesn’t already know it.

cut lengthwise 2.jpgAcorn squash are usually a dark green on the exterior (the ones in these pictures are mutants from a local farmer!) and medium to light yellow on the interior.  Their flesh is somewhat stringy and a little on the watery side compared to sugar pumpkins or other large squash.

1.  Preheat your oven to 375 degrees.

2.  Cut your acorn squash lengthwise.  Try to cut it into two even halves.  You can see that I didn’t completely succeed with one of mine!

stringy 2.jpg3.  Using a strong metal spoon scrape the seeds and the most fibrous part of the squash cavity out.
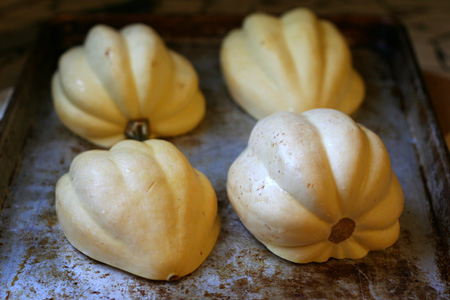
facing down 2.jpg4.  Place face down on a sturdy baking sheet.  Preferably not a non-stick.
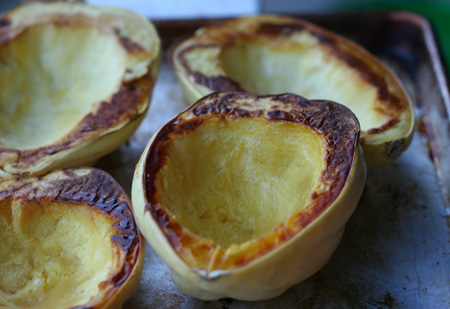
baked 2.jpg

5.  Bake until tender.  How long this takes will vary depending on the size of the squash and the thickness of the flesh but it should take somewhere around 45 minutes.  To test done-ness: you will be able to stick a knife into the skin with no resistance when it is done.

Things to consider:

Some people like to brush the undersides of the squash with olive oil.  You may do this if you like but it is unnecessary.

Many people like to cover their squash with aluminum foil.  This is also not necessary and I would recommend you don’t do this to prevent waste in the kitchen.  I’ve heard some people say that it helps cook the squash faster by holding heat in but at least with regards to acorn squash you get the same effect by cooking them face down in halves.

You can cook the squash at 350 degrees and just expect it to take a little longer.  I cook all my squash at 375 degrees which I think lessens the over-all cooking time without overcooking it too fast which a higher temperature might do.

What now?

Stuff them:
  They’re perfect for stuffing because a half a squash is a good single serving size.  If you fill it with grains and beans you will have a complete protein and with some salad on the side you will have a very nutritious meal.

Dress them:  While still hot add a tablespoon of butter, a sprinkling of salt (about five shakes from a shaker) and some grinds of fresh pepper (also about five), then eat it.  Simple good food.  You can do this right in the skin or if you prefer you can scoop the squash out of the skin and then add the butter, salt, and pepper.

Enhanced by Zemanta

Fry Cook

spring rolls 2.jpgThere’s no denying that these were better than the baked version, but worth the stench and the danger? 

Until last week I had never fried anything in my life.  I don’t think my mom ever fried anything in my life either.  We have always reserved our fried food eating for going out or for the occasional packaged potato or corn chip.  I’m hardly a paragon of healthy eating, what with my cheese habit and my beer gut, but the truth is that fried food doesn’t make me feel good.  Every six months or so I’ll eat an apple fritter and predictably I’ll feel icky afterwords.  I can eat fries once a week, but I have been known to get fry burps afterwords, a real sign that fried food doesn’t agree with me.

I have one frying ambition though- spring rolls.  I have made baked spring rolls but I think it makes the wrapping kind of tough.  I finally broke down last week and decided to fry some home made spring rolls.  Frying is easy, right?  You just heat up a bucket-load of oil and throw food into it until it turns golden…

Apparently there’s a learning curve with frying.  First of all, I can’t bear the thought of filling any of my pots and pans with inches of oil.  What do you do with all that oil when you’re done frying?  Do you dump it down the drain? That seems wasteful and also unhealthy for the drain.  Do you filter it and save it?  Do you make it into oil burning candles?  I couldn’t do it.  I put about a quarter of an inch of oil in a large frying pan. 

I heated it up.

Till it was really hot.

I added some spring rolls which sizzled satisfyingly.

But soon the rolls were frying too quickly and burning a bit.

The kitchen was filling up with a slight smokiness. 

The oil was looking a little suspect.

Turns out you should turn your oil down once you have heated it up.  I came very close to catching my kitchen on fire.  Apparently frying is much more of an art than I imagined.  Even if I hadn’t almost made my oil catch fire, the kitchen was filled with fried-smell for hours afterwords.  Usually my kitchen smells great after I’ve cooked.  How can the smell of fried grease smell so good when you’re eating the food and then smell so very wrong when just the grease smell is left?

I’ve decided that I’m not going to cultivate this kitchen knowledge.  I’m going to experiment with rice wraps next.  Perhaps I’ll make thin pancakes to eat my spring roll filling with.  I make a plum dipping sauce and I want to eat more of it but I need to find a way to eat this without baking or frying.  Pancakes might be the ticket!

I think it’s nice to find some things I don’t need to master in the kitchen.

Enhanced by Zemanta

My photo book is finished- come look!

my book cover.jpg

I have taken a break from writing my novel to create a book of my photos with some of my very best observations, meditations, and advice from my years of writing Dustpan Alley.  Please come take a look inside:

Preview of “Straight from the Jugular”

I had intended (and worked hard) to get it done in time for Christmas ordering but unfortunately I didn’t make it.  Doing it well was more important.  I’m not gonna lie to you, I’m very proud of this book.  Even if you don’t buy it, go check it out and leave a comment if you like it.

Here’s the introduction to the book which explains the connection between writing and photography and what I look for in photos:

When I first started taking pictures for my blog, Dustpan Alley, I committed all the usual photo crimes: lots of flash, not quite in focus, poor lighting, and no working on the pictures in Photoshop later. I am, above everything else, a writer, so at first I just used the photos to punctuate and illustrate posts in a perfunctory manner.  The writing was all that counted to me, but something happened along the way; I started playing with the photographic possibilities.  I started caring about the composition of my pictures.  I took pleasure in getting a sharp picture, a picture with its own story, a picture that could stand on its own.

My pictures still mostly sucked until I got my first good quality point and shoot.  My Canon SD850 took sharper better quality pictures than my ancient point and shoot could.  I could take much better macro shots and it was faster, capturing natural light better.  Suddenly my pictures were speaking to me, guiding my writing, inspiring posts rather than simply punctuating them.  I took my camera with me everywhere keeping my eyes peeled for anything interesting to capture, anything that might bring me more words, that might have something to say to me later.  Getting my first DSLR camera was a fresh revelation and though much bulkier to drag around than my little point and shoot, it takes even better pictures so I am rarely without it.

This is a book of my photographs that have sparked narratives and uncovered stories.  As is true with my writing, I’m not interested in capturing only the pretty or the awe-inspiring.  I’m not interested in self portraits that show me always at my best or pictures of other people that they would put in their school yearbook.  What I look for is motion, color, transitory moments; I want to uncover the blood and the guts, the trash, and the paint underneath the paint.  I want to see the sting, the opening, the flight, and the dreams that live and die just beyond our sight.  I want to revel in the minutiae, the detritus, the flecks of light that catch us, and follow the eye where it goes when we’re not thinking too much about it.  I want to find the humor, the daily irreverence, and the jubilation of daily life.

Just like my writing, my photographs come straight from the jugular.

I have collected in this book some of my best and each picture is paired with observations and thoughts I’ve taken from my writing.  The words don’t always immediately seem to go with the photographs and I’m not going to tell you why I paired each one as I have, I am only going to say that in each pairing there is something that binds them for me, whether it is mood, color, texture, or narrative.   

Polenta with Spinach, Onion, and Garlic

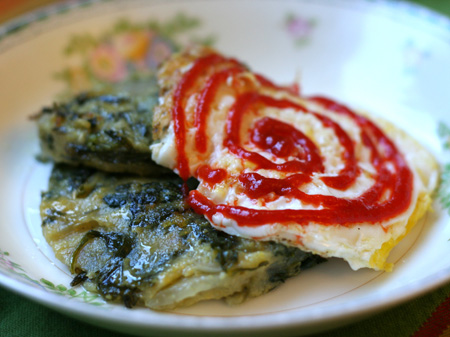
hot sauce spiral 2.jpgWhat’s the difference between polenta and cornmeal?  Nothing.  Polenta is boiled cornmeal.  You can make polenta using a fine, medium, or course grind of cornmeal which will determine how long it takes to cook.  The coarsely ground polenta will take at least 45 minutes to cook, sometimes longer.  I personally prefer a medium to fine grind because it’s silkier but a lot of my friends and family prefer the coarser grinds for the grainier texture.
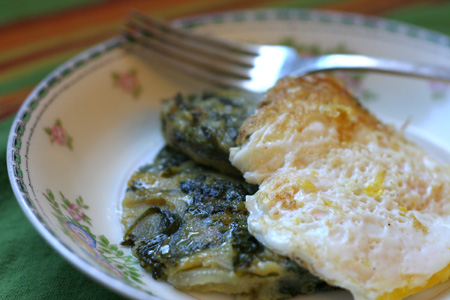
This is a versatile dish.  It goes well with almost anything.  I make my polenta different almost every time using what I have on hand as my inspiration.  When it’s first cooked it’s soft and porridge-like, perfect for spooning into a bowl with a heap of sauteed greens and garlic, but when it cools it firms up so I always pour it out onto a baking sheet, smooth it, and when it’s cooled I cut it into squares or use a biscuit cutter to cut it into circles and store it in the fridge for frying up later.

This particular batch made one dinner and several breakfasts.

best breakfast 2.jpg

Polenta with Spinach, Onion, and Garlic

Ingredients:

1 1/2 cups polenta
6 cups of water
4 cloves of garlic
1 tsp salt
30 grinds fresh pepper

1 lb spinach, washed and chopped
1 onion, diced
2 tbsp olive oil

To prepare leftovers for breakfast:
2 pieces of cut polenta
2 eggs
1 tbsp olive oil
salt and pepper
Sriracha hot sauce

Optional:
two slices of jack cheese

Method:

In a large sauce pan bring the water to a boil.  As soon as it boils turn it down to low heat and whisk the polenta into it, this is important because the whisking keeps the polenta from making lumps in the water.  Whisk really well to incorporate.  Press the garlic into the polenta, stir well, and then put the lid on the pot and let it cook.

Heat the olive oil in a large saute pan on med-high heat.  Add the onion and saute until translucent, then add the spinach and toss until well wilted, turn the heat down a little and put the lid on the pan to encourage steaming and stir every couple of minutes until the spinach is tender.

Stir the onion and spinach into the polenta, add the salt and pepper and stir well.  It is ready to spoon into bowls now unless you are using the coarse grind of cornmeal.

For the coarse grind you will need to let it continue to cook.  Total cooking time for coarse grind should be a minimum of 45 minutes, though some people swear it takes no less than an hour and a half (Italians do, anyway).  To check for done-ness taste a small cooled spoonful, if it’s done it will not be gritty.


To prepare leftovers for breakfast:

Heat the olive oil in a medium saute pan.  When hot, place two slices of polenta (pictured above are rounds I cut with a biscuit cutter) into the pan and crack two eggs next to (not on) the polenta.  The polenta is done when it is heated through and slightly browned.  The eggs are done when you say they are done.  Sprinkle the eggs with some salt and pepper.

If you like cheese you can stack a piece of polenta and and egg with a slice of cheese between them.

I highly recommend eating this with Sriracha hot sauce.

Recipe notes:  To make the breakfast vegan you can eat the sauteed polenta with beans (seasoned black beans would be very good) or with seasoned sauteed tofu.  This is a great and balanced breakfast- grains, greens, and protein.  I ate it for a week and it was the best thing about my day.  Yeah, hard week.


This recipe is vegan (if not using the egg or cheese for the breakfast leftovers)
This recipe is gluten-free.

Hors d’Oeuvre: Ciabatta, Caramelized Shallots, and Brie with Sour Cherry Sauce

the macro shiny brie 2.jpgI don’t often make hors d’oeuvres but I’ve noticed that when I don’t provide something to snack on while making Thanksgiving dinner everyone starts getting edgy and unthankful. 

I’m not a person who gets up at the crack of dawn to brine a turkey, partly because the thought of shoving my hand up a dead turkey’s “cavity” to remove its innards isn’t something I can handle before 5pm (when the experience can be fortified with strong drinks), but mostly I don’t make turkey because I’m a vegetarian.  In fact, I don’t labor in planning Thanksgiving dinner much at all.  A day or two before my family gathers (we’re a very small group) my mom and I discuss options.

This is the exception.  I have been planning to make this again since I made it twice last fall.  I took notes last year on the improvements I wanted to make and have been looking forward to making it again ever since. 

the cherry factor 2.jpgPeeling shallots takes a lot of time.  The ones from the store are
slightly easier than the ones I grow myself which have a thin dry skin
that doesn’t like to come off.  I made my sister do the peeling last
year so this year I performed an experiment in an attempt to improve the
tedium of peeling.  Garlic roasts well in its papery skin and squeezes
out afterwords very easily, so why not roast the shallots in their skins
the same way? 

I peeled all of the bigger cloves and left the rest.

shallot experiment 2.jpgUnfortunately, the experiment didn’t prove successful.  Yes, shallots can roast well in their skins but they are just as difficult to remove when they’re sticky as when they’re dry.  Most importantly, the bulbs that were skinned first got browned nicely whereas the ones left in their skin were browned on the skins only.  So the lesson is: peel your shallots.  Even though it’s a pain in the butt.  Better yet, assign a minion to do the peeling.

This appetizer takes time and effort to make.  It’s worth it.

godlike food 2.jpgCiabatta, Caramelized Shallots, and Brie with Sour Cherry Sauce

Ingredients:

2 lbs of shallots, trimmed and peeled by your minion
1/2 cup olive oil
salt
pepper

Sour Cherry sauce:
1 quart sour cherries, pits removed and chopped in half
4 cups sugar
(Alternatively: 1/2 jar sour cherry jam loosened up with water)

1 loaf of Ciabatta bread (or other good quality rustic bread)
2 wedges of Brie cheese, room temperature (Camembert is a good substitute)

the setup 2.jpgMethod:

Preheat the oven to 350 degrees.  Spread the shallots out on a baking sheet, drizzle all of the olive oil over them, then sprinkle with salt and grind some pepper on them.  Put on a rack in the middle and bake for up to an hour and a half, making sure to turn them with a spatula every ten to fifteen minutes.

Sour Cherry Sauce:

Add the sour cherries and the sugar to a medium sized sauce pan.  If the cherries are frozen, let them thaw enough to start liquefying the sugar before turning the heat on.  Once the cherry juice starts mixing and dissolving the sugar turn the stove on to high heat.  Bring the cherries and sugar to a boil, then reduce the heat to medium and cook for 20 minutes, stirring frequently to prevent scorching.  Remove from heat and let cool until everything else is ready.  As it cools it will thicken.

When the shallots are done (they should be browned but not scorched, see picture above) remove them from the oven and put them in a bowl with a couple of forks for serving.

Pour the cherry sauce into a bowl and provide a spoon for serving.

Slice the Ciabatta bread in appetizer sized pieces (each slice cut in four pieces worked well for me but you can cut them bigger if you like) and arrange them on a plate. 

Place the brie on a plate with knives.

If your guests are unfamiliar with or worried about the presence of fruit near their cheese and bread, go ahead and serve them up a piece before they have time to think about it. 

Each piece of bread gets a generous bit of cheese, a shallot or two, and a small spoonful of sour cherry sauce. 

sans cherry blood 2.jpgRecipe Notes:  If you can’t get your hands on sour cherries, cranberries would make an excellent substitute.  The important thing is to make a sauce that is both tart and sweet.  The shallots are sweet by themselves so using a fruit that is just sweet will result in a somewhat vapid experience.  A red currant sauce might be good here too.  Please don’t use sweet cherries.  They don’t work. 

About the rind of the cheese:  I don’t eat cheese rind.  I will dig into a wedge of brie completely gutting it, leaving just the velvety moldy exterior like a cheese-hungry termite which has caused some gasps of shock from others.  Some people view it as a crime to eschew the rind.  Some simply view it as the act of a philistine.  I’ve been told by many people that the French ALWAYS eat the cheese rind, however, I was finally gratified to find out from an actual French person that this isn’t true.  He said many French people don’t care for the rind either and it is a question of personal taste, not a point worthy of hysteria or snobbery.  I included the rind in these pictures and then fed them to my rind-eating relatives.  I think the rind is picturesque and since most people I know eat it, it seemed natural to include it for the shoot. 

The heat and cooking time: You can cook the shallots in less time at a hotter oven temperature but the results will not be quite as good.  Less heat keeps the shallots form scorching and consequently takes longer.  A good caramelization time.  Give it the time. 

best food ever 2.jpg

Enhanced by Zemanta