Author Archives: angelina

How to tell a hen from a rooster: before they reach full maturity.

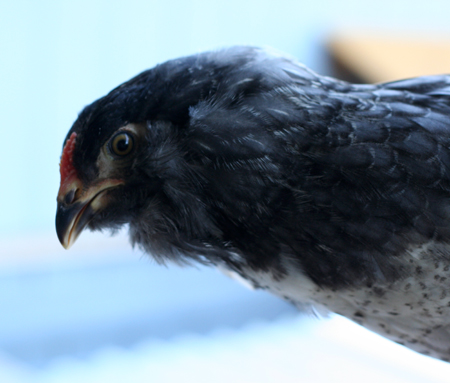
Bungie Boy.jpg

Bungie the rooster.  He’s a handsome boy.  Too bad my picture is sub-par.  He wasn’t cooperative and I didn’t have time to coax a good shoot from him before taking him to the farm store to be sent to the farm, where it is to be hoped he’ll have plenty of girls and no soup pot chasing him down.

Chickens are very difficult to sex when they hatch.  Experienced poultry people can tell the difference between the girls and the boys much better than most but no one is capable of being correct one hundred percent of the time.  If you live in a rural area where you’re allowed to have roosters this isn’t likely an issue you’ll lose sleep over, however, for everyone raising a flock of chickens in their own back yards in suburban or urban  neighborhoods, it is almost a certainty that roosters won’t be allowed. 

When you purchase chicks from the farm store they are sexed with the best accuracy possible, and yet, there is ALWAYS a risk that one or more of your chicks will turn out to be boy.  It’s a good idea to find out, before you buy them, what your farm store’s policy is on returning boy pullets.  Some won’t take them back so if you end up with a rooster you’ll need to be prepared to donate it to a farm or eat it for supper.  In my experience most farm stores selling chicks know that roosters are a problem for most of their customers and will take them back.  Some will even give you your money back. 

Bungie turned out to be a glossy preening gorgeous model of a boy.  Our farm store doesn’t really take roosters back but John the chicken man took ours.  We were sad to have to give him up because he was gorgeous and we actually like roosters, but they aren’t allowed, and he started practicing his crowing so we had to whisk him off.

Roosters don’t start crowing for at least two months.  Depending on the breed and the individual they may not start crowing until they’re three or four months old.  Bungie was a bit precocious in my opinion.  Little upstart!  Experienced poultry farmers like to tell you that until the bird crows you can’t know if it’s a rooster.  In our fist flock we had a hen that was acting like the boss of the whole group, herding the others around, posturing, and generally acting like a chest thumping boy and when I called the farm store they told me it was too early to tell.  I brought Lucy in and showed her to them and the chicken expert shook his head and told me she wasn’t a rooster.  I told him of her decidedly masculine behaviors and he explained (somewhat patronizingly) that some hens will behave in a very dominant fashion and that that wasn’t a sure way to tell a hen from a rooster before they’ve fully matured.

Two days later Lucy discovered his magnificent voice and began to practice his crow nonstop.  I brought him in to the farm store and they bought him back.  It wasn’t kind of me but I was a little smug.  Maybe he didn’t know for sure that Lucy was really Lucius, but WE did.

Our friends John and Jin were the first to tell us that Bungie might be a rooster.  They have a lot of experience with Ameraucanas and have noticed that the roosters always have a wider comb base which you can see even when they’re very young.  We wouldn’t have known by that indication but sure enough, there were other indications to make us suspect that John and Jin were correct.

So how can you tell a hen from a rooster before they reach full maturity?  I’ll include John and Jin’s tip, the rest of them are my own observations.  The only two times we had a rooster in our flock we knew it before they crowed.  So here are some things to look for:

How to tell a hen from a rooster:

  • In Ameraucanas the male chicks will have a wider comb base than the females.

  • Roosters generally have longer feathers around their necks than hens do.  You may start to notice a difference between two and three months of age. 

  • They like to thrust their chests out.  It is exactly the same type of gesture as a man pounding his chest.  They look like they’re puffing themselves up to look more manly. 

  • They will charge at the females (using their chest thrust) to herd them.

  • They may appear to fluff up their neck feathers and in addition to this some will have a distinct way of twitching their heads as they walk about importantly.  That one’s easy to spot but difficult to describe. 

  • Pushy, bossy, important, preening, puffed up, strutting, herding… these are all things you will find yourself saying about a hen who is really a rooster.

Obviously the gold standard is the moment the dudes roll out the voice.  I happen to love the sound of roosters crowing but there’s no getting around the fact that most people don’t enjoy it, so I hope that all of you with new flocks this year have only hens!

Enhanced by Zemanta

Free-range hens: What you should consider before letting your flock out.

free flock 2.jpg

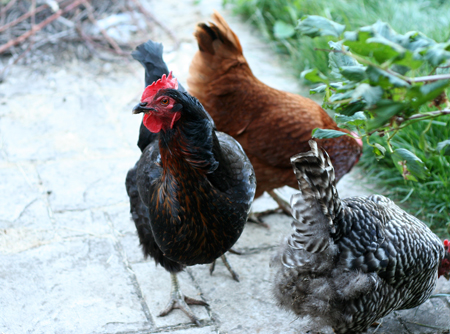
If you have (or are thinking about getting) a backyard flock of chickens you should consider the possibility of letting your flock free-range.  Chickens are foraging animals and thrive best when they can hunt for insects (and lizards!) and greens which no chicken run provides.  Being able to scavenge the lawn for worms, to pluck at grass and weeds, and to explore is deeply satisfying to them. 

We let our first flock of hens free-range a couple of hours a day (the last couple of hours of daylight) and they loved it.  It was wonderful to sit out in my garden and listen to the hens scratching, cooing, and scuffling.  If I was doing yard work they would follow behind me to see what interesting activity I was up to. 

By the time we got our second flock of hens we had a dog.  The dog went wild when she saw the birds in the coop the first time and Philip had to train her to not get excited around them.  Between that and the fact that the yard wasn’t properly fenced, we never let this flock free-range.  Naturally I was scared of the dog killing the chickens because I’ve known quite a few chicken-killing dogs.

At our current house the fencing isn’t an issue and we’ve been wondering for a long time whether or not our dog might be trained not to kill the hens if we let them out.  So we planned to do some experiments with the dog and the birds this summer but in the end the whole question of the dog versus the hens was effortlessly answered while Philip was working on building the new coop one evening.  He had to have the chicken run door open for some reason, the dog was close by, the access was there, and nothing happened.  The chickens ventured out and our dog continued to watch them with no more than casual interest. 

Just like that we are now able to let them free-range and I can tell you that they are very excited about the yard!

It worked for our flock this time, but will it work for yours?  There are some things you need to consider before letting your flock free-range in your yard:

  • Fencing: especially in a suburban environment, you need to make sure your fencing is secure.  It should be 6′ tall (most hens won’t fly such a tall fence, though it isn’t impossible because chickens did start out as jungle birds who lived in the trees) and it should not have any gaps in it big enough for the chickens to get out through.  It is equally important that no neighborhood dogs can get in to your chickens.

  • Dogs:  if you have a dog you need to make sure of your dog’s feelings about the chickens before you simply let them out.  A dog who wants to kill a chicken will accomplish the job so quickly you will not likely have time to save the situation.  If anyone has any tricks or tips on training dogs to be mellow about chickens please share! 

  • Mess:  Chickens poop, a lot.  They do it whenever they need to and don’t care where it lands so your yard will be scattered with their droppings.  I have never minded this.  They tend to prefer being in the dirt, the lawn, or under foliage rather than on pathways and decks, so I don’t mind a little mess from them.

  • Scratching:  Chickens forage by scratching at the ground with their strong clawed feet.  This is how they unearth seeds and grubs.  They will make holes in the garden.  They can be quite devastating to shallow rooted plants.  One of their favorite things to do in the warm weather when it’s hot is to find a shady spot in the dirt and dig themselves a shallow hole to dust themselves up in.  I find this charming except when they unintentionally expose the roots of nearby plants. 

  • Snacking:  While it’s true that chickens will often hunt down your slugs and snails and also enjoy plucking at a wide range of weeds, they really have an all-inclusive palate.  This means that they will equally enjoy snacking on young vegetable seedlings, flowers, rose leaves, and peck around any available fruits or vegetables. 

  • Getting them back in the coop:  Come dusk most chickens will automatically find their way back to the safety of their coop.  They are almost night blind so as the light begins to fade they will wander closer back to safety until they put themselves to bed.  Letting your hens free-range puts a responsibility on you to make sure that they’ve all made it back into the run and/or coop before dark and that you LOCK them in.  Sometimes a hen will get flustered and not find her way back before it’s too dark and she’ll just settle down right wherever she is and hope for the best.  The best does not usually come to hens sitting out all night without protection.  Weasels, snakes, skunks, and most of all, raccoons all want to eat your birds and they are just waiting for an opportunity to snatch them.  Nightfall is when most of them come hunting*.  So if you can’t commit to locking your birds in at dusk every single night, you should not let them out.

  • Birds of Prey:  Although I haven’t personally had a problem with chicken hawks or other birds of prey, you need to know if that might be a problem where you live as Belinda pointed out in the comments.  A large hawk can carry a chicken away, but especially vulnerable are smaller breeds such as banties.  If you don’t know if you have such birds of prey in your area, ask the poultry experts** at your local farm store.

With my first flock I started off letting them free-range all day long but after experiencing the damage they did to my most tender vegetable plantings I decided to only let them out during the last two hours of daylight (generally when I liked to be in my garden too) so I could watch over them and scare them off of any fresh plantings.  This served me very well.  The girls got some well deserved foraging in and some freedom but didn’t have enough time to do much damage.  The reason I let them out at the end of the day, instead of in the morning, is because not all chickens are easy to catch when they don’t want to be caught, but all chickens naturally return to their roost as it darkens which cuts down on work for me.

If I had a bigger property and could fence off my vegetables I would let my flock free-range all day.  But even a couple of hours a day will improve the quality of life your flock enjoys, not to mention the vastly improved quality of the eggs they reward you with.  It’s true!  The more your birds get to forage on weeds and bugs and dirt the richer their yolks will be. 

Not everyone who keeps chickens will be able to let them free-range.  What can you do to improve your flock’s quality of life in a run?  Here are three things you can do:

  • Weed toss:  When you weed your yard, toss the fresh weeds into the chicken run.  The bigger the pile you give your flock the happier they’ll be scratching around in it, eating the leaves (rich in vitamins!) and looking for any attached bugs.

  • Be sure to give them straw in their run: This gives them a satisfying feeling of digging, which makes a nice rustling noise as they work through it.  When it’s time to put new straw in the run I bring it in a big chunk and don’t spread it around.  The birds like to do this themselves and you’ll find they do a great job of distributing it around the run.

  • Kitchen scraps:&nb
    sp; I think if birds can’t go looking for treats it’s important to give them treats from the kitchen.  No grains (except fresh corn!) because if you feed them commercial feed they’re already getting all the grain they need, and avoid giving them potatoes.  Otherwise you can give them anything.  You’ll probably find that they have preferences (mine won’t eat carrots but LOVE turnips, for example).  The scraps will enrich their diet, which will enrich their eggs, and it’s a way to compost some of your kitchen scraps.

There are two sounds I like best in the world:  the first one is the sound of my kid laughing, the second one is the sound my chickens make when I toss them watermelon scraps, a quiet clucking and cooing which I think is more soothing than the sound of fountain water in a garden.

*Though my friend lost a hen to a raccoon during the day time!  This is pretty rare but it can happen. 

  • **This will be the person in charge of ordering and caring for the chickens the farm store sells.  They are nearly always people with strong experience in raising poultry and can answer most questions you might have about keeping hens.
Enhanced by Zemanta

Kitchen Garden Notes: July 10, 2010

shelled peas and onions 2.jpgIt’s HOT.  It’s too hot to go out and water anything but it’s hot enough that everything needs watering.  Except for the peas and favas which I’m almost done harvesting.  I grew two kinds of peas and as soon as I can find the packages and finish weighing them up I’ll write a post about the total yields I got from them. 
I only plant peas for shelling.  Without intending to, one of the varieties I planted this year is a “pod pea” which is the kind you can eat pod and all- even after the peas have started growing large.  I don’t like to eat them that way.  I do like snow peas when they’re young and tender but I hardly ever grow them because the shelled peas are so darn good and so hard to come by in farmer’s markets or grocery stores that I devote all my pea space to growing my own.

Is it worth it?  Oh yes!!

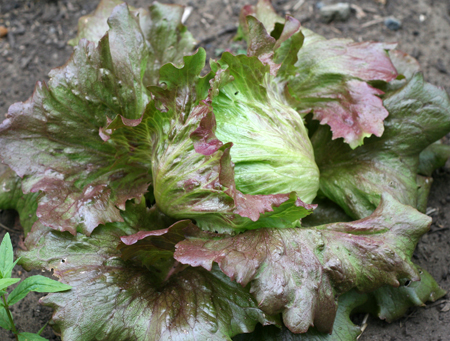
lettuce head 2.jpgThis is the first time I’ve ever grown iceburg lettuce.  This is “Red Iceburg” which was really crispy and delicious.  I only got two heads of it because I wasn’t careful in my sowing of the seeds and had some cat interference as well.  I will definitely be growing more crisphead lettuces!

pile of favas 2.jpgThe favas didn’t get very large this year.  I attribute this to how late I planted them.  As always, they are very tasty and were effortless to grow.  No pests (now there are black aphids on them but there were none all season up until harvest time). 
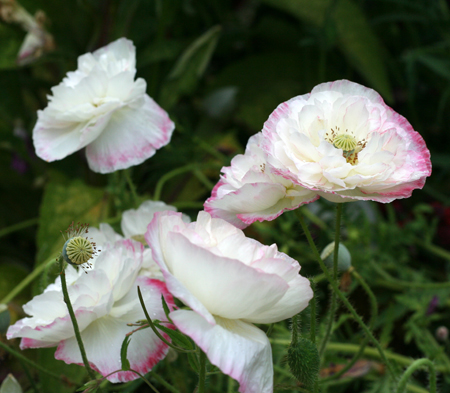
pale poppies 2.jpgThe poppies continue to amaze me.  I find them mesmerizing and I look at them all day from my window while I work.  I love the scarlet ones, of course, but these pale ones may be my favorites. 
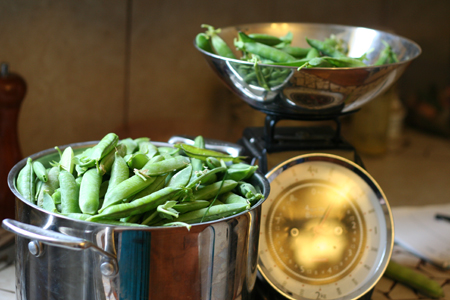
pea harvest 2.jpg

Right now my yard is waist high in grass and weeds.  We have no mower (ours broke and no one here in town works on electric mowers)* and I have not been making time for weeding between working and writing my novel.  This coming week I hope to work harder to tame the forest out there.  I have wild blackberries threatening to swallow half my yard too. 

This I am encouraging in part because I tasted them last year and they were really good!  I love blackberries and I had actually thought about buying a couple of cultivars to create a hedge of them in the corner of my garden.  Sometimes nature throws at you exactly what you crave.  They are probably the “Himalaya” blackberry which is considered a noxious weed here in Oregon.

I can’t consider anything a noxious weed that generously feeds so many animals, insects, and me!  This heat, though I loathe it, is exactly what the blackberry bushes need in order to ripen the buckets of green fruit they’ve got hanging from them. 

*This is a reasonable excuse, but of course we hate mowing and rarely do it anyway.

Strawberry Yield: 2010

scale strawb 2.jpgThis whole yield is from second year plants that I planted at the base of my three peach trees (which are in 3′ x 3′ raised beds).  I wish I had recorded exactly how many plants I put in each raised bed but since I didn’t I’ll have to estimate that there were about 7 plants per bed. 

macro strawb 2.jpg

The first year we got only a handful of berries.  I didn’t pinch off the flowers as all garden books suggest (to strengthen the roots and plants so that the second year will be all about fruit production.

Total yield from 21 plants:  13.5 lbs

That means that each plant produced .64 lbs of fruit.

I have done some research on how much yield I should be expecting (to see if my plants are performing well or not) and there is wide variation in what yields one should expect.  So that’s inconclusive. 

What I can conclude is that underplanting the peaches with the strawberries worked really well!

Because most of the fruit is ripe before we get our hot weather here I didn’t water these once this season. 

These are june-bearing plants but I don’t know which specific variety because a friend gave them to me last year. 

Enhanced by Zemanta

How To Make Couscous

fluffy couscous 2.jpg

Couscous is a granular pasta usually made of semolina.  I have never steamed couscous which is the traditional method of making it.  I first learned to cook it from Deborah Madison’s book “Vegetarian Cooking for Everyone” (which I highly recommend every cook have a copy of) but in rereading her instructions today I see I’ve gone completely off-book over the years with my own preparation.  My way works very well for me so I’m going to share it with you.

How To Make Couscous

Ingredients:

1 tbsp olive oil
1 cup couscous
2 cups water or broth

Method:

Pour the olive oil into a large saute pan and put the stove on high.  Add the couscous and stir to coat with the oil.  Stir the couscous for 1 to 2 minutes until it slightly colors. 

Add the water or broth and shake the pan gently to evenly distribute it.  Keep the burner on high until the water starts to bubble.  Turn the burner off and put a lid on the pan.

Let it sit for 7 minutes.

Remove the lid and fluff the couscous with a fork.

Recipe Notes:  Sometimes it clumps a little and if it does you just have to use the fork to break them up.  I don’t mind some clumps because they are never gummy or sticky for me.  I never eat couscous plain so by the time I mix vegetables into it the clumps usually break up completely anyway.  I don’t salt my couscous.  If I’m going to use salt I add it at the same time that I add other things to it. 

Enhanced by Zemanta

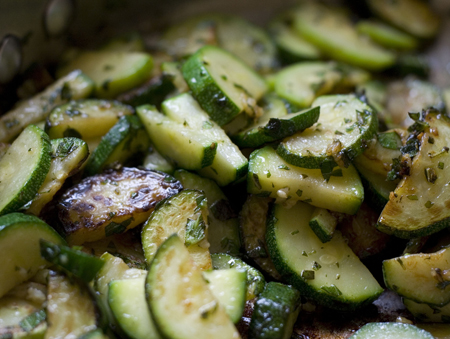
Oregano Garlic Zucchini Recipe

oregano zuch 2.jpg

I don’t buy summer squash in the fall, winter, or spring so when it finally shows up at the farmer’s market I can’t get enough of it.  I know that zucchini is the proverbial pest in the kitchen garden for its fecund habits, but I have never once in my life had so much zucchini I had to worry about fobbing it off on others.  I love it grilled, roasted, stuffed, steamed, and sauteed.  The only way I don’t like it is raw.

This simple recipe is my all time favorite way to eat them.  You can make this and eat is as a side or you can add it to pasta, couscous*, or rice.  You can add it to almost any other dish.  I love it best just like this!

Oregano Garlic Zucchini
serves 4

Ingredients:

2 tbsp olive oil
4 medium sized summer squash
4 stems of fresh oregano
2 large garlic cloves

Method:

Wash and slice the zucchini: if they are thin just cut in 1/4″ rounds, if they are thick, cut in half lengthwise first and then cut in 1/4″ half rounds.

Strip the leaves off the oregano stems and mince fine.

Have your garlic loaded into a garlic press OR mince it fine.

Pour the oil in a large saute pan and turn the burner to high.  When the oil is hot** put in the zucchini and let some of them brown but not burn, they cook fast so don’t walk away from them.  It usually takes about five minutes to get some good roasted bits. 

One minute before taking the pan off the heat add the oregano and garlic.  You don’t need them in the heat long.  Be sure to stir them in well.

Remove the pan from the stove and they’re ready to eat.


Recipe notes:
  Any summer squash will be fantastic made this way.  I don’t even salt and pepper mine but of course you can add either if you prefer.  Salt is a real flavor enhancer but in this dish the oregano and garlic are flavorful enough for me.  The worst thing that can happen when cooking summer squash is to over cook them.  As soon as you see the slices start turning from chalk white to translucent, they are almost done cooking. 

*Which is technically teeny tiny balls of pasta.

**To check if oil is hot, flick a little drop of water in it, if it crackles, the oil is hot.  But obviously, be careful because it can spatter and hurt you if you flick too much water into hot oil.  Or, of course, you can test it by putting one slice of zucchini in the pan, the oil should be hot enough that the zucchini start to sizzle a bit.

This recipe is vegan.
This recipe is gluten free.

Enhanced by Zemanta

Kitchen Garden Notes: June 11, 2010

red rome apple 2.jpgThere are so many good things happening in my garden right now.  My Red Rome apple has set a ton of fruit even though it’s still sitting in a dirt pile in the driveway.  We dug it up from the other house and haven’t decided where to put it yet.
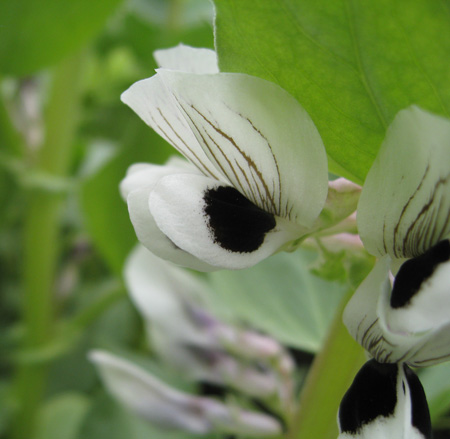
fava macro 2.jpgI love fava flowers with their bold black marks and stripes.  I planted them late this year so I’m not sure how they’ll do but it seems they’re doing fine so far.  It just might be later than usual when I get to harvest them. 

blueberry cluster 2.jpgAll of our blueberries were transplanted from our last house and are doing pretty well.  This particular one is in the same dirt pile as the Red Rome.  In spite of not having a deep place to send its roots down in, it looks pretty happy. 

peas blooming 2.jpgThe peas are very tall and covered in blossoms though I have yet to find any pods.  Peas really love our cool climate here. 

strawberry cluster 2.jpg

The strawberries from last year are very full and making tons of berries.  Unfortunately they are also being choked by bindweed which is rampant in our garden.

Seeing all the good fruit and flowers growing in my garden right now is a little bittersweet because there’s a strong chance we’ll have to move.  Not to a new house but to a rental.  We’re trying to work with our bank so that we can keep our house but the truth is, it doesn’t look good.  So I walk around and wonder what I’ll get to taste before I have to pack up and find somewhere new to live. 

We’ve started four gardens at four houses since becoming homeowners 10 years ago and I’ve gotten better at it with each one.  Every time I plant fruit trees and look forward to tasting the first tiny harvest and each time I end up moving before I get to enjoy them. 

We like to think of ourselves as modern-day Johnny Appleseeds, planting fruit trees everywhere we live so that others can enjoy them after we’re gone.  Establishing fruiting trees in a world that talks about starvation and wonders how we can feed all the people in the world while planting non-fruiting apple trees and ornamnentals feels useful and positive. 

If we don’t get to keep this house we will probably never be able to own a house again and my gardening days of collecting antique roses, establishing fruit trees, and growing my own vegetables will be likely be over.  It doesn’t mean I can’t continue to do a lot of the things that define urban homesteading. 

I am thinking about places where I can transplant some of my treasures so that I can visit them. 

But who knows, maybe some amazing bit of luck will allow me to stay put.

Mustard Potato Salad Recipe

another potato salad 2.jpg

Although potato salad is a dish that generally doesn’t get brought out until Memorial day, I think of it as an all season recipe because the ingredients can be found in your pantry all year.  When fresh dill is available it’s even better and then can be considered more of a summer indulgence.

Growing up I wasn’t a big potato salad fan because most of the time it’s made with too much mayonnaise, a condiment I like only in very moderate portions and never so much that I feel like my mouth is full of it.  This potato salad recipe has only a half a cup of mayonnaise and just as much mustard which gives it just enough creaminess to compliment the potatoes and the sharp tang of mustard shines.

Mustard Potato Salad Recipe

makes 6 servings

Ingredients:

8 medium red potatoes, cubed
1/2 cup mayonnaise
1/2 cup spicy brown mustard
1/2 red onion, diced fine
3 hard boiled eggs, roughly chipped
2 dill pickles, diced medium
1 tsp dried dill or 1 tbsp fresh (minced)
20 grinds fresh pepper
1 tsp salt

Method:

Steam the potatoes until tender but not falling apart.  It usually takes about ten minutes for me but I rely more on testing with a fork than on timing.  When they’re done put them in a large mixing bowl and let them cool for about fifteen minutes.

Once the potatoes are cooled down add the rest of the ingredients and stir them together well. 

This potato salad recipe is good eaten still warm or completely cold.


Recipe notes:  I used to make this potato salad with a couple of stalks of celery and if you like you can do this too.  I stopped being in the habit of using celery when I made greater efforts to shop seasonally for my produce.  Where I live celery is a late summer and early fall vegetable.  When using a large amount of prepared mustard try using a milder one first and then if you want it to be spicier try using a Dijon or experiment with other stronger prepared mustards.  The main thing is to remember that mustard is the star flavor in this recipe.

This recipe is gluten free IF the mustard you use doesn’t use vinegar made with malt or wheat.

This recipe is NOT vegan.  To convert this recipe to be vegan: omit the eggs and use a vegan mayonnaise.

Reblog this post [with Zemanta]

How To: Polish Your Pots And Pans

dirty pot 2.jpgIf your stainless steel pots or pans ever develop a dull film on them from cooking that regular cleaning won’t remove you should try this method of cleaning them. 
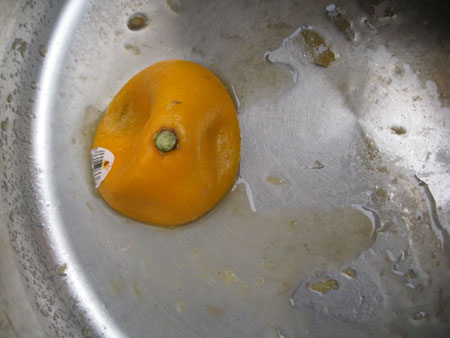
How To Clean Pots and Pans Using Lemon and Salt

It’s simple, quick, and inexpensive.

You will need:
1 lemon (more acidic varieties are best)
1 tbsp table salt
elbow grease, but only a modest amount

lemon scrub 2.jpgInstructions: cut the lemon in half.  In the bottom of your pan sprinkle half the tablespoon of salt.  Rub the lemon all around the dull stains squeezing as you do it to release the juice and using the salt to scrub the surface of the metal.  When you have scrubbed enough so that no dry salt remains and the lemon is squeezed out.  Let the lemon juice and salt sit for a few minutes.
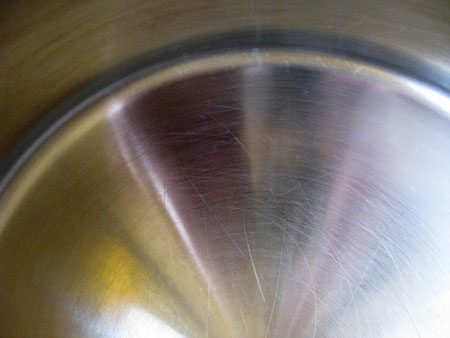
Next: rinse the pot out and gently scrub at dull stains with a non-scratching scrub sponge.  If it’s come completely clean then you’re done! 

However, my pot took two passes to get completely shiny clean.

So if the stains didn’t come completely off the first time: rinse and repeat, as they say.

clean pot 2.jpg

See for yourself the difference the lemon and salt made!
Reblog this post [with Zemanta]

Mustard Vinaigrette Recipe

mustard vinaigrette 2.jpg

I rarely buy salad dressing from the store since my close friend Chelsea taught me to make my own years ago.  I use this dressing for every kind of salad and I think it makes a great dressing for pasta with roasted summer vegetables. 

A salad dressing becomes very personalized in no time at all.  Once you learn to make one basic recipe, you will adjust it to suit your taste almost without thinking about it, and indeed, if you make your own frequently you won’t need to think about it at all or look up recipes.  It will become second nature. 

If you don’t already have a favorite mustard vinaigrette, try this one!  I use my favorite stone-ground spicy brown mustard but many people prefer the sharper bite of a Dijon mustard; use what you love best because mustard is the star of this dressing.

Chelsea tends to make her dressings in batches just large enough for her needs each time, I prefer to make enough to put it in a bottle and use it for a few different salads.  This recipe will make one full bottle of dressing.  I often double it so that I have two bottles premade.  This dressing will last indefinitely in the fridge due to the vinegar and mustard content, though it will thicken with the cold and may need to be warmed to be poured.

Mustard Vinaigrette Dressing

Ingredients:
1 cup olive oil
1/2 cup red wine vinegar
1 tbsp mustard
3 roughly chopped garlic cloves
1 1/2 tsp dried thyme
1/2 tsp salt
1/4 tsp freshly ground black pepper

Method:

Add all the ingredients to a tall sided bowl or very large measuring cup and then blend them together really well using an immersion blender.  I like using the immersion blender for this dressing because it emulsifies the oil enough to thicken it and make it creamy. 

To make by hand:
Instead of roughly chopping the garlic, if you want to make this without a blender, I suggest chopping the garlic very fine first or crushing it well in a mortar and pestle.  Then add all the ingredients to a medium sized bowl and whisk them well.  This method will not create quite as thick and creamy a consistency but the flavor will be just as wonderful.


Variations: Chelsea sometimes likes to add a teaspoon of sugar to her dressing to round out the sharpness of the vinegar, you might like to try it her way to see what you think, many dressing have sugar in them for this reason.  I prefer mine without but it’s worth experimenting.  My preferred herb for dressing is thyme but there are many dried herbs that are just as good in this dressing.  One suggestion to try is: 1/2 tsp each of thyme, marjoram, and basil.   

This recipe is gluten free: if the vinegar is gluten free, red wine vinegar usually is but if you have Celiac’s it is wise to be sure.  You can use an apple cider vinegar as a substitution.

This recipe is Vegan

Reblog this post [with Zemanta]