One of the goals of the Farmhouse Finishing School is to help people learn better household management skills. Keeping your spice and dry-goods shelves in your kitchen organized and cleaned out may seem a little too Martha-Stewart-perfect for some people but there are excellent reasons why you should periodically look at the food and spices you’re storing on your kitchen shelves and exert some effort to organize and clean it all up. This is a primer on pantry management. Some people have actual pantries, big enclosed rooms in which to store their canned and dry goods for cooking with, but most people have only a few shelves in their kitchen to use as their pantry. In either case, the place where you store all your bulk long-term storage goods needs to be periodically inspected and cleaned.
Here are a few reasons to do this:
- Inspecting your dry-goods closely allows you to identify any pantry pest infestations.
- Discover what dry-goods you don’t use and don’t buy them in the future.
- Organizing what you have allows you to remember things you could be using that were hidden from view.
- Storing your dry-goods properly will allow you to prolong their shelf-life.
- When you can see what you have on hand you are less likely to buy doubles of anything.

A view of my kitchen cabinet before the clean-up. Please observe that many things were shoved on the shelves in plastic bags. Goods stored in plastic bags are hard to see, vulnerable to pests, and more likely to go stale before being used, and there are health issues to consider as well. What a mess!
Over a period of several months I have been negligent about storing my pantry goods properly and this has caused several problems. I finally got tired of not being able to see at a glance what was on my shelves and I decided to tackle the mess. It took six hours to tame my spice cabinet and my food shelves, a task which would have taken a lot less time if I had been in a habit of storing things properly in the first place and cleaning my cabinets out more often. It’s a good idea to do a thorough clean-out at least twice a year.
I discovered that I had three boxes of powdered sugar, about six packages of mustard seeds, old grains that were stale, and spices with no integrity left they were so old and grey. Because I have to be careful with what I spend on groceries I see that I have been exercising poor household economy. If your kitchen cabinets look at all like mine did, then you need to clean them out too. Where to begin? It can be a daunting project. I understand a reluctance to dive in but the rewards are worth it. Be prepared to clean out a lot of jars. If you have a working dishwasher this may save quite a bit of time. I don’t, so I had to wash a ton of them by hand. The first concept I want to discuss, before you dive in is proper storage containers.
Out with plastic- in with glass!
I can’t stress this enough: storing anything long-term in plastic is a practice you must wean yourself off of. Plastic is an unstable material. It emits, at different temperatures (most notably in heat) and in reaction to certain foods, molecules into your water and food. Please feel free to do some research on the subject as I have done. Food kept in plastic containers can take on the smell and taste of plastic. All plastics off-gas chemicals when new and many plastics off-gas from the time they’re made until they completely biodegrade which could take a few hundred years. Once plastic molecules enter our water and/or food and we ingest them, they build up in our bodies and studies have shown that these plastic molecules are shared with babies through their mother’s breast milk. Plastics have been implicated in many health issues and continue to be studied.
If you insist on continuing to use plastics to store food be sure that the plastics you use are Bisphenol-A free, don’t reheat food in plastic in the microwave even if your plastic containers say they are “microwave safe”, and don’t store sauces in plastic as it has been found that the wetter your food the more likely a transference of plastic molecules to your food is.
Glass is generally more expensive than plastic storage containers but well worth the investment. Glass is a completely inert material and therefore doesn’t off-gas chemicals into the air or into your food or body. Cared for properly it can last indefinitely and is therefore will save you money over plastic in the long run. Glass will never give your food an off flavor. The number one best pantry container to store your dry-goods in are swing-top jars.

Swing-top jars, also called wire bale jars, have a replaceable rubber gasket and a metal clamp which secures the lid tightly onto the jar with and airtight seal. The gaskets will dry out and crack with age so a part of your cabinet clean-out is to replace old gaskets.
The disadvantage of swing-top jars is that they can be costly to buy. If you have a “Cost Plus” near you, see if they have any on hand. I have, in the past, found their prices to be reasonable. You can also find these at most well stocked kitchen supply stores. Sometimes you can find them in thrift stores. If you find them used just be sure to sniff the interior before buying. It is extremely rare for glass to take on a permanent odor but I had it happen to one jar. Look for scratches on the interior, scratches compromise the usefulness of a jar rendering it much more likely to break. Be sure to replace the gasket (if it even has one) with a new one when you get it home. If you can afford to invest in a larger quantity of these jars at one time you can buy them from manufacturers online. The best deal I have found so far is from Freund Containers, by the case. They have a minimum order amount so be sure you are prepared to meet it. You don’t need a special license to buy from them. (Just to be clear: I have no affiliation with them at all except as a customer of their goods. If you buy from them I receive no compensation or benefits.)

The next best storage container for your pantry goods are canning jars. These come in many different sizes. They have a two piece lid which creates a good seal if you screw it tightly. These jars are much less expensive to buy than the swing-top jars. The disadvantage of these is that it is impractical to screw the lids tight enough to get an airtight seal because if you manage to get the lid on that tightly you may not be able to unscrew them later. While I have never had a pest invasion in my swing-top jars I have definitely had a breach of my canning jars by pests. But with good cupboard management you can keep this problem at a minimum.
Getting Started:
- Clean up your kitchen before you start this project. You will need all the counter space and dish-rack space you have.
- Have a stack of clean dry dish towels ready.
- Be sure you have a sharpie pen on hand for labeling jars as you go along.
- Pick one shelf to start working on.
How to clean and organize the shelves:
- Pull everything off the shelf you’ve picked to start with. Everything. Put it all out on your counter. If you don’t have enough counter space you may consider dragging a small table into your kitchen temporarily to give you more space to lay it all out. (If your kitchen is too small for this then even bringing in a chair can give you extra surface space.
- One jar at a time, examine what you have. Open each jar and look closely at the contents and give it a smell test. If you haven’t used the contents in over a year you probably aren’t going to use it this year either. Throw it out.
- Any herb or plant matter can be dumped on your compost pile. If you have a hot composting system you can dump everything on the pile. If you have a cold composting system you will want to avoid putting grains or proteins in it. If you have hens some of your old grains may be enjoyed by them. (But don’t give them rancid food.)
- Clean the jars you empty as you go so they’ll be available for anything that’s been left in plastic bags and needs to be jarred.
- Any goods still in plastic bags: transfer to jars and label the jars with your sharpie (directly onto the glass).
- Wipe the empty shelf clean with a damp dish towel or sponge. Any spilled food, especially grains, will attract pests.
- Put everything that has passed inspection back on the shelf.
Repeat these steps for all of the shelves you need to go through. Once you have finished throwing old food out and cleaning up what you have you can spend a little time organizing the shelves to make more efficient use of them.
Here are some guidelines for deciding what to keep and what to toss:
- Herbs and spices are generally at their best for one year.
- Herbs and ground spices should have a pleasant strong odor on opening the jar. If you can’t smell them or if the smell is weak, they are most likely too old to do your food any service. Toss them out. Save any glass spice jars and soak them in warm soapy water to remove the labels.
- Turn the contents of jars around and upside down. If you can see any webbing the contents have been compromised by a pest and should be thrown out. If the contents (especially with regard to spices) don’t shift and move when you shake the jar around then they have probably settled from disuse and compacted- this is generally an indication that they are very old and should be discarded. In some cases this will mean the contents got a little damp and should also be tossed out.
- Look for any visible weevils or moth larvae. Toss anything that has them. (If the item is something your chickens might safely enjoy – give it to them. They love to eat bugs!)
- Everything should get the sniff test. If you don’t have a great sense of smell then have someone in your family who does perform this test. Flour, nuts, oils, nut butters, and grains can all go rancid. The smell will be slightly sour and musty.
- Canned goods, whether made at home or bought from the store, may be capable of lasting 10 years but they don’t actually improve with age and their nutritional integrity, like all stored foods, declines incrementally starting from the moment they are first canned. In most cases you shouldn’t hold onto canned goods for more than two years. If you haven’t eaten it by then, you won’t, you’re just hoarding it. My personal rule of thumb is that if I haven’t eaten it in a year I toss it out. You can put the contents of most canned goods on your compost pile so that they really aren’t going to waste but will add to your soil. (Recycling at its best!) The exceptions I make to my one year rule of thumb is if I preserve way more of something than I need one year and I have lots left over the next. If I’m making my way through the jars of that item I will keep it, knowing that I’m actually eating it. This is true of the pickles I made the year before last. I made twice as many as we could eat in a year and we have been steadily working our way through them. I still have some left and we’re still eating them.* On the other hand, I have some jalapeno jelly that I made a year and a half ago that didn’t have any heat to it and so I didn’t really enjoy it and haven’t been eating it. It’s time to toss it out.
- Cabinet items that have been stored in their original packaging, such as crackers and cereals, should all be checked for freshness. They go stale surprisingly fast. One way to prolong the shelf life of cereals and crackers is to transfer them to swing-top jars when you get them home. I now do this automatically with most boxed items.
- Baking soda and baking powder don’t necessarily go stale or rancid but they will become less effective. It is wise to replace them every six months or so. You can often buy them from bulk bins and transfer them to permanent jars in your cupboard. Buy small quantities to reduce possible waste.
Now that everything is clean and all your food is in labeled jars…how do you organize it all?
There isn’t one answer to this because how you use your kitchen is highly personal. You must think about how you cook. What things do you reach for the most? Those things should be on the lowest most accessible shelves. Reserve the top shelves for bulk goods you don’t use as often, or for back up bottles of condiments you buy or make in multiples.
I have organized my own cabinets so that my son’s snack foods are all in one place on a low shelf. My other lowest shelf has my baking goods on it (sugars, nuts, raisins, chocolate chips) and the next shelf up has the flours and grains I use the most. The top shelf has my dried legumes which I only grab for once or twice a week to make big batches of them. My spice rack is loosely organized by my use of them. I have all my sweet baking spices, including baking soda and baking powder, on one shelf. I have my spicy and savory herbs on another shelf together. I have all my bulk spices (like black peppercorns and mustard seeds) in large jars on the two shelves they will fit on. This works for me but perhaps you cook differently and so you need to think about how you grab for things and group your jars together accordingly.
Pantry organizing tips:
- Group like things together: it is much easier to make shopping lists when you can easily see all like-items next to each other. If you know you need more olive oil and you’re looking at the shelf where you keep it but you don’t see any vegetable oil (because you put it somewhere else) you may decide to buy some because you think you’re out.
- Put the things you use the most on the most accessible shelves.
- Spices and herbs should be close enough to your stove to be easily grabbed without being stored right above it where the heat and moisture from the stove can degrade them quickly.
Don’t be afraid to try different ways of organizing your pantry. Once you’ve already cleaned and sorted through your supplies it is much easier to move them around and play with how best to arrange them all.
Now, go put on some motivating music, crack open a festive beverage, and get those cabinets looking shiny and fresh!
*However, they are softer now than they were when under a year old. They are not getting better with age. I’m just not going to waste them because they still taste good and we’re still using them up.


![Reblog this post [with Zemanta]](http://img.zemanta.com/reblog_e.png?x-id=f3027dfd-76a1-42bb-a97f-e1f9d7fbc227)
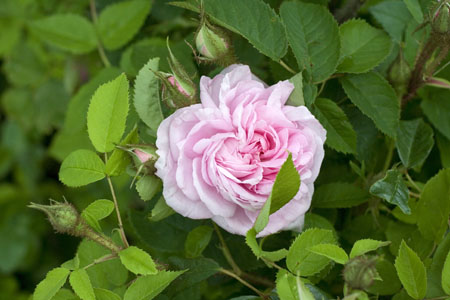 The moss rose Gloire de Mousseux is in full bloom. I didn’t prune any of the roses this winter so they’re a riot of tangles. This one gets very tall. I’m pleased it didn’t ball up in the spring rain.
 The arnica has just started blooming and I have promised myself not to miss out on harvesting it this year. I got lots of blooms last year and never managed to get them. They trickle in for a while then bust out in full flower mode and then are suddenly done. I’m determined to make an arnica salve from my own plants this year.
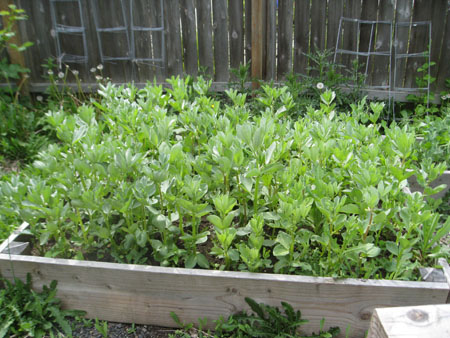 The favas are beginning to set flowers. I wish they’d had a chance to get taller first but I planted them late in the season. Still, I can’t complain about getting such a great
  The peas are very busy vining up. I have a perennial problem of not providing support before it’s too late. This variety is semi-self supporting. We’ll see what happens. No blossoms yet.
 The
The 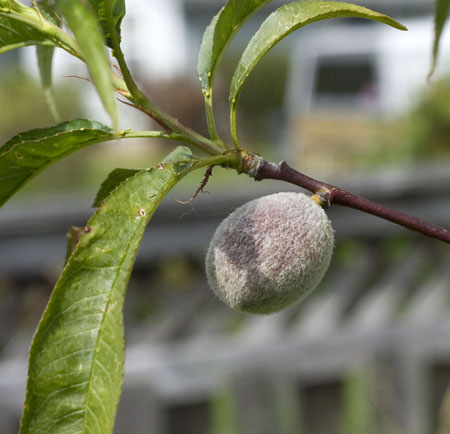 Of the three peach trees this is by far the healthiest. It’s “Frost” and seems to be much less inclined to succumb to peach leaf curl. It has a few peaches that might not drop. Fingers crossed!
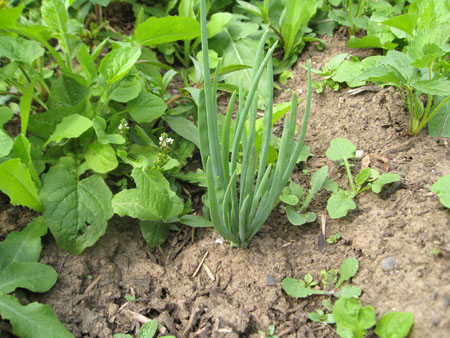 I took the picture before I weeded. I let this bed go nuts with weeds but when I was out there yesterday I started pulling them out and saw that most of my shallots had successfully come up. Only a couple of rotters. Now that I’ve cleared the weeds they should do even better. They’re planted in a bed with strawberries.
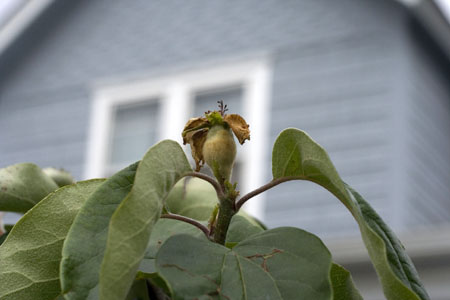 The
The 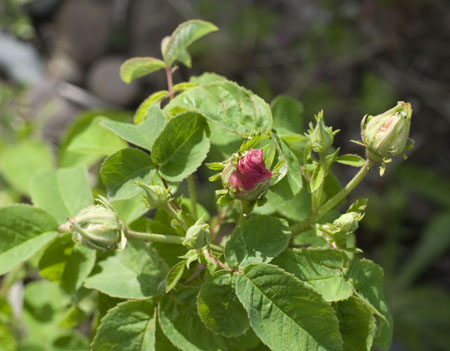 This is my
![Reblog this post [with Zemanta]](http://img.zemanta.com/reblog_e.png?x-id=0f346f2b-b591-4b28-843a-bcd07ca69408)

![Reblog this post [with Zemanta]](http://img.zemanta.com/reblog_e.png?x-id=d4016f16-7d92-4ec2-95bc-3d14c81cf223)
 We’ve had ameraucanas before and love them. Not just for the colorful eggs they lay but because they’re cool looking and our experience is that they have great personalities. We have never had a pale one, which in some places are referred to as lavender
  The naming of new chicks is a very important ritual. You can name your
 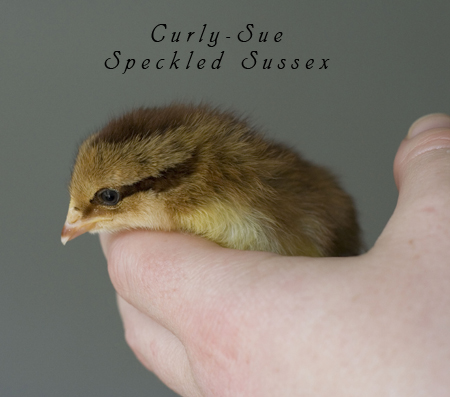 I’m willing to bet that no one can guess who named which birds. Naturally if you’re a farmer who has more than a small flock you don’t indulge in the great chick naming event. It’s too bad, I must say it adds some lively fun to family life and my kid is much more interested in chicks he gets to take part in naming than chicks he doesn’t. It becomes more personal to him. Naming is not recommended for those birds being raised for meat. We raise ours for the eggs, the manure, and the pleasure of having them around.
 We have a favorite
 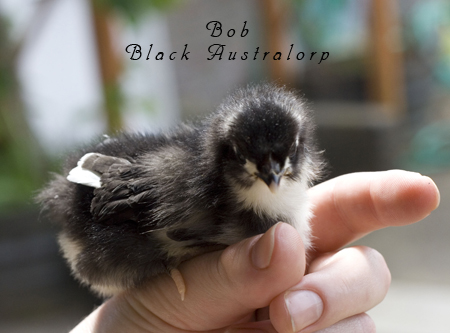 Bob is difficult to photograph. She’s not very cooperative and her head being so dark adds another challenge. We’ve never had Australorpes so we’re pretty excited to have two of them. Of course, any or all of these chicks could turn out to be a
 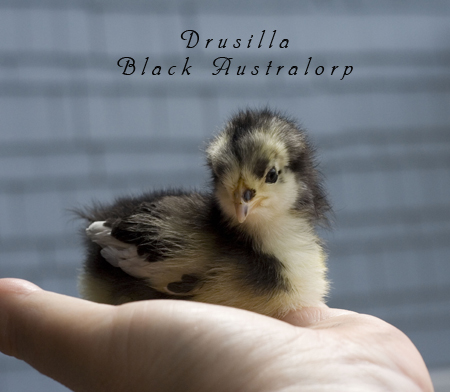 I’m curious to see how different Bob and Drusilla will turn out. Drusilla has a lot more yellow on her but I thought the grown Australorps are all black.
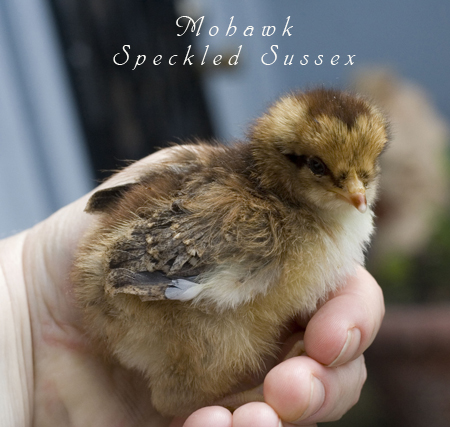 This is Mohawk who had a very stressful weekend during which she very nearly signed off after becoming cooked by the heat lamp. My next chicken post will give some tips about reviving chicks that have collapsed from overheating. It is amazing that she made it. She’s still a little ruffled looking but she’s completely recovered.
  Taking pictures of the chicks in their box is hard. The lighting is tough on the pictures. This is Mohawk just after making her full recovery.
![Reblog this post [with Zemanta]](http://img.zemanta.com/reblog_e.png?x-id=af81280f-6786-47ac-907e-aaf994d042b8)

 I also bought three red currants a couple of years ago that ended up living in pots until last month when I finally put the surviving two in the ground in my monastery garden. That may not be their permanent spot but they needed a more substantial bit of soil to grow strong roots. They are still very young plants but I saw that one of them flowered and now there are these very tiny berries hanging delicately the thin branch and my hope is that they will ripen so I can finally taste them. I will need to get one more, of a different variety, to improve pollination, but it’s exciting to see progress in the garden even when it’s small.
 Last summer we managed to dig up a few of our good plants from our old house. This was not my favorite apple tree but it was the one in the best condition. It’s a Red Rome apple. It already produces quite a few apples on its small form. We’ll be getting another tree to ensure pollination. There are apple trees fairly nearby but when one is planning a food producing garden it’s important to make sure that you have all the pollinators available on your own property because you never know when neighbors will cut down their own trees.