Category Archives: Recipes

Peanut Butter Chocolate Chip Cookie Recipe

Because I have an excessively picky eater to feed who doesn’t eat enough protein, I am always looking for ways to get more into him.  He has a huge sweet tooth and when it was established that he likes peanut butter cookies I went on a search for the recipe with the most peanut butter and the least amount of sugar.  Naturally I had to adapt what I found and this recipe is the one that has evolved and become our standard.


These cookies don’t spread so you have to push them down a little bit after making them into a ball.  It isn’t necessary to make the classic hash marks with a fork, but I enjoy doing it this way.


Each cookie is about an inch and a half in size when baked.

This is the color the bottom should be when you take them out- a nice deep golden without being too dark or too light.

Peanut Butter Chocolate Chip Cookie Recipe

yield: approximately 60 cookies

Ingredients:

1/2 pound (2 sticks) butter, softened

1/4 cup granulated sugar

1 1/4 cups light-brown sugar

1 1/2 cups smooth peanut butter

2 large eggs

1 tsp vanilla extract

2 1/2 cups unbleached all-purpose flour

1 1/2 tsp baking soda

1/2 tsp salt

6 oz mini chocolate chips

Method:

Preheat oven to 350 degrees.  Cream the butter and sugars together in a big bowl until they are fluffy and light yellow.  Add the peanut butter and continue beating until it is completely blended with the butter.  Next beat in the eggs, one at a time, and then add the vanilla.

In a separate medium-size bowl whisk together the flour, baking soda, and salt.  Gradually stir the flour in with the wet ingredients until completely incorporated.  Add the chocolate chips and mix them into the dough thoroughly.

Line a baking sheet with parchment paper.  To form the cookies use about a table-spoon of dough and roll it in the palm of your hand to form a ball.  Place it on the cookie sheet and flatten it gently with either a fork or your hand.

When the sheet is full, bake for 10 minutes until the bottom of the cookie is golden brown.  Cool on a rack for a couple minutes before eating.

Recipe Notes: You can make this dough using a stand mixer, as I do, using the whisk attachment for mixing the wet ingredients and a paddle for adding the flour.  If you use a mixer to cream the eggs and sugar it will take about 5 minutes on high-speed to get it to the fluffy light consistency you want.  If you’re doing it by hand be sure to use a whisk and give it the full power of your arm muscles!  If you can get it, use organic peanut butter, but if not, be sure you’re using a natural peanut butter with no added sugars or preservatives.  We store this dough in the fridge and make batches of 12 cookies at a time.  We think they’re best fresh.  The yield you get will depend on the size of cookie you make.  You can make them larger than we do if you like a bigger cookie.

Leek Strata

A strata is an Italian egg and bread casserole.  You can assemble this dish and refrigerate it over night, then cook in the morning which makes it a great dish for brunches.  This version makes use of seasonal leeks when you don’t feel like eating them in the tradition potato leek soup (though that’s something I look forward to every year!) or leek quiche.  I liked making the strata because I could make a dish as satisfying as a quiche but with wheat bread instead of a crust.


The cubed bread in the buttered baking dish.

The eggs mixture being poured over the bread.

Leek Strata

Ingredients:

3 slices whole wheat bread, cubed

7 large eggs

3 medium sized leeks, chopped fine

1 cup milk

8 ounces feta cheese (or chevre), crumbled

2 Tbsp olive oil

1 tsp dried thyme (or 2 tsp fresh thyme)

1/2 tsp salt

pepper to taste

1 Tbsp butter

Method:  Preheat your oven to 350 degrees.  Heat the olive oil in a large skillet on med/high heat and then add the leeks.  Saute them until they are soft.  Meanwhile butter a 3 quart casserole dish and fill the bottom with the cubed bread.

In a large mixing bowl whisk together the eggs, milk, thyme, salt, and pepper until will blended.  Add the crumbled feta and the leeks when the leeks have cooled down a bit.  Mix well and then pour over the bread cubes making sure you spread it out evenly.  Let the dish sit for about ten minutes to let the eggs and milk soak the bread.

Bake in the oven between 45 minutes to an hour*.  The sides should pull away slightly and be golden.

Recipe notes:  This is a very flexible dish.  You can make many substitutions such as chard and onions for the leeks.  You can use a sharp cheddar instead of feta or add Parmesan to it.  Keep the bread and the milk proportions the same and change out any of the other ingredients you like.

*Check it at 45 minutes, which is when mine was done, but some ovens cook hotter and some cooler so if it seems a little wet on the top still let it cook a little longer.  It should be moist inside but the top shouldn’t have a runny appearance.

Bean and Tomatillo Salsa Soup

bean and eggs 2

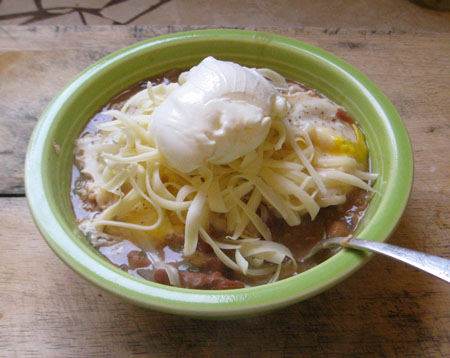
Growing your own beans to dry is easy and rewarding.  For this recipe I used the last of my home-grown dried beans, a mix of varieties including Jacob’s Cattle and Tiger’s Eye, and a jar of my home-made tomatillo salsa.  It is unbelievably easy to make and not only filling, but really tasty!  The beans and tomatillo salsa mixed together make a soup that you can eat plain, but when you poach a couple of eggs in a portion of the soup and top it with sour cream and cheese it is even better in my opinion.

The Bean Soup
Ingredients:

Approx 2 cups of dried beans (pinto or similar style bean recommended)

1 pint jar of home canned tomatillo salsa (store-bought if you have no home-made)

Salt to taste

Making the bean soup into a whole meal:

1.5 cups bean tomatillo soup

1 or 2 eggs

1-2 ounces jack cheese

1-2 Tbls sour cream

Method for making the soup:

Put your dried beans in a crock pot and fill the crock pot with water.  I put my crock pot on high for a few hours and the beans were perfect.  The cooking time will vary depending on the age and size of the dried beans.   When the beans are tender pour them, liquid and all*, in a large enough sauce pan and pour your whole jar of tomatillo salsa into the beans and mix well.  The salsa will have salt in it already so you should taste the bean soup before adding additional salt.  I added about a teaspoon of salt to mine.

Heat the beans and tomatillo salsa up until hot.  If you want a vegan dish- it’s really good plain like this.  No diary.  No meat.  I love to add sour cream and cheese to this soup but it’s really good without any additions.

Method for poaching eggs in the soup:

To make this soup into a hearty breakfast or lunch ladle about a cup or cup and a half of it into a medium saute pan and turn the heat to medium high.  With a spatula make two wells in the soup- it should be just thick enough for you to do this.  Into each well crack an egg.  Cover the pan and let the eggs cook until they reach the consistency you like.  I like my eggs whites to be completely cooked but the yolks to be just barely cooked all the way through.

When the eggs are as done as you like them, remove them from the pan with the spatula and put them in a bowl, then pour the rest of the soup over the eggs.  Top with the cheese and sour cream.  That’s it.

Recipe notes: this is a protein rich meal, if you want to serve the soup with a grain instead of more protein you could serve it with corn muffins or fried or grilled polenta rounds.  This soup works because the beans have a rich earthy flavor which is perfectly complemented by the salsa.  Don’t be afraid to try different kinds of beans or different kinds of salsa.  I came up with this recipe because I want to develop an arsenal of satisfying meals made almost completely with my pantry staples.  Salsa with beans is pretty simple and two things I almost always have on my shelves.  If you don’t have a crock pot for the beans use a soup pot on the stove on medium heat, add water as necessary.  Obviously you can used canned or frozen beans if that’s what you have.  But it is better when you make them from dried.

*If you have so much liquid that your beans are more brothy than soupy then drain some of it out.  If the liquid in the beans is fairly thick then don’t drain any of it away.  While cooking beans I keep my eye on them, even when they’re in a crock pot, so that I can add small amounts of water as needed so the beans cook up thick but have enough water for the beans to soak up and become tender.   If you’ve never cooked dried beans before consult your all-purpose cook book and if it’s a good one it will have all the information you need to know about cooking dried beans well.


Recipe for my tomatillo salsa
Soup Philosophy

Cooking For Beginners: Shopping For A Recipe

canned haggis 2

Before you head off to the store to shop for a recipe you need to pick an appropriate one.  If you are truly a beginner in the kitchen you may not know what to look for.  I am going to assume that you have got your hands on one of the books I recommended that every beginner should have on hand.  Decide first what type of recipe you’re interested in making: a vegetable dish, a meat dish, dinner recipe, dessert?  Once you know what you have in mind look at the index of your all-purpose cookbook.  Most cookbooks are arranged by type of dish: meat, sides, mains, vegetable, grains…you will be able to see how it is arranged by reading through the index.  Open to the section most likely to have the type of dish you’re interested in.

A few pointers on picking a recipe:

  • Look for a recipe with fewer ingredients. Fewer ingredients usually means a simpler recipe.  Try to find one with 6 or fewer ingredients for the first one you try.
  • Skim the instructions.  If the instructions have 25 steps to them, it is probably not a good recipe for a beginner to start off with.  Look for simple instructions.  Simple instructions are only a few paragraphs long.
  • Pick a dish that you are already familiar with eating and love.  This is important for two reasons: if you learn to cook all your favorite foods first you will have a much more rewarding cooking experience and will want to learn more and if you start off making dishes you are very familiar with you will be able to tell if you have made them well.  You will know what it should look and taste like.
  • Choose a dish with easily found ingredients.  As you become more experienced some of the excitement of cooking (for me) is to locate interesting sometimes exotic ingredients.  Trying new things is great- but when you’re at the very beginning of this adventure you should first stick with ingredient lists that can easily be found at your grocery store.

Once you’ve picked the recipe you want to try you need to take a quick inventory of what you have in your cupboards before dashing off to the store.  When I was a very beginner cook I didn’t have many staples in my cupboard because I mostly ate things like toast and boxed pasta and I also ate out at cheap diners quite a lot.  So I found myself having to buy a lot of basics for my “pantry” (which was nothing more than a couple of cupboard shelves).  Acquiring pantry items as you go along is the only way to do it.  I will (at the end of this lesson) list what I consider to be the bare bones basics of any pantry but every person who cooks has individual preferences and tastes that will directly affect what herbs and spices you will need to have on hand and what kinds of oils, condiments, and vinegars you might need.

My co-headmistress here at The Farmhouse Finishing School (Mrs. C) loves to cook Indian and Mexican inspired dishes and so she keeps more curry and exotic seasonings like tamarind paste on hand than I do.  You are more likely to find things like corn husks and masa harina on her pantry shelves than on mine where you will find more dried thyme than in anyone else’s pantry because I can’t get enough of thyme as a seasoning.  My preferred style of cooking is Mediterranean so I keep a lot of polenta, Kalamata olive,  and pasta on hand.  So don’t buy a lot of things for your pantry ahead of time.  Build it slowly based on what you find you like to cook as you learn to make what you love eating.

Here are some tips on shopping for recipes:

  • Always make a list of what you need before you head out to the grocery store.  This is especially true for beginner cooks.  I remember when I first started shopping for recipes I was going to try and when you’re not buying crappy boxed food anymore a whole crazy world of choices opens up.  It was so exciting and fun to me but also sometimes overwhelming.  I remember standing in front of the salt choices feeling stunned that there were so many kinds.  Having a list with you will help you focus on what you actually need and prevent you from forgetting essential items or overspending on things you don’t actually need.
  • Buy herbs and spices in small quantities until you find yourself using them frequently enough to run out of them.  Buy them from the bulk section of the grocery store.  If the store you shop at doesn’t have a bulk herb section, change where you shop!  Only buy enough for the recipe you’re planning to make plus a little extra in case you need to remake the recipe or if you find your personal tastes demand a little more.
  • Even if it’s much cheaper to buy an ingredient in a larger quantity, don’t do this unless you know for sure it’s something you’ll be wanting to use a lot of.  It is easy to get excited about saving some money but if you don’t use what you buy then you’ve actually wasted money.
  • When choosing produce: be choosy!!  Wait, let me say that again: be very choosy!!  How can you tell if the produce you’re looking at is at its freshest and highest quality?  It can differ from item to item but there are some universal guidelines to follow.  If an item of produce has any of these: soft spots in an otherwise non-soft produce item, discoloration such as browning, sunken spots on the surface, limp to the touch, dry appearance, mold, insects hanging out on the surface, or a withered appearance- don’t buy it.    If all the produce in the store you shop at looks like I have just described- find a new place to shop.
  • Choose organic everything whenever you can afford the option.  I (like so many I know) cannot afford to buy everything organic.  It is my opinion that everything should be organic in the first place but since it’s not and since organic can be very costly, start with  your produce.  I am terribly fortunate to have a very reasonably priced organic CSA that is generous with their weekly portions.  If there is a farmer’s market where you live- shop there.  You can usually find organic producers and sometimes you can find producers who don’t have an organic certification but don’t spray.  Ask farmers about their practices.  Farmer’s markets are one of the very best places to shop for produce because what you will find at them is ALWAYS seasonal and fresh.
  • Read ingredient labels.  If you’re going to bother cooking food for yourself you should choose the best quality ingredients you can afford.  Quality means the least amount of processing necessary for any given food item.  The following is a list of ingredients you should avoid bringing home to your kitchen:

1.  Artificial flavorings
 
2.  High Fructose Corn Syrup, Corn Syrup, Dextrose, etc.  (stick to plain sugar).
 
3.  MSG  I’m not allergic to it myself, though many people are, but I still avoid it because good     quality food doesn’t need this flavor “enhancer”.
 
4.  Preservatives.  There are a few preservatives that aren’t harmful but most of them are.
 
5.  Unnatural coloring.  (no real food is bright blue, not even blueberries)

6.  Any “ingredient” that could only be replicated in a factory setting.

  • Be careful with sale items.  If you are on a budget and need to try to save pennies wherever you can, just be sure to check expiration dates on packaged foods, avoid old “clearance” produce (not usually worth the savings), and be sure that nothing has compromised the item such as a hole in the packaging or a banged up appearance, or dents in canned items.

If it would be helpful for you to have the above pointers with you while you’re shopping, print this article out and bring it with you.  These are the kinds of things I would be telling you if I could go with you to shop for your first few home cooking adventures.

As I mentioned earlier, a pantry is a highly personal thing.  Building it up should be gradual and reflect how you like to cook, however there are a few items that nearly everyone should have on hand.  I will list them below, but keep in mind that this is my opinion only and every experienced cook will have different items they consider essential.  As always, if you have a really experienced cook helping to teach you then you should listen to them rather than me.  Having someone experienced at your elbow is the best possible way to learn to cook.

Pantry Staples (the bare necessities list):

Olive Oil

Vegetable Oil
Wine

Vinegar (or rice vinegar if you prefer)

Salt (I prefer a grey salt or a kosher style salt with no additives but plain table salt is fine)

Pepper (it’s best if you have a grinder and can grind it fresh, but preground is fine)

Baking Soda

Baking Powder (non aluminum kind is best)

Tomato Paste

Soup Broth (home-made is best but canned/boxed or bouillon is fine)

All Purpose Unbleached Flour (a couple of pounds of it to begin with is adequate)

Cane Sugar (a pound is enough to begin with)

Honey (8 oz jar is enough to begin with, make sure it’s raw)

Mrs. C’s particular pantry recommendations:

Thyme

Italian Seasoning


If you missed the first lesson in the series “Cooking For Beginners” here it is:
Cooking For Beginners: Cookbooks and Equipment

Ratatouille: Lisa E’s Version

ratatouille grilled 2

These are the vegetables on the grill.  You can broil the eggplant separately in the oven at 450 degrees if you are doing a huge batch and need more room on the grill for the summer squash, peppers, and onions.

 ratatouille roasted 2

The vegetables are done when they are cooked all the way through but aren’t mushy.

 ratatouille tomatoes 2

Cook the tomatoes while the vegetables are all grilling and/or broiling.

ratatouille basil 2

You can use other seasonings for ratatouille such as thyme, bay leaves, or herbes de Provence, but Lisa and I both prefer to simply use a truck load of fresh basil added right as you remove the ratatouille from the heat.

 ratatouille 2

There are as many recipes for ratatouille as there are passionate cooks.  A traditional ratatouille is made by cooking the various ingredients separately first and then layer them in a casserole and then baked.  The main (important components) of ratatouille are: eggplant, tomatoes, summer squash, sweet peppers, fresh basil, and garlic.   There are hundreds of variations of this dish possible- you can use mushrooms, omit the peppers (I don’t digest sweet peppers well and never cook with them), make it chunkier or saucier.  What you must never leave out (if you want it to still be a ratatouille) is the eggplant, summer squash, tomatoes, garlic, and onions.

It should always be made in summer or early fall when all of these ingredients can be had fresh from the garden or from the farmer’s market.

The following version is from Lisa E and involves roasting and grilling most of the different ingredients and then adding them to the pot of cooking tomatoes.   She doesn’t give specific amounts for the ingredients because she never measures them.   My suggestion is to use roughly equal quantities of tomatoes and eggplant, slightly fewer summer squash in proportion, and even fewer sweet peppers, and for one big pot of ratatouille I would use two to three onions.  You can’t use too much fresh basil and the garlic should be to your personal taste.  My preference for a giant pot would be about 10 cloves minced.


Lisa’s Ratatouille

Ingredients:

tomatoes- peeled, cored, seeds squeezed out then coarsely chopped

eggplant, zucchini, red peppers- cut lengthwise into slabs, brush with olive oil, salt  & pepper

onions- quartered, brush with olive oil, salt & pepper

garlic- loads of it finely chopped

basil: chiffonade

In a large heavy bottomed pot heat olive oil (about a quarter cup), add tomatoes and cook at medium high; continue to cook while preparing other ingredients and until tomatoes get nice and broken down and saucy.

I usually roast the eggplant in the oven at 450 while the rest of the veg is on the grill.  Usually timing works out perfect: when veg is all cooked allow to cool enough to handle then coarsely chop it all and add it to the tomatoes along with the garlic.  Simmer until the flavors develop and it gets to the consistency you like, adjust salt & pepper to taste.  Stir in the basil when you turn off the heat.

When it has cooled I usually keep enough out for dinner and the rest goes (in either 2 cup or 4 cup increments) in quart size freezer bags (squeezing out all the air) or in food saver bags to freeze and then vacuum seal when it is frozen.  It isn’t high enough acid to can safely.

When I said it is a big batch technique I mean a full stockpot or if I am really ambitious I have my two biggest pots going at the same time.  That way I do it once during the season and have it stowed away in the deep freeze for meals throughout the year.

Serving Notes: I like it by itself with Parmesan, feta or goat cheese, with polenta, grilled or soft, any kind of pasta.  I have used it to make lasagna too.

Soup Philosophy

breadsoup2

Every year, just when I’m in the middle of mourning the end of summer tomatoes, wearing my black band and draping my windows with the evidence of my sinking tomatoless spirits, a brisk shiver of cool air brushes across my skin and I drop the banners the flags and the weeds of loss as a single word crosses my mind in a kind of breathless joy:

SOUP!

Suddenly I have forgotten all about the tangy sweet tomatoes I’ve been in love with for weeks and I am happy again.  Soup!  Soup is absolutely one of the very best dishes on earth.  It is everything humble, simple, nourishing, inexpensive, hearty, healthy, uplifting, and homey.  I am aware that a soup can be made of $100 a pound lobsters and mushrooms that people have been shot for.  This doesn’t change its humble nature.  Its simple entreaty to nourish yourself and heal your spirit when the winds are howling and the wolves are baying outside your door.

Soup is a chameleon, changing into whatever you need it to be: you  can devise a torturous 20 step soup that calls for 17 hard to find ingredients and takes 24 hours to make; you can make a soup with 5 ingredients in just a half an hour; you can use up all manner of old-ish vegetables from the cellar and feel like a king.  It’s what you want it to be.  It’s whatever you need it to be.

I’m not sure how old I was when I learned about the magical powers of soup but I do know that it was the first thing I learned to make completely on my own.  Split pea soup is one of my favorites and I have been known to make it when I feel low simply because making it uplifts my spirits, infuses me with renewed hope and calm.  The scent of the garlic and fresh dill is intoxicating and improves my health before it ever reaches my mouth.  Making soup is like  saying a prayer in the kitchen.  It is the only kind of prayer I know.

Soup is not only the first food I learned to make completely on my own, it is the first dish I learned to make by instinct and the first dish that my reputation for being an excellent cook was built on.

I have heard many a novice cook express the opinion that soups are difficult or a mystery to master.  I disagree in spite of the fact that someone once asked me for my recipe for vegetarian split pea soup and reported back to me that it didn’t turn out.  When this curious person described what had happened I realized that there are many things about soup making that I take for granted and therefore don’t think I need to explain.  I learned a lot from that exchange.

I am going to break down some of the components of successful soup making here for anyone who needs a little courage and knowledge.  These are merely my soup making rules and truths.  If you are learning to make soup and you have an excellent soup maker offering to teach you their own magic- trust them and let them teach you!  I am only putting my own soup philosophy here in case someone out there doesn’t have a best friend or a grandmother to help them out.  I will be your guide if you need me.

In the beginning…

There is no soup in my kitchen that doesn’t begin with a tablespoon or two of olive oil and an onion.  I saute the onion until it is slightly browned and transparent.  I often saute it with celery.  The reason I do this is because I often don’t use a stock and browning an onion and celery at the start adds a little depth to whatever soup I’m making.

That’s how all my soups begin.  If you don’t like onions you can do exactly the same thing with leeks, scallions, or skip the alliums all together if you don’t like them or are allergic to them.  If you’re making a soup with many vegetables you can saute them all together at the beginning to get the same effect of deeper broth flavor.  Only do this if you aren’t going to add beans or meat that needs a long cooking time.

The order of all things…

One thing to understand about soup is that most of them take between an hour and two hours to cook so it pays to be mindful of what vegetables should be added and when.  Some vegetables hold their shape longer than others.

Once you’ve sauted your onion and celery you add some water or broth.  If you’re going to add beans to a soup that aren’t pre-cooked then you will want to add the amount you need to the broth and cook them until tender.  You wait to add the other vegetables until they are tender so that you don’t over cook anything.  Onions and celery can take the long cooking times.

Here’s the order of things as they get added to my soup:

1.  Onions, celery, bay leaf, garlic.

2.  Carrots, potatoes, celery root, dried herbs, turnips, yams, rutabagas, parsnips, winter squash.

3.  Broccoli, Cauliflower, green beans, pasta.

4.  Summer squash, leafy greens.

Those lists may not be complete but they illustrate the hierarchy of ingredients and what order they should be added based on how quickly they cook and risk turning to mush.  Some things can be added at any time like fresh herbs.  The only fresh herb that should never be added until the very end is cilantro which tends to lose its flavor when cooked too long.

Liquid Assets: broth or water?

I have been making excellent soup for 20 years and it was only recently that I learned to make my own vegetable broth to use in soups.  You will read absolutely everywhere that using a broth of some kind is so essential to making soup successfully that if you use plain old water you will suffer such a deep disappointment that you will go into an immediate decline.  This is patently untrue.

I promise you: if you don’t have any broth of any kind or any bouillon cubes to add to your soup you can still make soup that everyone will remember for a long time to come.

Don’t be afraid.  Broth is generally made up of many of the same ingredients your soup will have in it anyway.  sauteing vegetables or meat and then deglazing with water will help deepen the flavor.  Use excellent quality herbs because these will also add a lot to the overall flavor.  Using the right amount of each different herb is something you develop an instinct for with experience.  Fresh is often the best.  Garlic is an excellent flavor enhancer in soup (be sure not to use so much of it that it overpowers everything else).

Having said that, I will say that it’s absolutely true that using stock is ideal.  If you have a choice of using broth or using water: always use the broth!  I made two versions of the same soup in one week last year, one using no broth, the other using my homemade stock.  Everything was exactly the same except for that one detail.  Without knowing of my experiment my husband liked the batch made with the stock best.  So it does make soup better.  But he loved the other batch too- just not as much.

If you don’t have broth a close second is to use a bouillon cube or two.  You can get them in beef, chicken, and vegetable flavors.

Then there’s the question of how much to add.  Soup i so flexible that if you add too much liquid to it at first you can cook it a little longer until it steams off and thickens.  If your soup is too thick- add more liquid.  You get a feel for how much to add as you get more experienced but when you’re still a new soup maker it’s wise to add water in 1 or 2 cup quantities.  It is amazingly difficult to translate a soup recipe so that it tells you exactly the right amount of liquid you’ll need to add.  Never assume that the amount the recipe calls for is correct just because it’s printed on paper.  So many factors can influence this such as how hot you’re stove is, how large your vegetables/meat are, and how long you cook it for.

Always add more liquid when you feel the soup has gotten thicker than you want it or let it cook down when it’s too brothy for your taste.  You are in control of this.  Get comfortable winging it.

Size always matters…

The larger you chop your ingredients the longer it will take to cook them.

The smaller they are the faster they cook.

The issue with size is that if you are making a soup that’s going to cook for a long time and you chop all your vegetables really small they will eventually break down into specks.  So if you want them to hold some shape and have a presence…cut them chunky.

For quick vegetable soups it is appropriate to dice your vegetables very small.  This is true of any soup you plan to puree.  No need for chunks then cut them small.

Cream in the pot…

Always add cream to soup as a last step.  If you simmer cream it will curdle.  Curdled soup has little charm.  When you make cream of potato leek soup you cook everything first then you puree it using your blender (not recommended) or an immersion blender (totally recommended) and then you add the amount of cream you want.  To warm it up later be careful not to bring it to a boil.  Heat it up gently stirring frequently.

What substitutions fail?

I’m not sure how many times in this article I have already mentioned the flexibility of soup but it needs saying again.  If you see a soup recipe that sounds great except for one particular spice or one ingredient it is almost always possible to leave it out or substitute it for something you like a lot more.  I would say that this is more true of soups whose whole character doesn’t depend on one particular ingredient.  If you don’t like potatoes you should probably not try to make cream of potato soup…then again…you can substitute the potatoes with celery root and get the same type of soup…so never mind.  Don’t be afraid to experiment.  Experimenting is the very best way to develop your soup skills.  Herbs and spices are like color- develop your personal palette!

A very long time ago I thought lentil soup was always curried or cumined up to its neck and since I am only an occasional curry fan I almost never made lentil soup.  Then one day I was reading a French vegetarian cookbook (yeah, I know!  Crazy!) and it had a recipe for a lentil soup that used thyme instead of curry and it sounded so good.  I made it and it was a revelation!  I loved it so much I have never made a curried lentil soup since because I am in love with thyme as a soup seasoning.

To get a good idea of what kinds of vegetables-meats-and seasonings go well together read a lot of recipes.  I read cookbooks for the joy of it.  It’s where I get a lot of my food inspiration.  Though I rarely follow recipes in them explicitly any more I turn to them to give me ideas of things to pair together and new flavors to try.  There are a gazillion great food blogs online that you can read for free and if you like the old-fashioned feel of paper and enjoy the sound of turning pages- go to your local library and see what they have.  I have collected many cookbooks over the years but I can rarely afford to buy them now and I depend a great deal on my library which has a great cooking section.  Explore yours!

When the love grinds to a halt…

This is my last bit of soup philosophy to offer for the day:  if you make a soup that fails to please on every level, do not let this ruin the magic of soup for you.  Soup is a lot more flexible than gratins, souffles, or bread.  You will have more successes while learning to make soup than you will with any other food but there will still come a soup that stumps you.  I’ve had a few of my own colossal let-downs over the years but I think the most depressing one was a curried cauliflower soup I made that unbelievably ended up having NO flavor.  It’s almost impossible to achieve a flavorless soup- yet I did it.  How is it possible to put curry in a dish and then not at least taste curry?  I don’t know.  I will probably never know how that happened.  You just have to toss it to the pigs or lump it and eat it (this one was really inedible) or pour it down the drain.  I am poor enough now that I would probably eat it anyway.  Or make Mr. Williamson eat it.

The point is- for any failed soup experiment there are hundreds of successes to be had.  Everyone is capable of making a great pot of soup.
When everything else in life feels poor and hopeless, as long as you have a bowl of soup you can be sure you’re going to pull through!

Yam and Kale Soup with Coconut Milk and Curry Recipe Try this great warming soup!

Yam and Kale Soup with Coconut Milk and Curry

yam and kale 2

Sometimes the very best way to stay healthy in the flu season is to eat food that can repel the plague.  Spicy stews and soups are invigorating, warming, and healthy.  This particular soup is a variation on one I made years ago from either Moosewood’s Low Fat cook book, or from Vegetarian Times.  I have forgotten because it’s been so long now.  The original had some fresh Serrano chilis in it and I’m not sure what else since I couldn’t find the original.  I was feeling low this week and wanted to make a soup that could help me bounce back and not get sick.  This soup did the trick!  It is always satisfying that what I want to eat is actually in season, most of the vegetables in this soup came from my organic CSA!


Yam and Kale Soup

Ingredients:

3 onions sliced in thin rounds and then in quarters

2 lbs yams* (sweet potatoes), cut in 1″ pieces

1 large bunch of kale chopped smallish

2 quarts stock or water

1 can coconut milk

2 Tbsp olive oil

1″ piece of fresh ginger peeled and minced

3 garlic cloves minced

1 red dried hot chili such as cayenne

2 tsp curry powder

1 tsp salt

Method:

In a soup pot on medium heat: saute the onions in the olive oil until they caramelize.  This should take about 20 minutes.   When the onions are soft and browned and slightly sticky add the minced garlic and ginger.  Cook for a couple of minutes with the onions, stirring frequently, then add the 2 quarts of water to the pot and turn the heat up until it comes to a boil, then turn down to medium/high.  Add the yams and cover the pot.  Let the yams cook until tender, about 15 to 20 minutes.

When the yams are tender add the curry, salt, chili pepper, and the kale.  Stir well and then cover and let cook until the kale is well-cooked, about five minutes.  Now add the coconut milk and when it is completely blended into the soup it is ready.

This recipe makes approximately 8 servings.

Recipe Notes: If you are short on time you can simply saute the onions until they are transparent rather than caramelize them.  That will save almost 15 minutes off the cooking time.  I like the onions caramelized here because it compliments the spiciness and deepens the flavor of the broth.  If you want to shave even more time off of the cooking time you could cut the yams in smaller cubes which will cook faster (try doing 1/2″ cubes).  This is an easy and versatile soup to make and you can make many substitutions to please your own palate:  chard instead of kale, winter squash instead of yams, and of course if you don’t have coconut milk it is excellent without it.
*When I was growing up my mom cooked with yams a lot.  Our favorite was the “Garnet” variety.  I have always known them as yams…however, what I grew up eating weren’t true yams.  True yams are an African tuber that is very rarely available in the United States.  What I grew up eating are actually orange varieties of sweet potatoes.  This knowledge is becoming more common and now there is almost always someone who feels the need to correct me when I say “yam” instead of “sweet potato”.  So why do I still call them yams?  Because that is what most Americans (particularly in the West) know them as and it’s what I’ve called them my whole life.  I choose to continue to call them yams but if you choose to do as I do, just be prepared to have people pipe up with this information!
Soup Philosophy An article about soup making basics.

Oeuf Cocotte: Eggs Baked In Marinara

oeufs cocotte 2

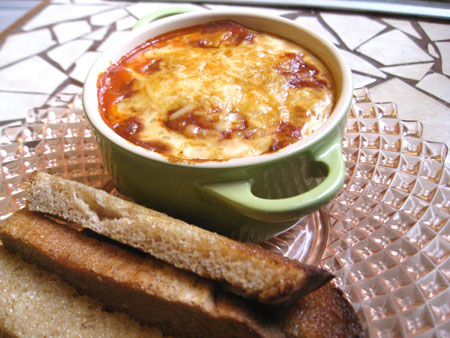
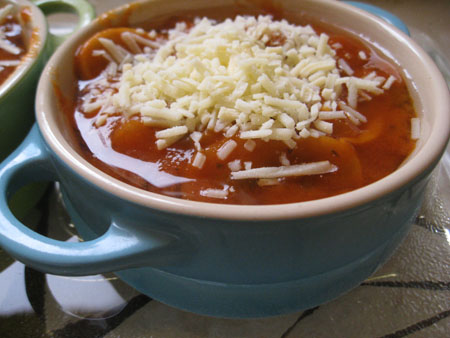
Oeuf Cocotte* is a dish consisting of an egg baked with other ingredients in a ramekin.  Chocolate and Zucchini has a recipe on her site for this dish and explains that it is usually made with ham and creme fraiche, however I first heard of this dish from a French vegetarian cookbook in which the egg was cooked in a mushroom saute.  The recipe I’m giving you here is my current favorite in which an egg is baked in a marinara sauce and topped with parmesean and served with toast fingers.  I will list the ingredients you will need per one 8 ounce ramekin, so if you’re making more than one you need to multiply all ingredients by the number of servings you wish to make.

This recipe doesn’t include the marinara recipe.  You can use any that you have on hand.  This is a simple and satisfying meal.  I especially like to eat it for breakfast.

Ingredients:

3/4 cup marinara sauce (my favorite is a mushroom marinara)

1 egg

1 Tbsp Parmesan cheese

the veriest smear of oil or butter to grease the ramekin

2 slices buttered wheat toast cut into fingers

 breakfast in progress 2

Method:

Preheat your oven to 400°

Grease your ramekin.
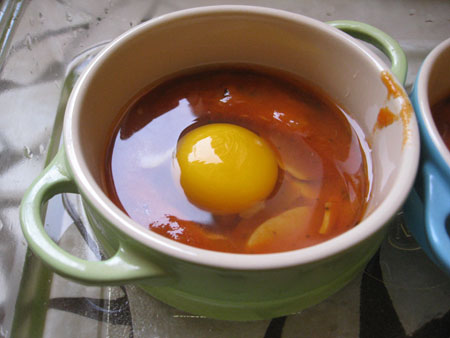
Set it in a larger deeper dish (see picture above) and fill halfway with water (this will help heat the dish evenly).  Ladle about a half a cup of the marinara into the ramekin.

 eggs 2

Crack your egg into it then cover the egg with the remaining 1/4 cup marinara.

 breakfast 2

Sprinkle the Parmesan on the top and put in the oven to bake.

Baking times vary depending on your oven and how you like your eggs.  The times I give here are approximate according to how my oven heats:

20 minutes: if you like your egg whites almost runny like Parisians do, this is probably long enough.  They will just barely be set up at this point and the yolk will be very runny.

25 minutes:  the whites should be completely cooked but the yolk will still be runny.

30 minutes:  the yolks will be thick but not completely hard cooked.  This is my favorite way.  I like the yolks to be tender and soft but not runny.

35 minutes:  the yolk should, at this point, be thoroughly hard cooked.
When the dish is almost ready to come out of the oven make the toast.

*I have also seen this spelled “oeufs en cocotte”.

Concord Grape Juice: How To Make Grape Juice

concord 2

Making grape juice isn’t difficult but if you’re doing it without a press (as I must) then it does take some time because the straining process is slow.  You can use any grape varieties you like but if you want the classic grape flavor (like Welch’s makes) the concord variety is the only grape to use.  They are a deep bluish purple color when they’re ripe and the flesh slips out of the skin easily and has two sizable seeds in each one.

This is how you make grape juice but it isn’t a recipe with specific amounts.  Use whatever quantity of grapes you have on hand and if you want to know exactly how many jars you’ll need to heat in your canner you can measure the amount of juice you have before you reheat it to process it in the jars.  You won’t know exactly how much you’ll end up with until you’ve finished straining the pulp out of the liquid.

First step:

Put your grapes in a big enough pot that it won’t boil over.  If you have more than will fit in one pot you can use as many as you need that will fit on your stove.  Don’t add any water.  Before turning the heat on, crush some grapes with a potato masher or the back of a spoon.  This will keep the grapes from burning at the bottom before the juice is boiled out of the grapes.

bubbling hot 2

Second Step:

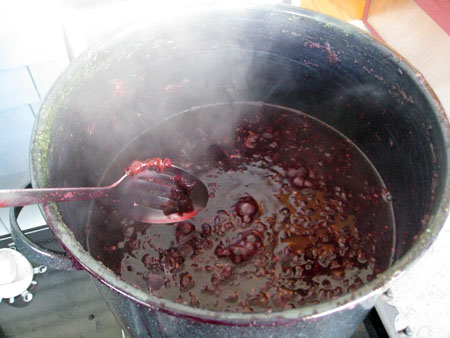
Bring your pot of grapes to a boil.  Boil the grapes for as long as it takes for the grape flesh to reduce to juice leaving mostly grape skins as pulp.  Look at the first picture in this post to see how they start out looking and then look at the picture below to see how your pot of grapes should look when they’re ready to strain:

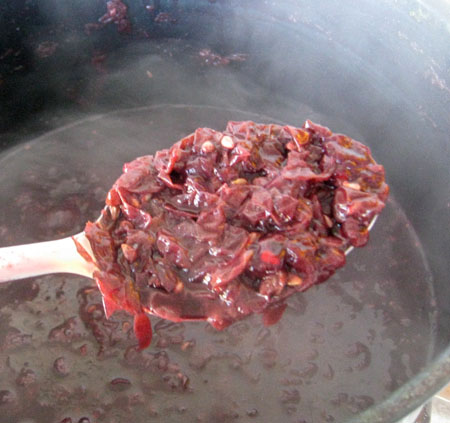
 grape mash 2

Observe how the slotted spoon brings up only skin and seeds.  There are no more globes of grapes left.  Also notice how the skins look more red than purple now as the pigmentation has been cooked out of them into the juice.

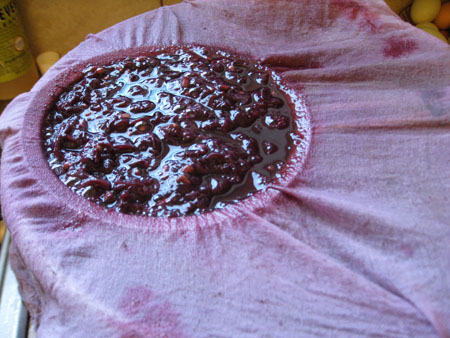
 grape juice drain 2

Third Step:

You need a large bowl or pot to strain your juice into, a strainer, and either double layer cheese cloth or butter muslin.  Place your strainer over the top of the bowl or pot and place your straining cloth over it, be sure to push it into the bowl of the strainer before ladling your juice into it.  Now you can fill the strainer to the top with juice and pulp you just cooked.  Let it drip until most of the juice has drained out.

 grape squeeze 2

Fourth Step:

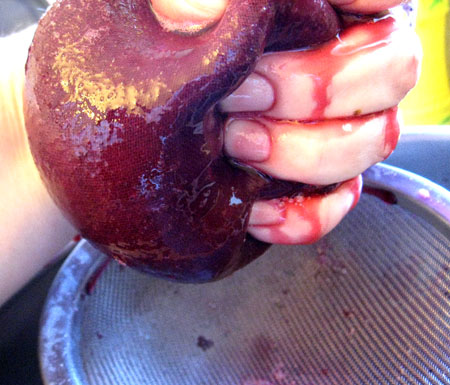
Now gather up your cloth and squeeze all the extra juice you can out of the pulp.  You will be surprised how much you can get out of it- so don’t skip this step for the best yield.  When you’ve gotten all you can out of the pulp, put it in your compost bin, rinse the cloth out well, and set it back into the strainer.  Rinsing the cloth each time is important because if you don’t do it the fine sediment will make the next batch you ladle into the cloth drain even more slowly because it clogs up the cloth.

This is the part that can take a long time.  Just keep straining until all of it is done.  At this point you may wish to restrain it, this time through one extra layer of cloth to strain out even more fine sediment before canning it.  This is up to you.  Once you can your juice and let it sit for a week on a shelf you will see all the sediment sink in a layer at the bottom of your jars.  You can carefully pour your juice out of the jars, when you’re ready to use it, leaving the sediment in the jar, or you can restrain it at that point.  One think I can tell you for sure is that the sediment is not pleasant to drink and kids especially don’t appreciate it.

To Process the Juice:

1.  Heat up the strained juice to boiling point and then turn off the heat.

2.  Ladle the juice into hot pint or quart jars leaving 1/4″ head space.  Adjust the two piece caps.

3.  Process pints or quarts for 15 minutes in a boiling water bath canner making sure to cover the tops of the jars with at least an inch and a half of water.

Special notes: Depending on the sweetness of the grapes and according to personal taste, you may need to add sugar to your juice.  Some years the grapes are sweeter than others.  There is no specific amount for me to recommend.  Taste the juice and add sugar a half a cup at a time to your entire batch, tasting after the sugar has completely dissolved into the juice.  I prefer my juice to be tart but my son has a sweet tooth so I add sugar to mine until it’s sweet enough for him to enjoy, but only just.

You can also freeze juice.  If you freeze it in jars you need to leave a lot more head space for the expansion of the freezing of the juice- leave about two inches room.  You can also freeze in plastic containers.  Juice freezes exceptionally well so this is a good option for people who have room in their freezers.

Cooking For Beginners: Cookbooks and Equipment

Joy Of Cooking 2

If you are a real beginner cook you may not know yet what cookbooks are appropriate for you and what equipment is essential.    When I first started learning to cook on my own I had very little kitchen equipment, and in truth you don’t need a ton, but I found that my equipment grew as I read my two cookbooks and decided on things I wanted to make.  People who love to cook tend to collect kitchen gadgets that they really don’t need and I’d like to present here two lists of what I consider the first tier of necessary equipment and then if you become a proficient and passionate cook the second tier of essential equipment.  You should always buy the best quality equipment that you can afford.  Don’t be afraid to look for things you need in thrift stores and in used restaurant supply stores.   Good cookware will last a long time.   Look for 5 ply stainless steel or cast iron (enamel coated or not) for the very best quality pots and pans.

The most necessary items:
1 saute pan: if you only have one make it a 12″ size.

1 medium size sauce pan: a 3 quart size is good.

1 soup/stock pot: 8 quart is perfect.

1 cookie sheet: if you can get one from a restaurant supply place, those are the best.

1 casserole dish: I suggest a glass or ceramic one (Corning makes really good ones).

2-3 wooden spoons: these should not be expensive.  Have one short-handled one and a long-handled one.

1 spatula: I prefer metal ones but either metal or plastic will be fine.

1 colander: any  metal style, don’t buy a plastic one because one of the main uses is for draining hot pasta.  I have one I bought 20 years ago from Cost Plus.  It’s dinged up and still working hard.

1 set mixing bowls: no need to get fancy if you’re on a budget, plain glass ones aren’t hard to find in thrift stores.  Stainless steel mixing bowls are also excellent.  Don’t buy aluminum bowls because some food reacts with aluminum.  It’s very useful to have three bowls in different sizes.

1 set measuring spoons: any kind will do.

1 (2 cup) measuring cup: I suggest glass Pyrex if you only have one.

1 folding steamer basket for sauce pan: these fit into the bottom of your sauce pan allowing you to steam vegetables.  They’re cheap and very handy.

1 pie pan: I suggest you get a glass one.

1 loaf pan: if you can get one from a restaurant supply place that would be best but if not, just get any kind you find, average loaf size.

1 decent knife: don’t worry about fancy.  My favorite knife is one I bought 14 years ago from a health food store.  I sharpen it regularly and it still works perfectly.  You want your main knife to be a chef’s knife.  Shop around and hold the different styles to figure out which kind is comfortable for your hand.

1 paring knife: any kind will do.  I use cheap ones because I lost my nice one.  I have to sharpen them more often but they work fine.
Sharpening steel: whether your knife is cheap or expensive you need to sharpen it regularly.  I didn’t know how to do this for years and chopping with a dull knife is not only more dangerous but much harder.

1 good quality food processor: 11 cup capacity is best for a family but smaller is fine for an individual.  I bought the best Cuisinart processor I could afford almost 12 years ago and it is still working wonderfully well, though I could stand to sharpen or replace the blades.  At the time it really stretched our budget but it has been essential to me in my cooking.

Less necessary appliances that you may want to get eventually:

Stand Mixer: I bought a Kitchenaide (professional series) and I have used it so much over the years that it was worth the expense.  I bought the pasta attachment which I love and use often.

Immersion Blender: Mrs. C had to convince me to get one of these and I resisted for a long time but I can’t imagine making salad dressings without one now.  Though seriously- don’t worry about having one of these if you are just beginning.  I made great dressing before, the thing this does that I love is allow me to make a creamy vinaigrette.    It’s also very handy for pureeing soups and sauces.

With all of the equipment I’ve listed above you should be able to make anything you find in a cookbook.  There are plenty of other things you can add to your kitchen like graters and peelers, for example, but if you have the food processor it will come with a grater function and a paring knife works perfectly well for peeling fruits and vegetables.  I have merely listed the essentials here.  What you need to start off with.

Cookbooks

I love cookbooks.  I have over 40 of them on my bookshelves and that is only half of what I would probably have if I didn’t edit and choose carefully.  I can’t afford to buy them often but I have been collecting them since I bought my very first two cookbooks when I first learned to cook.  Now I rarely use cookbooks for actual recipes but for inspiration.  If I’m in the mood for something Mediterranean I look in my Greek, Italian, and French cookbooks for ideas.  For baking, however, I do follow recipes exactly.  Anyone can learn to cook using just one cookbook provided that cookbook is an excellent all-purpose one.  I am going to recommend the two cookbooks I have used the most, learned the most from, and found to have infallible recipes.  As a beginner you can’t judge whether recipes are infallible or not because you’re own initial lack of skill can make a mess of recipes that are quite good.  As you become more experienced you’ll be able to tell if the reason why your meal didn’t turn out well was because of you or a poorly written recipe.

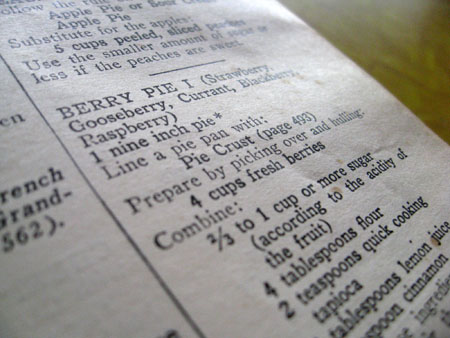
The Joy Of Cooking, by Irma Rombauer: this is, by far, the most reliable, useful, informative, and complete cookbook in print for cooking everything.  My copy is from 1948 which I love because it has a lot of old fashioned recipes in it, but there are many recent editions that reflect our more modern sophisticated palate.  Ultimately it doesn’t matter which edition you choose, they all have the basics in them such as how to cut meat, how to saute food, and include basics such as pie crusts, measurement conversion charts, and all the essential kitchen methods you might need to reference.  If you only get one cook book, get this one.

Vegetarian Cooking For Everyone, by Deborah Madison: I am a vegetarian and if you can have two cookbooks, this is the other one you should have.  Like Joy Of Cooking, she covers so much basic information for the beginner cook (but her recipes don’t include meat, obviously)- you will have access to information on how to cook all vegetables and grains exceptionally well with her book.  Her directions are clear, her recipes are solid.  If they don’t turn out well I guarantee that it’s something you did wrong, not something wrong with the recipe.  This isn’t just a good book for vegetarians, this is the best resource for everyone when it comes to cooking with produce- because even meat eaters need vegetable sides.  Many of her recipes are vegan or she explains how to make them vegan.

Those are the two best cookbooks I have ever used.  Everyone who cooks has their favorites but here at the Farmhouse Finishing School these would be my textbooks if the school was brick and mortar.

Don’t forget to make good use of your public library’s cook book section.  You can try a lot of cookbooks without having to buy them.  Or you can try cookbooks to see if they’re worth buying.  All of my recommendations below are for vegetarian books.  If you want to find some books that include meat, try out the following well respected cook book authors:  Julia Child, Jacques Pepin, and Mark Bittman.

Mrs. W recommends:

Great Breads, by Martha Rose Shulman: I learned to bake bread with this book.  I tried a number of other books before I found this one and though the others were prettier and full of pictures, this is the one that has proved the easiest and most reliable to learn from.  No one learns to bake breads without some failures but you will have fewer of them if you carefully read and follow Martha’s instructions.  Two of my closest friends also learned to bake bread using her instructions.

“The Vegetarian Table” series: This series is published by Chronicle Books.  They aren’t big books but each one really captures the foods from different countries, both traditional and more modern.  The instructions are clear, each book contains plenty of recipes appropriate for beginners, and they are full of pictures which I find inspiring.   I have The Vegetarian Table France, America, Italy, Mexico, and India.  There is also one for Japan.  Some of my long time meal staples come from these books.

The Complete Italian Vegetarian Cookbook, by Jack Bishop: He has amazing basic Italian recipes such as fresh pasta, almond biscotti, and sauces.  I have used his book for years and his recipes always turn out well for me.

This Good Food, by Brother Victor-Antoine d’Avila-Latourrette: He has written a few cookbooks and I recommend them all.  The dishes in this book are simple, flavorful, and healthy.  They are arranged by season because that’s how monks in monasteries usually eat and it’s really how most of us should be eating too.  This is not fancy French cooking but simple French cooking (many Americans don’t know there is such a thing) and that means that the ingredients are usually easy to come by and not especially costly.


Jump to the second lesson in the “Cooking For Beginners” series:
Cooking For Beginners: Shopping For A Recipe