Category Archives: Recipes

Muffins: Chelsea’s Master Recipe

Chelsea muffins 2

Muffins are not difficult to make once you understand a couple of basic principles:

1.  Always mix the wet and dry ingredients separately until the very end.

2.  Do not beat the batter to death.  Mix as quickly and gently as you can or the muffins will come out tough.

Behind every excellent muffin baker there is a master batter recipe to be found.  Mrs. C, the other headmistress of the Farmhouse Finishing School, is a superb baker and she has a sense for it that goes beyond precise measurements.  It was therefore a challenge to translate her master recipe- but I managed to do it and practiced using it and I confidently present it here for you.

I have made these muffins with little substitutions and alterations and had great success with them.  I have also made them exactly as written here.  I will share with you the master recipe and then I will tell you what alterations you can make without being disappointed in the results.

Ingredients:

2 1/2 cups all purpose unbleached flour

2/3 cups sugar

2 tsp baking powder

1/4 tsp baking soda

1/2 tsp salt

2 eggs

1 1/4 cup buttermilk (or regular milk)

1/3 cup oil

1 1/2 cup blueberries (or other small fruits or berries)
muffins 2

Method:

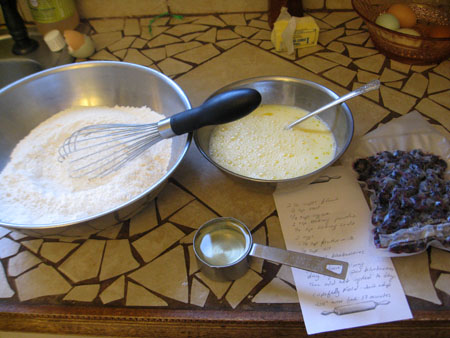
Preheat the oven to 425°.   Mix all the dry ingredients in a medium sized mixing bowl.  In a slightly smaller bowl mix all the wet ingredients together.  If you are using berries or chocolate chips, stir them into the dry ingredients so that they are well covered in flour.  This is important.  Do not mix in after you’ve combined the wet and dry ingredients.  Coating them with the dry flour first will help keep them separate from each other in the batter.

Coat the inside of the muffin tins with butter or oil (I recommend using the butter).

Make a little well in the middle of your dry ingredients and pour the wet ingredients into it.  Quickly and gently stir the wet and dry together just until they are mixed- do not over stir.   Do not whip them together violently or you will end up with tough muffins.

Cook for about 17 minutes, until the tops are lightly golden.


floured berries 2

Here I have added the blueberries to the dry ingredients and stirred them in well.

mixing 2

In this picture I didn’t make a well in the middle of the dry ingredients.  It isn’t necessary, but it’s recommended because it makes the incorporation of the wet and dry ingredients faster to bring together.

batter 2

Every muffin recipe I’ve ever made says to only fill the muffin tins 2/3 full.  This irritates me.  My muffins never seem satisfyingly top lofty.  I fill them mostly full.  To me they are perfect this way.  The yield may vary depending on what you add to the batter- you may get only 12 muffins or you may get 15.

blueberry muffins 2

Recipe Notes: I almost never have buttermilk on hand.  When I do buy it I always have left overs that proceed to go bad.  Mrs. C doesn’t have this problem.  She nearly always has buttermilk on hand.  Instead I use 2% milk and I can say that this substitution does not make an inferior muffin.  There is that pleasant tang when you use the buttermilk but other than a slight flavor difference, the quality of the batter can handle the substitution.
I like a lot of berries in my muffins.  So I used 2 cups of berries.  You can do this too if you like.  I think 1 1/2 might be the most ideal ratio of berries to batter but I always like going over the top.  Using frozen blueberries works exceptionally well, just be sure not to let them defrost before adding them to the batter.  You can also use blackberries, diced peaches, raspberries, or even chocolate chips.  If you use chocolate chips I recommend you only use 1 cup of them.
One last note- you may need to add a little bit more milk/buttermilk to your batter if it’s too stiff when mixed.  Things that can affect your batter are the humidity in the air and the size of your eggs.  If your batter seems too stiff, add 1/4 cup of buttermilk or milk and as gently and quickly as you can,  mix it in.
 

Sugar Syrup For Canning

sugar syrup 2
Sugar syrup is used primarily in canning fruits.  It’s easy and fast to make.  I will list the different strengths of syrup you may want to make for different projects and the approximate yield.  Deciding how much you need for a given recipe is (I’ve found) a guessing game.  There are a lot of variables such as how much fruit you put in each jar, whether the fruit is diced or in large chunks, and how many jars you end up filling which depends on the same variables.  When I am going to can a big batch of peaches or pears I start off making a triple batch of syrup because I nearly always need at least that much.  If you run out in the middle of your project it is very easy to make more.  So don’t let yourself get too worried.  If you make too much you can store the extra syrup in the fridge indefinitely or if you prefer you can put the extra in a jar and can it to use later.
I have never used a heavy syrup for my peaches and pears.  I usually use either a light or an extra light syrup.  The sugar syrup helps to maintain the fruit quality and color as it sits in your pantry.  You can also use fruit juice or plain water, but I prefer the more traditional sugar syrup.  It is all a matter for your personal preference.
General instructions:
1.  Choose a pot that will acomodate the quantity of syrup you are going to make.
2.  Measure the sugar into the pot.
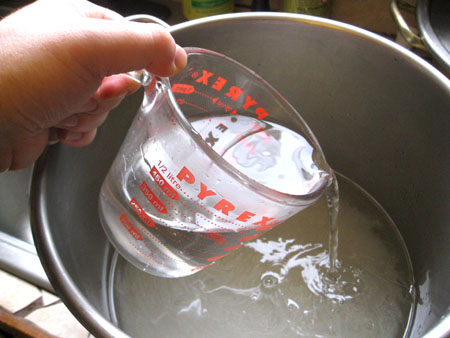
3.  Measure the corresponding amount of water into the pot and stir really well.
4.  Put it on the stove on high heat and bring it to a boil while stirring it.
5.  By the time it comes to a boil the sugar should be well dissolved, it is ready for use.
List of syrup types and the ratio of water to sugar for each one:
Type of syrup:     % of sugar     Sugar                    Water                         Yield of syrup
Extra-Light            20                   1 1/4 cups            5 1/2 cups               6 cups
Light                          30                   2 1/4 cups            5 1/4 cups              6 1/2 cups
Medium                    40                   3 1/4 cups            5 cups                      7 cups
Heavy                        50                   4 1/4 cups            4 1/4 cups              7 cups

Tomatoes: Skinning And Seeding

No matter what you plan to do with your glut of tomatoes, you will need to process them first.  There are many ways of preparing them and Stitch and Boots will work to compile a number of different methods.  This one is a classic and is called for in many canning preparations such as making sauces, juice, and salsas.

Peeling and seeding your tomatoes is ideal if you’re going to make sauce, salsa, or can diced tomatoes.  I didn’t use to think it was necessary to peel or seed my tomatoes (thinking it was a colossal waste of time…) until I made my very first batch of tomato  sauce without doing either.  The seeds are juicy and covered in a gelatinous membrane that doesn’t reduce when being cooked so that a sauce that’s full of them doesn’t ever get that pleasing thick consistency that is the ideal.  I know this because I’ve done it!  Similarly, if you you don’t peel your diced tomatoes you will end up with curls of peel floating in your soup or your casserole which, while not the end of the world, will prevent your food from reaching a state of excellence.

Peeling and seeding your tomatoes does take some time, but is not at all difficult to do.  You’re going to need:

1.  A large pot of water.

2.  A slotted spoon to place and remove tomatoes from the boiling water.

3.  Paring knife.

4.  Lots of ice to put in a big bowl. 

5.  (And a big bowl.)

 cross cutting 2

  • I never buy sprayed tomatoes so I don’t wash them first.  They are going to be boiled and skinned so a little dirt isn’t a concern.  However, if your tomatoes are especially dirty, muddy, or coated in pesticides, you will want to wash them first.
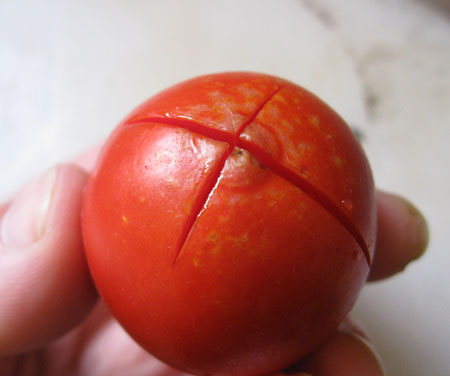
  • Before you set your water to bowl or put the ice out you will want to score the blossom ends of all your tomatoes.  Simply use your paring knife to cut an “x” in the skin.  This will help you slide the skins off easily after blanching the fruits.

coring 2

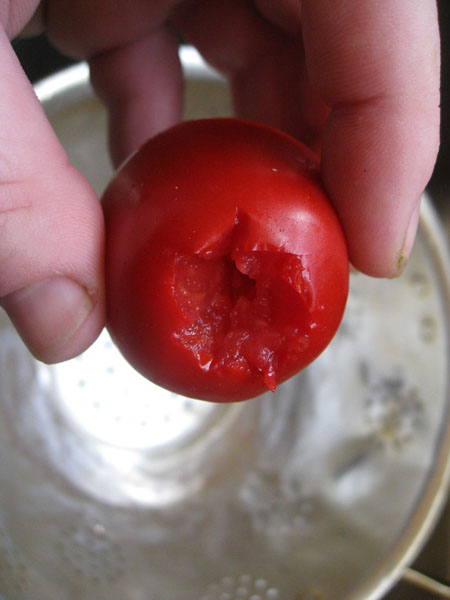
  • Then you want to core them all.  Some roma tomatoes barely have a core and in this case you may just want to slice the very end off.  If the tomatoes are a little tough further down, definitely core them.  I usually core and score each tomato but you can do all the scoring first and then all the coring- whichever way seems the most streamlined to you.
  • When you get 3/4 of your tomatoes cored and scored, put the pot of water on to boil.  Then fill a bowl with ice and some cold water.
  • When the water is boiling and your tomatoes are all prepared, put a few tomatoes in the pot at a time.  If you are processing slicing tomatoes only put 2 or 3 in the pot at a time, if you are processing romas, put about 6 of them in the pot at a time.  If you put too many in the pot at once it will bring the temperature of the water down so far that it will not start boiling again for longer than you want your tomatoes in the hot water.  When you see the water recover to a boil you let the tomatoes blanch for 30-60*  seconds.  It is good to gently stir them with your spoon to make sure all the skin surface of the tomatoes has been submerged.

icing toms 2

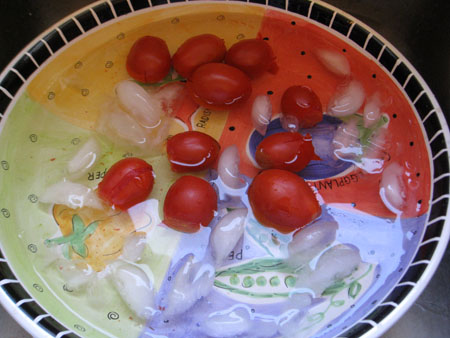
  • Remove each batch from the boiling water straight into the ice bath.  Let them cool down while you put more tomatoes in the pot.  Then remove the cooler ones and put on your counter or in another large bowl.  I like to get all of them blanched before working on slipping the skins off and seeding.

loose skin 2

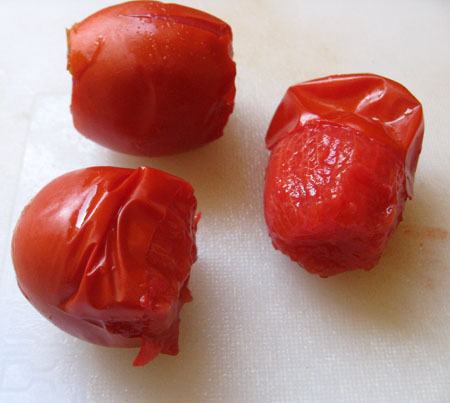
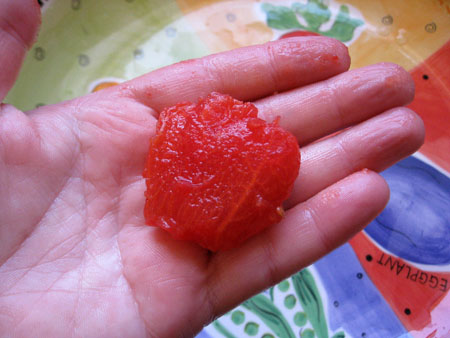
  • Once all your tomatoes are blanched, slip their skins off.  Now put the tomato in the palm of your hand, over the sink or a compost bucket and gently squeeze until most of the seeds have come out.  This can be messy so wearing an apron is recommended.  Don’t worry about getting all of the seeds out.  Just concentrate on getting the bulk of them out.

seeds pressed 2

  • When you have squeezed the seeds out your tomatoes will be a little flat.  This makes them easy to chop.  Now you’re done.  You can either chop them for salsa, sauce, or freezing for later, or you can leave them whole.

It takes some time to process tomatoes but you will find that there are circumstances where you will be well rewarded by your efforts!

*An exact time isn’t important.  If you do a search for information on how to peel tomatoes, you will find all different times being recommended.  15 seconds may not be enough to loosen the skins, and you definitely don’t want your tomatoes boiling for more than 60 seconds or they will really start cooking and breaking down.  Start off timing yourself for about 30 seconds.  Once you have a feel for it, don’t worry too much.

Slow Oven Roasted Tomatoes

roasted toms 2

This method of slow roasting tomatoes comes to me from my good friend Lisa E.. The point isn’t to completely dry the tomatoes, just to concentrate the flavors.  When they’re done they’ll have a thick, sweet, rich tomato flavor and the texture will be moist but not juicy.  Because you aren’t drying them, they can’t be stored in oil or in jars on the pantry shelf as you might do with dried tomatoes.  If you make more than you can use, you can freeze them.  I recommend using a vacuum seal if you have one.  Otherwise just squeeze as much air as you can out of a freezer bag and label it with the date they were frozen.

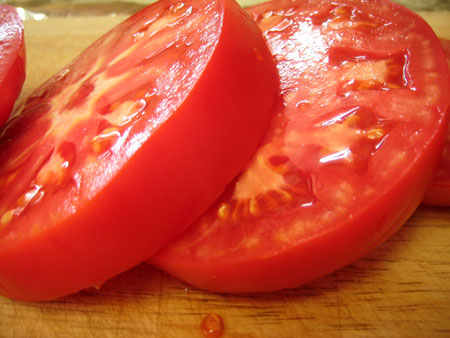
 thick slices 2

Slice tomatoes thickly (between 3/8″ and 1/2″ thick). They are going to shrink quite a bit.  If you are going to roast romas, trim off the tough stem end and slice them in half length-wise.

 foiled pan with rack 2

Preheat the oven to 325 degrees. Line a baking sheet with aluminum foil to catch all the drippings. Then place a drying rack on top of it. This lets the oven air circulate around the tomatoes for better drying out. If you don’t have one, you can still make these, just put the tomatoes directly on the foil. They won’t dry out as well but you’ll still get the deepened flavor. A great alternative is to use paste tomatoes which don’t drip as much.
Lay the sliced tomatoes out on the rack closely together. (So you can fit as many as possible on one baking sheet). Incidentally, I always do two trays at a time. I do this because I can’t make small batches of things. I like to make as much as possible. Some people call this “greed”, but I prefer to call it SMART.

 oiling toms 2

Brush all top sides of the tomatoes with either olive oil or other cooking oil. This will help develop a rich texture. Everything roasts better with oil.

 sugaring toms 2

Sprinkle with salt.
Then sprinkle with SUGAR. Lisa says this is VERY important. If you have used a slicing tomato then turn them all over and brush the backsides with oil and sprinkle with salt and sugar. You won’t have to do both sides if you use paste tomatoes.

 baking toms 2

Put them in the oven and cook for several hours. Yes, I know, it isn’t a quick recipe, but it is so easy I think you won’t mind the hours they tie up your oven racks. If you do two trays of them at once, I suggest switching the trays between the top and bottom rack every hour or so so that they all bake evenly.

 finished toms 2

They’re done when they are dried out a bit (but aren’t crisp), are half their original size, darkened in color, and smell richly of tomato. There’s no exact baking time.  It should take at least 3 hours.

So what do you do with these now?  You can put them on sandwiches with roasted eggplant, cheese, and pesto.  You can slice them up to add to pasta.  You can eat them just as they are.  You can use them to top pizzas with.  You can use them in a savory tart.  You can add them to soup.  You can use these in almost any recipe that calls for reconstituted sun dried tomatoes.

Pesto: Angelina and Chelsea’s Recipe

pesto 2

Mrs. C and Mrs. W’s Pesto

Ingredients:
2 cups tightly packed basil leaves
1/2 cup olive oil
1/2 cup Parmesan cheese
1/3 cup lightly roasted pine nuts
two or three garlic cloves
1.5 tsp salt*
1/2 tsp pepper

Method: Put all the dry ingredients in a food
processor. Pour in the oil. Blend the heck out of it until it is
precisely the texture you like your pesto to be.  You can also grind
all the ingredients together in a mortar and pestle if you have a good
one.  I don’t.

Recipe notes: Pesto freezes very well so
if you have a ton of basil and can get your hands on all the other
ingredients, I suggest you make as many batches as you can to enjoy
during the cold months of winter when mired in root vegetables and
dreaming of the taste of summer.  I recommend using a vacuum sealer if
you have one for the best possible quality.

*Chelsea and I have a stylistic difference of opinion on the amount
of salt necessary to make this pesto shine…I like one and a half
teaspoons, she likes two. Basically, use as much as you think is best.

Grilled Polenta Rounds With Fava Beans

polenta with fava 2

Fresh fava beans come around only once a year for a very short period of time.   They are difficult to find in stores though they are becoming more readily available at farmer’s markets.  I usually grow my own because they are such an easy crop to grow and yield well even in less than ideal conditions.  They require some preparation for cooking, but are well worth the effort!  This is a recipe I make every single year when the fava beans come in.  I usually serve it with grilled onions, potatoes, and mushrooms, and a marinara sauce.  It makes a great early summer meal.

Ingredients:

1.5 cups polenta/corn meal (I generally use corn meal)

6 cups water

2 cups fresh shelled favas

4 Tbsp butter (optional)

2 cloves garlic (pressed)

1 teaspoon salt

many grinds fresh pepper

Method:

Bring the 6 cups of water to a roiling boil in a larg sauce pan.   Whisk the cornmeal into the water in a steady stream.  When it’s all whisked in and as smooth as you can get it, turn the burner down to low.  Put a lid on the pot, and let it cook until almost ready.  If you’re using a medium grind of polenta it could take 45 minutes to cook.  I use either a finely ground polenta or corn meal which is usually completely cooked in about ten or fifteen minutes.

Add the fava beans, butter, garlic, salt, and pepper to the pot and stir well.  Put the lid back on the pot and let cook for an additional five minutes.  Stir really well a couple of times before removing from the heat.

Pour the polenta onto a cookie sheet and spread it out with a spatula until it is evenly covering the whole cookie sheet.  Let it cool until it has stiffened.  This takes about a half an hour.  You can make this polenta a day in advance of using it if you like.  It will keep for several days in the fridge if properly covered.

Using a biscuit cutter (large size) cut the sheet of polenta into rounds.  You should get between 12 and 14 rounds.  Keep the trimmings to eat for lunch with marinara sauce or to fry up the next morning with eggs.

Coat each side of your rounds with a marinade or oil before grilling.

Recipe Notes: The butter in this recipe is optional.  You can either substitute it with olive oil or you can omit it all together.  I like adding it because it makes the polenta creamier and the butter compliments all the other flavors.  I have made it many times without and loved this recipe just as much.  You can add more salt if you like saltier food.  I tend to use less salt than many people.
Rosemary Marinade

Homemade Ricotta

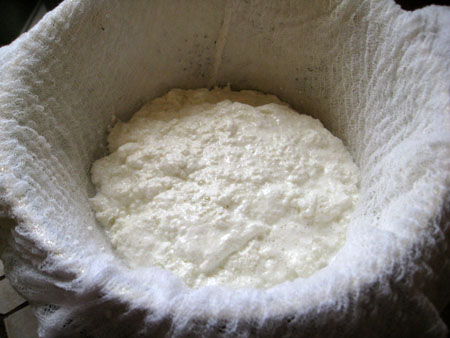
straining

This is the finished batch of ricotta.

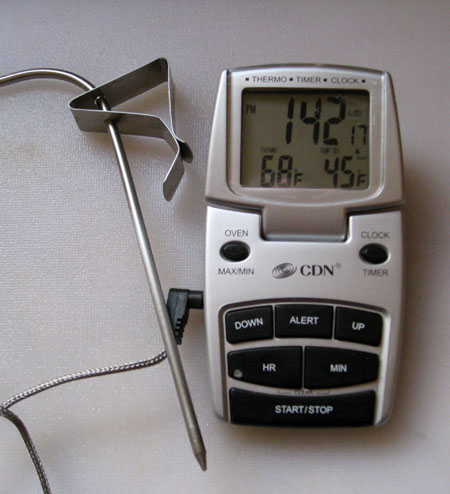
thermometer 2

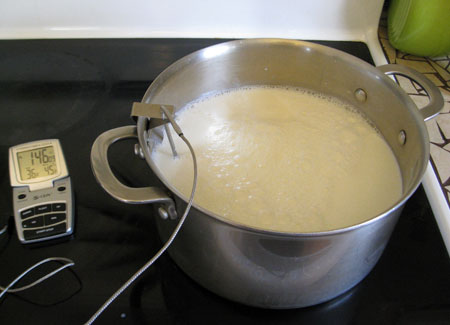
This is the thermometer I use.  You can use any model that allows you to clip it to the side of your pot so that the gauge is in the milk at all times.
 
the set up

Like this.

curds and whey

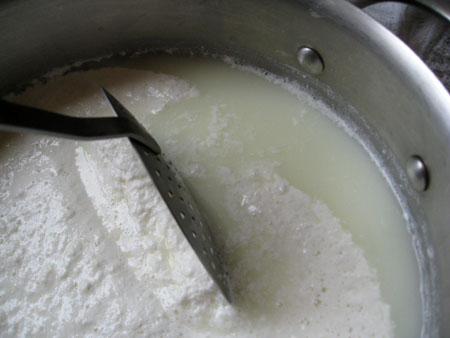
This is how your milk should look when it has set for ten minutes.

Making your own ricotta is very easy, doesn’t require expensive equipment, tastes better than store bought, and as though that weren’t enough- it’s possible to make it for half the price of store bought ricotta.  The cost is highly dependent on the milk you buy.  I don’t buy organic milk because I can’t afford it but I do buy locally made milk that doesn’t have any hormones or other undesirable additives in it.  I look for deals on gallons which I take advantage of whenever I can.  I can find my milk for $2.00 per gallon quite often.  If I buy a 16oz tub of ricotta it costs between $4.00 and $6.00.  (I actually almost always seem to pay $4.69)  This may not be the case if you can’t find good deals where you are.

The milk you choose is not vital.  You can make ricotta from raw milk, ( if you’re lucky enough to have a source for it), organic, or non-organic.  The one kind of milk you cannot make ricotta from is “ultra pasteurized”.    You can use low fat, whole fat, or non fat but keep in mind that the lower the fat the less yield you will get*.   One gallon of milk produces about 15 to 16 ounces of ricotta.  You can use the resulting whey for other food preparations if you like.

What you need:
 
thermometer

stock pot

gallon of milk

1/2 tsp citric acid

1/4 cup cool water

strainer or collander

cheese cloth or butter muslin

spoon

Method:

Dissolve the citric acid in the water.

Pour the milk in the pot, gently stir in the water/citric acid, put your thermometer in place,  and put the stove on high heat.

You want to bring the milk to a temperature between 185 and 195.  While the milk is heating up be sure to stir it often to keep it from sticking to the bottom of your pot.   If any milk sticks to the bottom and browns it could impart a bitter or off flavor to your ricotta.

Never let the milk boil.  It shouldn’t do so if you remove it just before it reaches 195 degrees.

When it reaches the necessary temperature, immediately remove it from the heat and let it set for 10 minutes.

Lay your cheese cloth (double layer) or butter muslin (single layer) in the collander and ladle the solid curds into it.

Let the liquid drain off for a few minutes.

Your ricotta is now ready to season as you like it and use!

Project notes: The whole process takes about a half an hour.  I always salt my ricotta after it’s made.  If you let it drain too long it will become dry.  If you want your ricotta to have a creamy consistency, you can add a little milk or cream back into it.  Citric acid is not always easy to find but if you have a wine making store near you they will carry it.  There are places you can order it online. 

*I usually make low fat ricotta and I haven’t really noticed a huge difference in the yield but I have read that the yield an be affected by fat content so I just want to make sure you know it may happen.

Pasta With Fresh Shelled Peas And Fava Beans

peas and favas 2

I look forward to eating this dish all year long.  The window of opportunity for it is very short, so you have to enjoy it while you can.

 pasta peas 2

Ingredients:

Serves 4 generously or 6 moderately

2 large onions

2 cups fresh shelled peas and/or fava beans*

1/4 cup olive oil

8 ounces pasta (I love angel hair but I think any will do)

salt and pepper to taste

Method:

Slice the onions in thin rounds then into quarters.  Heat the olive oil in a large saute pan on med/hi heat, add the onions when the oil is hot.  To caramelize onions you want to stir them frequently and once they begin to clarify, turn the heat down to med.  The onions will be done when they are all caramel colored and soft.  Be careful not to burn them or they will taste bitter.   While your onions are cooking, boil water for pasta.

At the same time your pasta is cooking, add the peas and favas to the saute pan with the onions and cook for 3 to 5 minutes.  You don’t want to over cook the peas and beans.  Drain your pasta and add it to the saute pan with a small amount of the cooking water.  Add salt and pepper to taste (I use about a teaspoon of salt and about 10-15 grinds of fresh pepper, but I think most people would like this better with more salt).  Toss everything together really well.

Optional: add crushed red pepper and Parmesan cheese.

Recipe notes: this is such an easy dish to make and because there are few ingredients it allows the delicate flavor of the fresh shelled peas and the fava beans to shine.  I often like strong flavors such as garlic and herbs but this is an exception.  It only takes me about a half an hour to make.  Shelling the peas and beans takes time but you can do it while the onions are sauteing.

*If you are using fava beans be sure to remove the outer skin first by blanching and then dunking in ice water.

Tomatillo Salsa: A Canning Recipe

husk 2

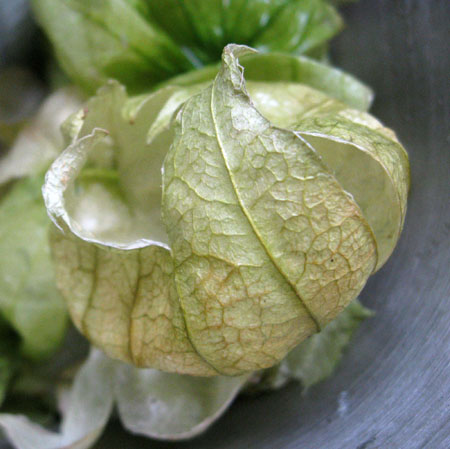
I find the husks on tomatillos charming.  I can’t resist taking photos of them.

studyingreen 2

It takes a lot of chopping and dicing to make this salsa, but it’s worth it!

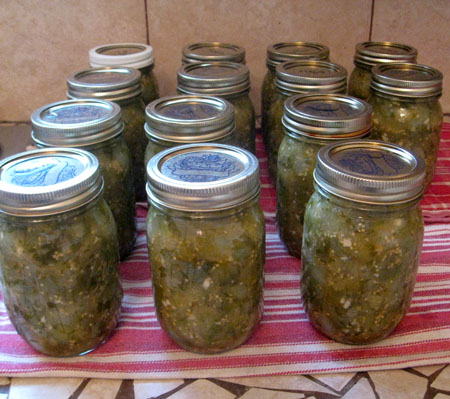
tomatillo salsa jarred 2

Ingredients:
 
5 1/2 cups husked, cored, and chopped tomatillos

1 cup chopped onion

1 cup chopped jalapenos

1/2 cup white vinegar

4 tbsp lime juice

4 cloves garlic, minced

2 tsp ground cumin

1/2 tsp salt

  • Prepare canner, jars, and lids.
  • In a large stainless steel saucepan, combine all of the ingredients. Bring to a boil over a medium high heat, stirring constantly. Reduce heat and boil gently, stirring frequently, for 10 minutes.
  • Ladle hot salsa into jars, leaving 1/2″ head-space. Remove air bubbles and adjust head-space if necessary by adding more hot salsa. Wipe rim. Center lid on jar. Screw band down until resistance is met, then increase to fingertip tight.
  • Place jars in canner, ensuring they are completely covered by at least 1″ of water. Bring to a boil and process both 8 ounce and pint jars for 15 minutes.

You should know that the amounts I’ve given are for one batch, which is ridiculously small. I made 5 batches all at once. If you’re like me and would like to make a lot at once multiply all of the ingredients by five. It’s nice to know you can do smaller batches, though, because if you have a lot of these ingredients in your garden you may only be able to make a little at a time as things ripen.

You can use other types of hot chili peppers, according to your tastes. I only have eyes for jalapenos because they don’t repeat on me as much as other peppers. I like serranos too but they tend to be too hot for me. If you used a cup of serranos per recipe I think you’d be breathing fire and then you might die (mostly just kidding).  So if you like things hotter, try a blend. Just be sure that the total amount of peppers you use remains the same.

You can also use a little more garlic if you like.

This salsa is quite soupy. Mr. W  wanted to know if it can be made thicker. I’m not sure about that yet. I have to do a little canning research before I know how much I can safely adjust the liquid content. (If I was just making it for fresh eating, instead of for canning, I would just cook it down til it was as thick as I liked). Until I find out, or some other experienced canner gives us the answer, don’t mess with it. It’s amazing just as it is.

Garlic Dill Pickles

picklejars


Fresh from the canner, these pickle slices are still turning from bright green to dark green.

raw cucumbers

You can use small, medium, or large cucumbers, but the larger they are (of course) the fewer you can fit in one jar.

filling jars

You can also do some sliced.  I have found that they are a little softer in texture than the ones I can whole but I like these for sandwiches and it doesn’t bother me.

placingjars

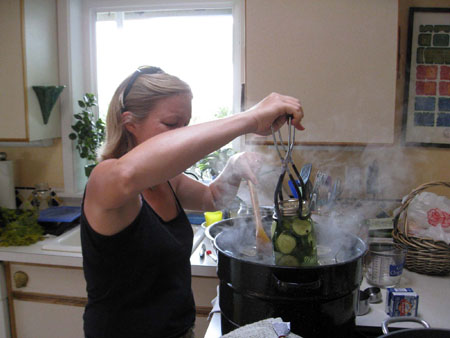
My friend Lisa E. (pictured above) and I learned to pickle dills together.  The first recipe we tried called for pickling spices,  so we cooked up a batch of the vinegar with spices and Lisa, smelling the odor coming from the pot, mentioned that she wasn’t enjoying the smell of the spices and was reluctant to use them, wasting a bunch of cucumbers.  Although I hadn’t thought about it, I didn’t like the idea of my pickles tasting of allspice and Cinnamon either.  We looked furiously for a dill pickle recipe that would have a clean garlicky dill flavor.   We found only one that came close to our idea of how a pickle should be and it came from the Sonoma County Extension office.  We tweaked it just a little bit until it was perfect.  My sister, who is a dill pickle connoisseur called it one of the best pickles she’s ever had!  So here’s the recipe for you to try!

Ingredients:

4lbs (2 quarts) freshly picked small to medium sized cucumbers

4 tbsp canning salt

4 cups vinegar

4 cups water

1 fresh head of dill weed per jar

1/2 tsp mustard seeds per jar

1 clove garlic per jar

6 peppercorns per jar

Method:

1.  Wash cucumbers thoroughly.

2.  For whole cucumbers, small sizes up to 4 inches are preferred.  Larger cucumbers should be sliced, quartered, or halved lengthwise.

3.  Combine salt, vinegar, and water in a pot.   Heat to boiling.

4.  Pack cucumbers into hot clean jars.  For each quart jar add: 1 head of dill, 1 clove of garlic, 1/2 tsp mustard seeds, and six peppercorns.  Fill with hot pickling liquid to 1/2 inch of  the top for quart jars, and 1/4 inch for pints.

5.  Process pint or quart jars of whole cucumbers in hot water bath for 10 minutes, jars of slices or halves for five minutes.
6.  Let the pickles cure for 4-6 weeks before opening to taste.

Recipe notes: I have updated this recipe to start off with a larger batch of brine.  Because of the irregularity of cucumber size and shape it is an inexact science to figure out how many jars of pickles you’ll get out of 4 lbs of cucumbers.  Sometimes you can only fit three in a jar, sometimes you can fit six.  So be prepared to whip up another batch of brine.  It’s truly fast and easy to do.  And remember that if you have leftover brine you can save it in the fridge for more pickling projects.